You are using an out of date browser. It may not display this or other websites correctly.
You should upgrade or use an alternative browser.
You should upgrade or use an alternative browser.
onthemove MOD's
- Thread starter onthemove
- Start date
onthemove
Member
- Car
- 2003 FX35 AWD
- Name
- Michael
I removed the heat shields in preparation for the header install. One bolt on each side rounded off. They didn't want to part ways with the FX, so I had to coax them with my weapon of choice, an old 1/2" ultra-long hole saw. It took me much longer than it should've but I beat those heat shields off without damaging anything else. The only other time I've had an issue with any nut or bolt on this thing was those fucking abs or speed sensors or whatever the hell they are. Shitty, cheap little bolts in the worst damn spots. Oh, there was the battery tray bolt too.
The heat shields are a lot heavier than I thought they'd be. I'll weigh it all when the manifolds are off and will weigh the Tomei's as well. Tomei is confused about the weight difference per their site as is Taka, a rep at Tomei USA. The oem shields would probably be much more effective if they had a high temp. insulating textile between them and the manifolds.
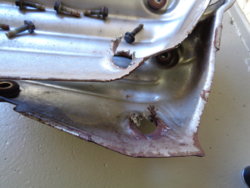
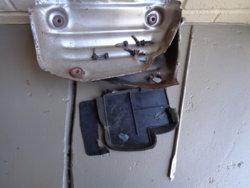
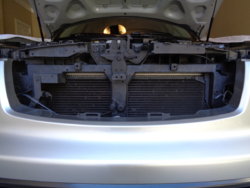
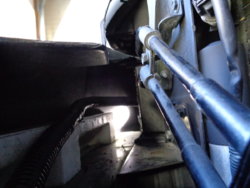
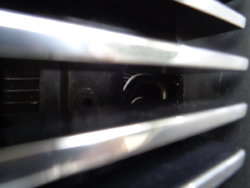
I removed the odd panel on the passenger side as I did the driver side previously, along with the core support piece as seen in pics 4 & 6. I trimmed the inside of the front bumper on this side as well. Then I trimmed off the remainder of the old plastic support structure that was necessary for the oem grill. I did leave the 2 tabs on the bottom as seen in pic 5 as they are needed for the t-rex. This whole area is a drag issue. Can't do much about that but I can give more of the drag area a purpose and by doing this, I'm getting more cool air into my air box, relieving some engine bay heat and exposing a little more surface area of the radiator. Not much, but every little bit helps.
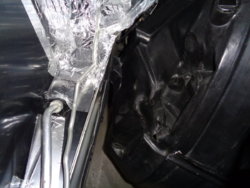
Pic 7 shows the location of the bracket I cut off which was located where the frame runs into the bottom of the strut tower. All the tape is an attempt to reduce every last bit of engine bay air as I can. Making yet another top for the box is no big deal but the back plate, where all this foil mess currently resides, is going to be a bitch.
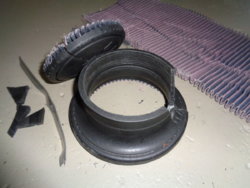
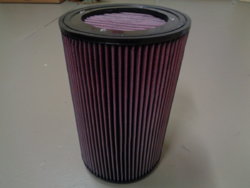
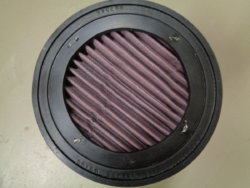
Finally, I butchered my new but old k&n cone filter. I'm going to use some fllter material replace the 7"+ diameter rubber end of the new, bigger filter. Now that air is available right at the grill and with the end of this huge filter nearly butted up against this new opening in the core support, I might as well try and take as much advantage of it as I can. Just need to find a way to attach filter material to the existing rubber.
The heat shields are a lot heavier than I thought they'd be. I'll weigh it all when the manifolds are off and will weigh the Tomei's as well. Tomei is confused about the weight difference per their site as is Taka, a rep at Tomei USA. The oem shields would probably be much more effective if they had a high temp. insulating textile between them and the manifolds.


I removed the odd panel on the passenger side as I did the driver side previously, along with the core support piece as seen in pics 4 & 6. I trimmed the inside of the front bumper on this side as well. Then I trimmed off the remainder of the old plastic support structure that was necessary for the oem grill. I did leave the 2 tabs on the bottom as seen in pic 5 as they are needed for the t-rex. This whole area is a drag issue. Can't do much about that but I can give more of the drag area a purpose and by doing this, I'm getting more cool air into my air box, relieving some engine bay heat and exposing a little more surface area of the radiator. Not much, but every little bit helps.
Pic 7 shows the location of the bracket I cut off which was located where the frame runs into the bottom of the strut tower. All the tape is an attempt to reduce every last bit of engine bay air as I can. Making yet another top for the box is no big deal but the back plate, where all this foil mess currently resides, is going to be a bitch.
Finally, I butchered my new but old k&n cone filter. I'm going to use some fllter material replace the 7"+ diameter rubber end of the new, bigger filter. Now that air is available right at the grill and with the end of this huge filter nearly butted up against this new opening in the core support, I might as well try and take as much advantage of it as I can. Just need to find a way to attach filter material to the existing rubber.


Last edited:
onthemove
Member
- Car
- 2003 FX35 AWD
- Name
- Michael
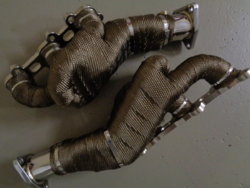
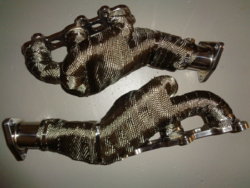
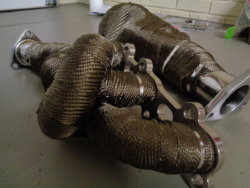
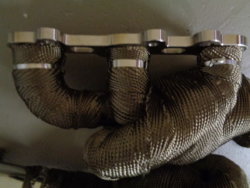
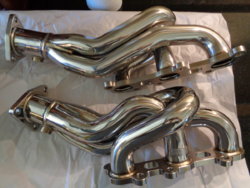
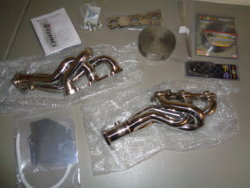
I ordered these headers end of December assuming they'd be ready end of January. Just got them today. That's a long time to weld up some fucking pipes but whatevers. Maybe they've got like 1 dude making all the headers like Bentley's got 1 guy to wrap all the steering wheels. Either way, I appreciate them making and selling them but I'm still gonna bitch.
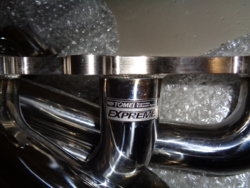
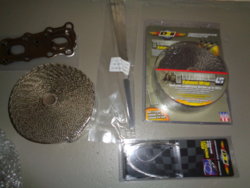
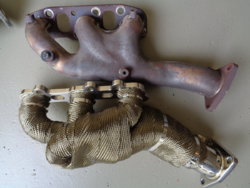
The old shields and 6 of the 8 bolts weighed 2 lbs 10 oz . The 2 rolls of wrap are 4 lbs though I don't expect to use it all and the headers themselves weigh 14 lbs 6 oz. I'll know what the stock manifolds weigh soon enough but I'm not expecting any weight reduction at this point. They sure are pretty but unfortunately they'll be wrapped. I thought ceramic coating would be best but based on my research a good wrap is more effective regarding heat. I was going to use Heatshield Products Header Armor until I found out that Tomei supplies this so called "titanium" wrap. It's apparently really good stuff and there's no need to spray them with silicone to keep'em nice.
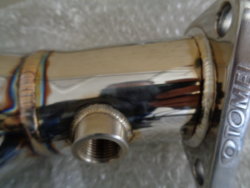
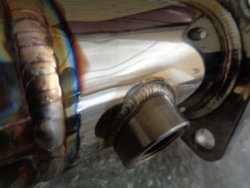
The welds look fantastic. No doubt Tomei takes a lot of pride in their products. I bought some extra DEI titanium wrap from Concept Z which is where I bought all this from. I'm fit'n on wrapping past the headers as I wrote previously. I'm anticipating more hp and tq, a cooler engine bay and a little more of a grumble out the tail pipes.
Edit 3/18/18 - Weighed the oem manifolds - 14.6 lbs. So, the only difference in weight is the removal of the heat shields but then once you throw in the wrap, which is included with the headers now, they're a horse a piece govna, a horse a piece.


Last edited:
If you have stuck bolts, in terms of penetrating fluid, the product you want is called "MOOVIT".
Hands down it's like a miracle fluid. I work in heavy industry and it's all we use, WD40 and regular penetrating fluid is junk compared to moovit.
Nice work on the mods, I love the attention to detail. As rookie put it, the engine bay is such a rabbit hole. Easy to get caught in there, and as soon as you change something, there's always something else to clean up.
onthemove
Member
- Car
- 2003 FX35 AWD
- Name
- Michael
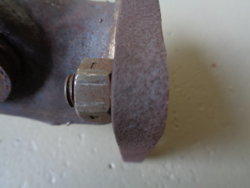
And here's what you get when you pay to have work done, bolts that were never tightened and exhaust leaks. Pic 1 is on the passenger side. I did develop an exhaust leak on the driver side 6 weeks or so after having the kinetix cats installed. The schmuck replaced 2 brand new bolts with some old rusty shits. He probably stripped the 2 he replaced because he installed them incorrectly which I found out in full yesterday. What a diiiick! I'm surprised there were no leaks on this side. Below is the flange from cat to exhaust manifold. This jackass also made it a point to install both bolts that should be reversed, 1 on each cat, in the wrong direction. What a mess.
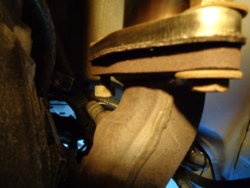
Cats are still in great shape. They've been on for maybe 1 1/2 years. One of the first mod's.
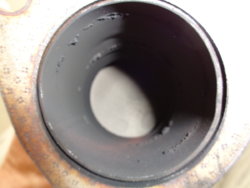
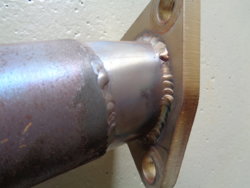
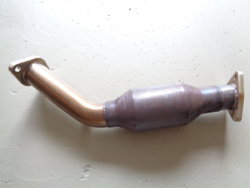
This bolt snapped in 1/2 on me. Snappy, snappy, me not so happy.
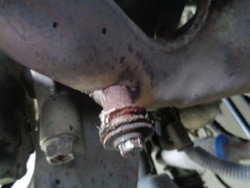
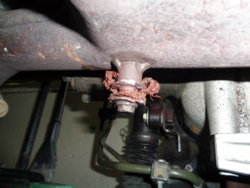
I had to remove all three support bolts on the a/c compressor to move it to get the front header bolt on. It came off ok but these headers are pigs. My experience with this install was much different than that of Mr. t-chuck or is it chuck t? Or am I thinking of chuck d? Ah, fuck it. 1/2 the bolts come out accompanied by the respective studs which just made the project so much fucking fun. My bolts spin pretty well on the studs (unlike chuck's experience) and the studs comply whilst being installed back into the cylinder head but I had the extra steps of having to get the nut off the stud for those that came out this way and resetting the studs. Not all were necessary, but some had to be done this way. These headers with wrap are probably the most difficult shorties to install, based on all I've read about the various brands and installs. Got to tighten the passenger side tonight.
The stock manifolds look like something out of the movie Krull (pic 3).
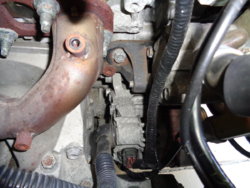
Pic 2 is the driver side cat & indvidia exhaust bolted up. With the oem manifolds, the back of the cats tilted up a little which made this juncture look slightly kinked. With the Tomei's, it's straighter. Huh.
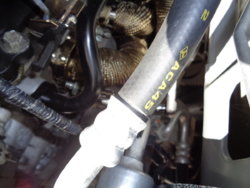
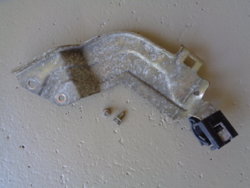
I had to pull this bracket, held in by 2 mini bolts on the back of the power steering pump. It held the power cable for the alternator but is not needed in my case. I was going to remove it during the tuck but past it up. Middle of pic 2 is where it was located.

Cats are still in great shape. They've been on for maybe 1 1/2 years. One of the first mod's.


This bolt snapped in 1/2 on me. Snappy, snappy, me not so happy.

I had to remove all three support bolts on the a/c compressor to move it to get the front header bolt on. It came off ok but these headers are pigs. My experience with this install was much different than that of Mr. t-chuck or is it chuck t? Or am I thinking of chuck d? Ah, fuck it. 1/2 the bolts come out accompanied by the respective studs which just made the project so much fucking fun. My bolts spin pretty well on the studs (unlike chuck's experience) and the studs comply whilst being installed back into the cylinder head but I had the extra steps of having to get the nut off the stud for those that came out this way and resetting the studs. Not all were necessary, but some had to be done this way. These headers with wrap are probably the most difficult shorties to install, based on all I've read about the various brands and installs. Got to tighten the passenger side tonight.
The stock manifolds look like something out of the movie Krull (pic 3).
Pic 2 is the driver side cat & indvidia exhaust bolted up. With the oem manifolds, the back of the cats tilted up a little which made this juncture look slightly kinked. With the Tomei's, it's straighter. Huh.


I had to pull this bracket, held in by 2 mini bolts on the back of the power steering pump. It held the power cable for the alternator but is not needed in my case. I was going to remove it during the tuck but past it up. Middle of pic 2 is where it was located.


Last edited:
onthemove
Member
- Car
- 2003 FX35 AWD
- Name
- Michael
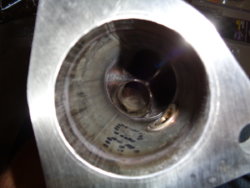
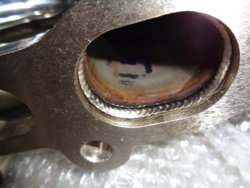
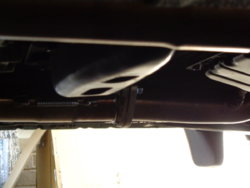
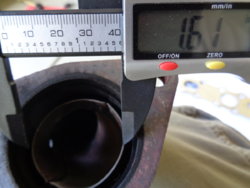
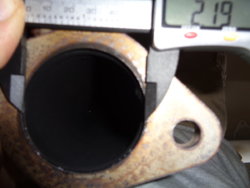
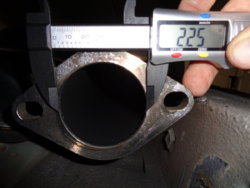
Here's some measurements between the headers vs oem manifolds, the cats and an upside down trick shot of the passenger side Invidia exhaust pipe pre-resonator. The Tomei headers are clearly much more opened up which isn't necessarily a good thing. In my case it is. The oem's are choked off, mass produced without performance in mind. They open up beyond the poorly formed opening but as you'll see below, not by much.
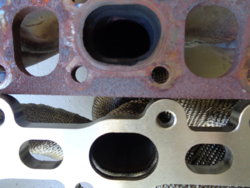
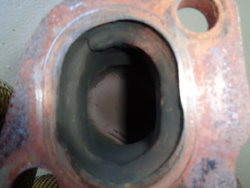
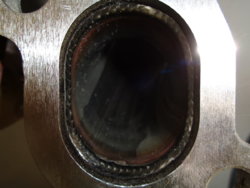
The oem's are "lined" with a thin metal inside wall. I'm thinking Nissan was thinking about insulation properties but what the hell do I know. The T's in pic 2.
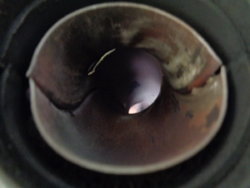
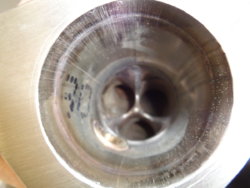
pic 1 = Tomei---pic 2 oem manifold---pic 3 = Kinetix cat---pic 4 = Invidia upside down trick shot. They're all really close with the odd man out being the oem manifold.
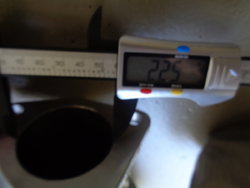
Edit - forgot to mention that Motordyne has an explanation of how it's desirable to have the smallest pipes closest to the engine with a gradual increase in size as the rest of the exhaust continues which increases velocity iirc. Sort of like my intake, with a 6" velocity stack to a 4" pipe tapering down to a 3" throttle body.


The oem's are "lined" with a thin metal inside wall. I'm thinking Nissan was thinking about insulation properties but what the hell do I know. The T's in pic 2.


pic 1 = Tomei---pic 2 oem manifold---pic 3 = Kinetix cat---pic 4 = Invidia upside down trick shot. They're all really close with the odd man out being the oem manifold.


Edit - forgot to mention that Motordyne has an explanation of how it's desirable to have the smallest pipes closest to the engine with a gradual increase in size as the rest of the exhaust continues which increases velocity iirc. Sort of like my intake, with a 6" velocity stack to a 4" pipe tapering down to a 3" throttle body.
Last edited:
onthemove
Member
- Car
- 2003 FX35 AWD
- Name
- Michael
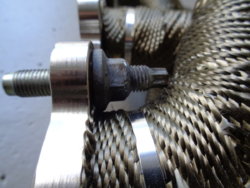
1st 2 pics show just how close some of these bolts come to the header. Some of the studs that came out with the bolts where put right back in the way they came out.
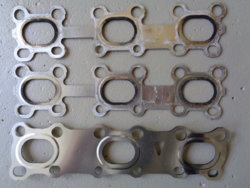
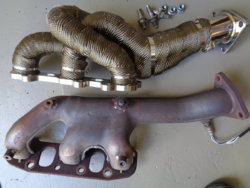
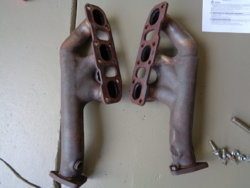
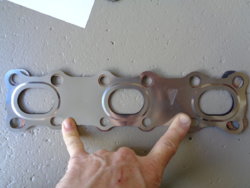
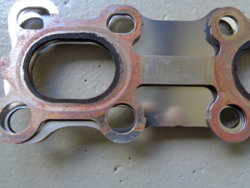
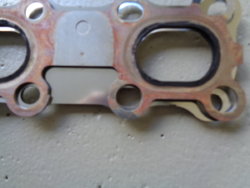
The next 3 pics are the old vs new gaskets, a shot of the Tomei passenger side prior to install and the old & busted off the FX.
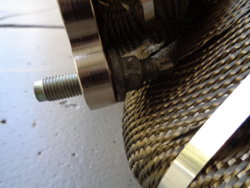
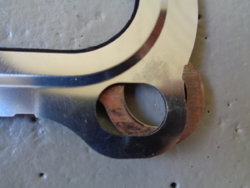
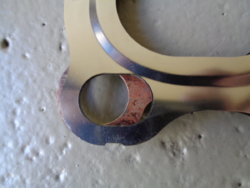
The last 5 pics are of the passenger side gasket. Everything about the Tomei's are good quality imo, except this gasket. The bottom hole on the right side is so far off that the gasket would not fit. At first, I thought it was something I did wrong. I put the old gasket on and no problem then I installed the Tomei in every possible way thinking that they had the direction wrong in the directions. Nope. They fucked this up. Pic 7 is the problem corner and pic 8 is on the other side and how it should look. I had to cut the corner to get it to fit.
Edit 3/23/18 - It's a little unnerving that the Tomei rep for the USA was told that the headers are supplied with DE and not HR gaskets, yet that is clearly not the case. It's really odd that only 1 bolt wouldn't line up and only on the passenger side. The hole located right above the problem hole looks sketchy but that one was fine.
Tomei's reply;
" Thank you for the link and I have forwarded it to our engineer in Japan. One thing that confuses us is that I was told that it is supplied with VQ35DE gaskets, and we have never had an incident with our gaskets.
Thank you for running our manifolds!
Best Regards,
Taka
TOMEI POWERED USA "


Last edited:
onthemove
Member
- Car
- 2003 FX35 AWD
- Name
- Michael
Yeah, idk. I was convinced it was me until I re-fit the oem than lined it up with the new one.
Dude on a 350z site pointed me to the hr gaskets on concept z's site. I bought the headers from concept z. It reads on their site that the hr gaskets, which are what the Tomei headers come with, are not compatible with the vq35de. Lovely.
Dude on a 350z site pointed me to the hr gaskets on concept z's site. I bought the headers from concept z. It reads on their site that the hr gaskets, which are what the Tomei headers come with, are not compatible with the vq35de. Lovely.
Last edited:
onthemove
Member
- Car
- 2003 FX35 AWD
- Name
- Michael
I let the engine idle for awhile and while they were smoking, I made a couple vids. Below are a few final photos of the installed headers. The cats & exhaust should've been wrapped by now but my plans to do so changed. I'll wrap the pipes from the cats to the resonators and use DEI form a shield for the cats next week.
In person, it sounds just a little deeper and marginally louder at idle. There's enough added bass to intermittently rattle the sliding lock on the garage door.
Revving, you can here the popping. That was there before, prior to the 4" intake & associated mods, though not as pronounced. Now it's back. Hmmm....
Took it out for a spin and I can't say I noticed much difference. The sound is around the same as it was pre-Tomei. I knew they weren't going to be much louder and if they were, I never would've considered them because my FX is already plenty loud for my taste. No time testing yet but the right nor left ass cheek feels a difference either way.
When I did the intake manifold region mod's, I honestly didn't really notice much difference in feel but the 0-60 and 1/4 mile times told the truth of much improved acceleration. After the 4" and re-tune, I noticed a very obvious difference but it only made an extra 8hp and 5tq. Weird shit, the whole seat in the pants feel deal is and I think that it is unreliable.
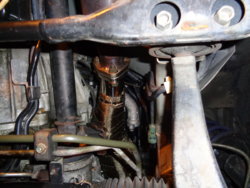
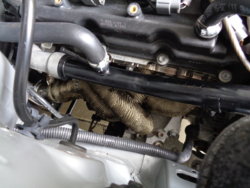
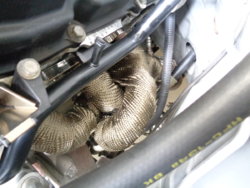
Kinetix hfc's and Invidia dual;
+ wrapped Tomei headers;
+ wrapped Tomei headers with revs up to 6k
In person, it sounds just a little deeper and marginally louder at idle. There's enough added bass to intermittently rattle the sliding lock on the garage door.
Revving, you can here the popping. That was there before, prior to the 4" intake & associated mods, though not as pronounced. Now it's back. Hmmm....
Took it out for a spin and I can't say I noticed much difference. The sound is around the same as it was pre-Tomei. I knew they weren't going to be much louder and if they were, I never would've considered them because my FX is already plenty loud for my taste. No time testing yet but the right nor left ass cheek feels a difference either way.
When I did the intake manifold region mod's, I honestly didn't really notice much difference in feel but the 0-60 and 1/4 mile times told the truth of much improved acceleration. After the 4" and re-tune, I noticed a very obvious difference but it only made an extra 8hp and 5tq. Weird shit, the whole seat in the pants feel deal is and I think that it is unreliable.


Kinetix hfc's and Invidia dual;
Last edited:
onthemove
Member
- Car
- 2003 FX35 AWD
- Name
- Michael
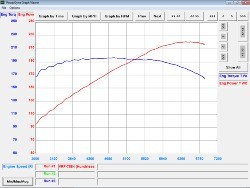
Fresh tune today. Not exactly peak #'s to brag about. This tune was performed on the first awd dyno in NC. It's as old as my FX. A 2003 MD500. This thing is a huge beast of a dyno. He doesn't run a load on it because it's already weighed down so much. He said smaller cars struggle on it and it reads 5% lower than his old mustang dyno, whatever model that was, which reads 10% under what might be considered an accurate reading. It's got it's problems but it does the job. He had to finish the tune in 2nd gear and the new chart is a 2nd gear pull as there is no torque spike in the 3k range. Sucks for me because he doesn't have his old setup so no superimposed charts to have a nice clean comparison.
Not sure how accurate my guesstimate is but at a 15% handicap onthemove is around 250 awhp and 223 awtq. Considering a potential 28% drive train loss, 348/321 at the flywheel. In the end, it doesn't really matter I suppose. My aim is fast acceleration without going overboard doing things like gutting the cabin or driving around town without catalytic converters. Power is just one of several aspects that have dramatically increased this FX's acceleration.
Peak torque #'s remain the same but the curve is much improved, pretty flat really as higher #'s are held longer without the dips. (Edit - on second glance, might've gained peak 2-3 lbs).
Peak horsepower is up 12. The new hp curve is arched with more area under the curve and without the dips. One data point for example would be horsepower at 150. At 150 the last tune is at 4,200 rpm while the most recent tune it's at 4,000.
I'm explaining this as best I can knowing most people reading this aren't going to spend much time looking over my little charts.
It was running rich on the top end so he leaned it out a bit. Should improve mileage a bit and keep onthemove's ass and tail pipes a little cleaner for a little longer. It is interesting that the first 2 tunes looked the same, with the exception of more power whereas this time, it's different. It feels really strong and I was hoping to go to the closest track to me which is 1 1/2 hours away this weekend but they will be closed due to inclement weather. Figures. I'll have a 0-60 and 1/4 mile time soon and hopefully a time slip from a different drag strip soon enough.
There is no line representing a baseline prior to tuning, so I really don't know if the tune was even necessary, except for leaning it out on the top and I'm not sure what the noise is all about, the squiggly lines that straighten out at 4200 rpm.
New tune with Kinetix hfc's, V plenum, UR under drive pulleys, 4" intake, Invidia DE, plenum and collector mod's, 75mm t.b., velocity stack, fuckin huge air filter and Tomei headers.
Considering the assumed 15% OG mustang loss, 251 awhp/231 awtq with 93 oct.
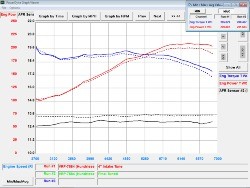
1st tune is the dotted line with Kinetix hfc's, V plenum, UR under drive pulleys installed and 2ND TUNE is the solid line with all the above + 4" intake and Invidia DE). Invidia made ZERO power btw.
Considering the assumed 10% mustang loss, 231 awhp/214 awtq with 93 oct.
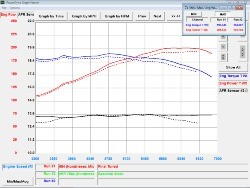
Dotted line with Kinetix hfc's, V plenum, UR under drive pulleys installed and 1ST TUNE, solid line.
Considering the assumed 10% mustang loss, 214 awhp/203 awtq before tune & 221 awhp/209 awtq after with 93 oct.
Here's a decent explanation from a guy from Berk. He writes mustang dyno's always read 12% low but they can all be manipulated to read high or low. And here I thought a mustang read 10-12% under, a dynojet 10-12% over, so a 20-24% swing. Apparently, the big swing is between a mustang and a dynapack. So, is it possible that the dynojet is the accurate make and that's why it's the most popular?
" BerkTechnology

Location: Irvine, CA
Differences between dyno #'s: Dynojet, Dynapack, Mustang.
People seem a bit confused about the different types of dyno's and what numbers to expect out of them. So let's clear them up.
There are 3 types of chassis dyno's you'll run into in the USA. Dynojet, Dynapack, & Mustang. They all spit out slightly different HP/TQ numbers when you compare one brand to another (i.e. Dynojet vs Dynapack), but they are all 100% consistent if you stay on the same dyno every time. So if you are tracking your mods as you add them, go to the same shop every time.
95% of the shops in the USA are running one of these three dyno's:
1. Dynojet - most popular in the USA. Considered the "standard" here in the states since most shops utilize them. For our theoretical "car", the Dynojet will read 100 rwhp, & 100 ft/lbs of torque.
With this dyno you drive up to the rollers, they strap the car down, and do a full throttle pass in 3rd or 4th gear. The dyno will calculate the power based on how fast the car will spin the rollers. This is called an inertia based dyno.
For WOT power passes that you can compare to each other on the internet, Dynojet's are perfect. They're everywhere! But most do not have any sort of load simulating capability. Since 2005 more and more Dynojet's sold have their eddy current loading device. So you can ID them, Dynojets are typically red or black.
2. Mustang Dyno's - not as nearly as popular as the Dynojet's, but all performance shops that have Mustang dyno's DO have the capability to simulate load on the car to map ECU's. These are also great dyno's, are very accurate, simulate load very well, and are repeatable every time. They are also inertia based dyno's where you'll drive the car up on the rollers, strap the car down, and make a 3rd or 4th gear pass.
These dyno's will always read ~12% LOWER than a Dynojet, which is our standard here in the states (unless the shop has messed with the gearing settings in the computer). Because of this, lots of the internet folk don't like to use them. They come on the internet, share their results and everyone says "why didn't you make more power with mod XX". So our theoretical car will show 88rwhp on the Mustang dyno.
These dyno's will always be blue.
3. Dynapack - These are the red headed step children here in the states. Not as common as the Dynojet or Dynapack, but these are the standard in Japan. These are fundamentally COMPLETELY different that the inertia type dyno's.
With the Dynapack (my favorite), you remove the rear wheels, attach the hubs of the car to the "pods", and make your pass.
The load is simulated on the car via a hydraulic pump. Because these are effectively inertia-less, they will read HIGHER than the standard Dynojet numbers by 8-10%. That number will vary depending on how "fast" your dyno run lasts (sweep time), but as a rule of thumb, they'll read ~8-10% higher. So with this dyno our car will now read ~109rwhp on average.
The pods are always red, but these are easiest to ID. If they are taking off your wheels, it's a Dynapack!
And understand one thing when it comes to dyno graphs and product claims! Every dyno graph can be cheated by dishonest individuals/companies. All of them. So always take every dyno claim with a grain of salt. If they are cheating their tests, the truth eventually comes out (usually). Be a smart consumer! "
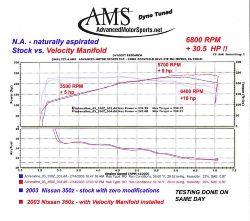
Edit - Looks like the Dynojet probably does read the most accurately. 280 hp x18% d.t. loss=50 50-280=230 which is where the bone stock Z started out on the chart below, done on a Dynojet. I came across this after I was schooled by some guys about the validity of the Kinetix Velocity intake. Newer chart on the Kintex site.
Not sure how accurate my guesstimate is but at a 15% handicap onthemove is around 250 awhp and 223 awtq. Considering a potential 28% drive train loss, 348/321 at the flywheel. In the end, it doesn't really matter I suppose. My aim is fast acceleration without going overboard doing things like gutting the cabin or driving around town without catalytic converters. Power is just one of several aspects that have dramatically increased this FX's acceleration.
Peak torque #'s remain the same but the curve is much improved, pretty flat really as higher #'s are held longer without the dips. (Edit - on second glance, might've gained peak 2-3 lbs).
Peak horsepower is up 12. The new hp curve is arched with more area under the curve and without the dips. One data point for example would be horsepower at 150. At 150 the last tune is at 4,200 rpm while the most recent tune it's at 4,000.
I'm explaining this as best I can knowing most people reading this aren't going to spend much time looking over my little charts.
It was running rich on the top end so he leaned it out a bit. Should improve mileage a bit and keep onthemove's ass and tail pipes a little cleaner for a little longer. It is interesting that the first 2 tunes looked the same, with the exception of more power whereas this time, it's different. It feels really strong and I was hoping to go to the closest track to me which is 1 1/2 hours away this weekend but they will be closed due to inclement weather. Figures. I'll have a 0-60 and 1/4 mile time soon and hopefully a time slip from a different drag strip soon enough.
There is no line representing a baseline prior to tuning, so I really don't know if the tune was even necessary, except for leaning it out on the top and I'm not sure what the noise is all about, the squiggly lines that straighten out at 4200 rpm.
New tune with Kinetix hfc's, V plenum, UR under drive pulleys, 4" intake, Invidia DE, plenum and collector mod's, 75mm t.b., velocity stack, fuckin huge air filter and Tomei headers.
Considering the assumed 15% OG mustang loss, 251 awhp/231 awtq with 93 oct.

1st tune is the dotted line with Kinetix hfc's, V plenum, UR under drive pulleys installed and 2ND TUNE is the solid line with all the above + 4" intake and Invidia DE). Invidia made ZERO power btw.
Considering the assumed 10% mustang loss, 231 awhp/214 awtq with 93 oct.

Dotted line with Kinetix hfc's, V plenum, UR under drive pulleys installed and 1ST TUNE, solid line.
Considering the assumed 10% mustang loss, 214 awhp/203 awtq before tune & 221 awhp/209 awtq after with 93 oct.

Here's a decent explanation from a guy from Berk. He writes mustang dyno's always read 12% low but they can all be manipulated to read high or low. And here I thought a mustang read 10-12% under, a dynojet 10-12% over, so a 20-24% swing. Apparently, the big swing is between a mustang and a dynapack. So, is it possible that the dynojet is the accurate make and that's why it's the most popular?
" BerkTechnology

Location: Irvine, CA
Differences between dyno #'s: Dynojet, Dynapack, Mustang.
People seem a bit confused about the different types of dyno's and what numbers to expect out of them. So let's clear them up.
There are 3 types of chassis dyno's you'll run into in the USA. Dynojet, Dynapack, & Mustang. They all spit out slightly different HP/TQ numbers when you compare one brand to another (i.e. Dynojet vs Dynapack), but they are all 100% consistent if you stay on the same dyno every time. So if you are tracking your mods as you add them, go to the same shop every time.
95% of the shops in the USA are running one of these three dyno's:
1. Dynojet - most popular in the USA. Considered the "standard" here in the states since most shops utilize them. For our theoretical "car", the Dynojet will read 100 rwhp, & 100 ft/lbs of torque.
With this dyno you drive up to the rollers, they strap the car down, and do a full throttle pass in 3rd or 4th gear. The dyno will calculate the power based on how fast the car will spin the rollers. This is called an inertia based dyno.
For WOT power passes that you can compare to each other on the internet, Dynojet's are perfect. They're everywhere! But most do not have any sort of load simulating capability. Since 2005 more and more Dynojet's sold have their eddy current loading device. So you can ID them, Dynojets are typically red or black.
2. Mustang Dyno's - not as nearly as popular as the Dynojet's, but all performance shops that have Mustang dyno's DO have the capability to simulate load on the car to map ECU's. These are also great dyno's, are very accurate, simulate load very well, and are repeatable every time. They are also inertia based dyno's where you'll drive the car up on the rollers, strap the car down, and make a 3rd or 4th gear pass.
These dyno's will always read ~12% LOWER than a Dynojet, which is our standard here in the states (unless the shop has messed with the gearing settings in the computer). Because of this, lots of the internet folk don't like to use them. They come on the internet, share their results and everyone says "why didn't you make more power with mod XX". So our theoretical car will show 88rwhp on the Mustang dyno.
These dyno's will always be blue.
3. Dynapack - These are the red headed step children here in the states. Not as common as the Dynojet or Dynapack, but these are the standard in Japan. These are fundamentally COMPLETELY different that the inertia type dyno's.
With the Dynapack (my favorite), you remove the rear wheels, attach the hubs of the car to the "pods", and make your pass.
The load is simulated on the car via a hydraulic pump. Because these are effectively inertia-less, they will read HIGHER than the standard Dynojet numbers by 8-10%. That number will vary depending on how "fast" your dyno run lasts (sweep time), but as a rule of thumb, they'll read ~8-10% higher. So with this dyno our car will now read ~109rwhp on average.
The pods are always red, but these are easiest to ID. If they are taking off your wheels, it's a Dynapack!
And understand one thing when it comes to dyno graphs and product claims! Every dyno graph can be cheated by dishonest individuals/companies. All of them. So always take every dyno claim with a grain of salt. If they are cheating their tests, the truth eventually comes out (usually). Be a smart consumer! "
Edit - Looks like the Dynojet probably does read the most accurately. 280 hp x18% d.t. loss=50 50-280=230 which is where the bone stock Z started out on the chart below, done on a Dynojet. I came across this after I was schooled by some guys about the validity of the Kinetix Velocity intake. Newer chart on the Kintex site.

Last edited:
onthemove
Member
- Car
- 2003 FX35 AWD
- Name
- Michael
Yeah, I agree. It sounds...good, maybe? The pops are bizarre. I was going to record the FX while it was on the dyno and it totally slipped my mind. With the tuner behind the wheel, it's sounds nuckin futty. Under load it sounds great. I'll try for one more vid and back the camera up.
Test pipes aside, it probably depends more on your cat back and if its single or dual.
Test pipes aside, it probably depends more on your cat back and if its single or dual.
onthemove
Member
- Car
- 2003 FX35 AWD
- Name
- Michael
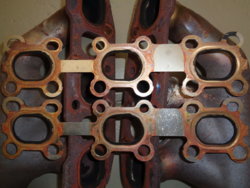
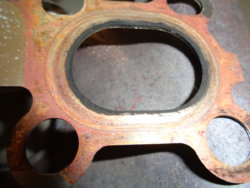
Here's a couple close ups of the oem manifolds and gaskets before they took a dive right into the trash. With the headers, the engine is a little less audible. I noticed that the first time I started it. Might be the wrap, might be the difference in the type of metal or there were multiple micro exhaust leaks or any combination. I think over time, as the manifolds corrode (rust) air is able to pass by the gaskets. Not enough to leave a carbon foot print, but enough to hear, barely.
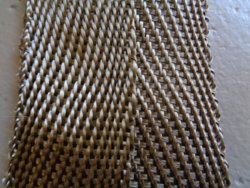
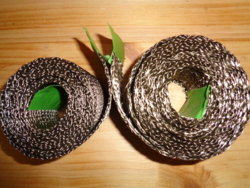
Pic 1, Tomei's wrap on the left and DEI's on the right. I'm no expert but if I had to chose one over the other, it would be Tomei all day. The weave is tighter and the wrap is thicker. Pic 2, DEI to the left. These 2 pieces are close in length yet the Tomei brand (right) roll is much bigger. Pic 3 is my attempt to show the thickness of the 2 (Tomei on the left). The Tomei is just plain prettier as well. I'd rather wrap headers with the DEI because it would be much easier but the Tomei wrap will most likely out perform it.

DEI's "form a shield" product along with some miscellaneous Tomei crap that I simply do not need. The form a shield was pretty easy to work with but unlike the wrap, ya gotta be careful and wear gloves, glasses and a face mask if you value your lungs.
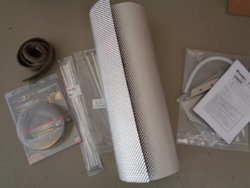
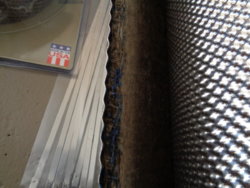


Pic 1, Tomei's wrap on the left and DEI's on the right. I'm no expert but if I had to chose one over the other, it would be Tomei all day. The weave is tighter and the wrap is thicker. Pic 2, DEI to the left. These 2 pieces are close in length yet the Tomei brand (right) roll is much bigger. Pic 3 is my attempt to show the thickness of the 2 (Tomei on the left). The Tomei is just plain prettier as well. I'd rather wrap headers with the DEI because it would be much easier but the Tomei wrap will most likely out perform it.


DEI's "form a shield" product along with some miscellaneous Tomei crap that I simply do not need. The form a shield was pretty easy to work with but unlike the wrap, ya gotta be careful and wear gloves, glasses and a face mask if you value your lungs.


Last edited:
onthemove
Member
- Car
- 2003 FX35 AWD
- Name
- Michael
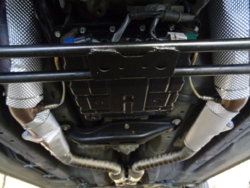
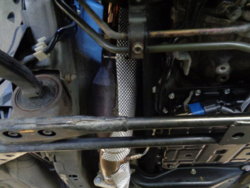
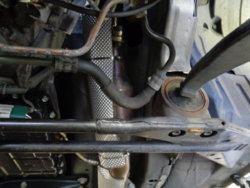
I used the DEI form a shield on the cats and the DEI wrap on the pipes. The engine, transmission, engine bay and floor boards will have less heat to deal with and the wrapped headers might have an easier time scavenging. The shields can be removed and strapped right back on if needed. Did only top and inside halves of the cats so the heat doesn't destroy them. I left all 4 o2 sensors out of the mix. Added 4 lbs. Damn it!
One comment on the stainless wrap ties. Those things suck. If everything is really easy to get to, they're ok but any area your working on that's tight or difficult in some way, forget about it. If I ever need to replace any of them, I'll do so with stainless worm drive clamps. A much better option imo.
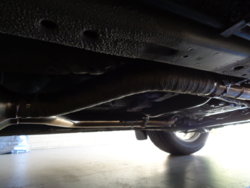
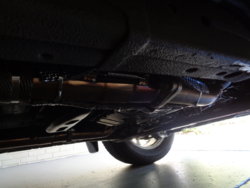
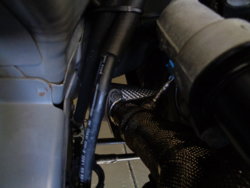
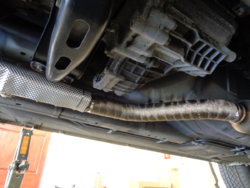
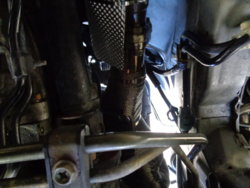
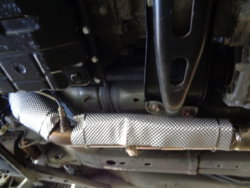
One comment on the stainless wrap ties. Those things suck. If everything is really easy to get to, they're ok but any area your working on that's tight or difficult in some way, forget about it. If I ever need to replace any of them, I'll do so with stainless worm drive clamps. A much better option imo.


Last edited:
onthemove
Member
- Car
- 2003 FX35 AWD
- Name
- Michael
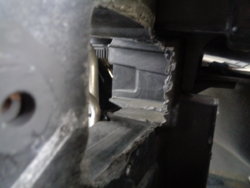
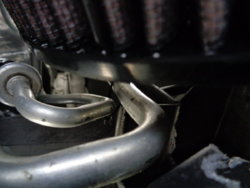
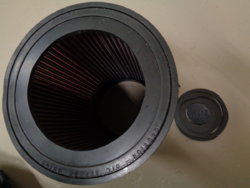
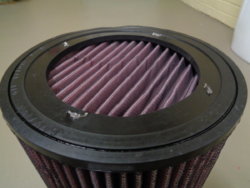
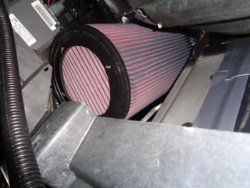
Mod'n the mods. I wanted a filter with the inner inverted cone instead of a solid, blank top like the Apexi, but I don't care for that filter for other reasons. I mentioned somewhere in this thread that Injen told me why they and most others do not do the inverted cone anymore and it has nothing to do with performance. After squeezing in this FFF (fat fucking filter) I have now, I thought of ways to aid it in accessing air, so I punched through the core support a couple weeks back in anticipation of butchering the new filter. With a fine flat head, hammer and needle nose pliers, I removed chunks of it. With the angle the filter is at now, I removed a little more of the support in this area. It's not pretty but it's also not visible and I was able to do it without removing anything, other than the filter. Someday the bumper will come off and I'll clean up the roughness.
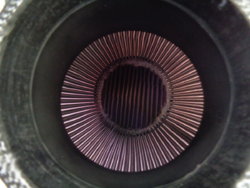
The hole itself couldn't really be opened up much more because there's a fastener (bolt), so this part of the core is acting as a support for the headlight. I tore out the two "walls" seen to the left of the large a/c pipe in pic 1 and dead center of pic 2 where you can see the jagged remnants. Pic 3 shows just how much room there is for this filter. Just enough to get it in and installed.
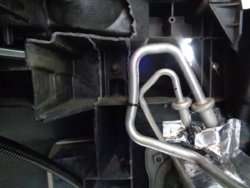
I used the cleanest section of the new but old filter. Damn that poor thing got beat to shit quickly. After removing as much rubber as I thought I should, I used a heavy gauge sewing needle and some 50lb test line and stitched it onto the rubber in 4 spots, tied it off then melted the test line ends to make sure it doesn't go anywhere. Then I used my hot glue gun and sealed it off from the inside. This new piece of filter medium isn't going anywhere.
You can see part of the filter through this "Z" mod in pic 1. I'm still dicking around with how the air box and filter get along. I'll have a permanent air box someday soon.
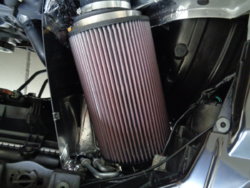
The hole itself couldn't really be opened up much more because there's a fastener (bolt), so this part of the core is acting as a support for the headlight. I tore out the two "walls" seen to the left of the large a/c pipe in pic 1 and dead center of pic 2 where you can see the jagged remnants. Pic 3 shows just how much room there is for this filter. Just enough to get it in and installed.


I used the cleanest section of the new but old filter. Damn that poor thing got beat to shit quickly. After removing as much rubber as I thought I should, I used a heavy gauge sewing needle and some 50lb test line and stitched it onto the rubber in 4 spots, tied it off then melted the test line ends to make sure it doesn't go anywhere. Then I used my hot glue gun and sealed it off from the inside. This new piece of filter medium isn't going anywhere.


You can see part of the filter through this "Z" mod in pic 1. I'm still dicking around with how the air box and filter get along. I'll have a permanent air box someday soon.


Last edited:
onthemove
Member
- Car
- 2003 FX35 AWD
- Name
- Michael
Here's an updated comparison chart. I really want to get a time slip from the drag strip soon, before the temps get too warm and am curious to see just how accurate the scanguage and my assessments are. I'd sure like to be competitive with that Levante S.
I pulled the G35x vq35de out. It's too slow. I also changed the G35x 2007 for the G37x 2013.
2003 FX35 AWD 5 spd Transgo VQ35DE (onthemove)
3,926 lbs, 354/314, 0-60 5.0, 0-83 9.0, ¼ 13.8 @ 103 mph, 255/55/18, 29"diam. tire, 11.1 lbs/hp,
trans 1st-3.54 2nd-2.26 3rd-1.47, F.D. 3.88 Drag Coefficient Cd = .35
2013 G37x AWD 7 spd slushbox VQ37VHR
3,823 lbs, 328/269, 0-60 5.5, 0-80 9.2, ¼ 13.8 @ 100mph, 225/55/17, 26.7"diam. tire, 11.7 lbs/hp,
trans 1st-4.92 2nd-3.19 3rd-2.04, F.D. 3.36 Drag Coefficient Cd = .29
2017 QX50 AWD 7 spd slushbox VQ37VHR
4,019 lbs, 325/267, 0-60 5.7, 0-80 9.8, ¼ 14.3 @ 97mph, 225/55/18, 27.7"d.t, 12.4 lbs/hp,
trans 1st-4.92 2nd-3.19 3rd-2.04, F.D. 3.13 Drag Coefficient Cd = .33
Maserati Levante S 8 spd V6 Twin Turbo
4,649 lbs, 424/428, 0-60 4.8, 0-80 8.4, 1/4 13.4 @ 104, 295/45/19, 29.5"d.t., 11 lbs/hp,
trans 1st-4.71 2nd-3.143 3rd-2.106, F.D. 2.8 Drag Coefficient Cd = .31
Then there's this clown car. What a piece. Do ya think Lexus completely alienated there buyer base when they came out with these beauties? God damn this thing looks ridiculous. They tried to make it look racy but it's performance is on par with a stock 1st gen FX35. Every time I see one on the road I wanna smack the driver. Is that so wrong?

Last edited:
onthemove
Member
- Car
- 2003 FX35 AWD
- Name
- Michael
Here's a couple more. You can really hear the engine breath in this vid. I'm sure this is helping.
Edit - The iat's fluctuate faster, stay lower longer and while driving average 7* higher than ambient. The MAF read 8-9* above ambient upon start up on a cold engine. WTF?
Still likes to pop. At idle, it sounds a little hollow and like a helicopter flying overhead.
Edit - The iat's fluctuate faster, stay lower longer and while driving average 7* higher than ambient. The MAF read 8-9* above ambient upon start up on a cold engine. WTF?

Still likes to pop. At idle, it sounds a little hollow and like a helicopter flying overhead.
Last edited:
Share:

