You are using an out of date browser. It may not display this or other websites correctly.
You should upgrade or use an alternative browser.
You should upgrade or use an alternative browser.
onthemove MOD's
- Thread starter onthemove
- Start date
I guess that sounds about right... Don't forget that the shipping weight quoted would include the box and all the packaging and whatever inside... And don't forget that the coilovers are made of aluminum, which sounds GREAT for weight reduction, but not so great if you live somewhere with bad winters... Aluminum and road salt don't go together very well...He did say about 5 lbs per corner lighter for the coils.
Yeah... That and the shitty quality of the MEGAN'sThe aluminum/salt issue might be why your megans failed?
The BC's are way better quality-wise... They've survived one Ottawa winter already which is pretty good... I'll clean them up again in the spring...
onthemove
Member
- Car
- 2003 FX35 AWD
- Name
- Michael
Replaced both belt tensioner pulleys while replacing the front diff seal today. Them thangs waz get'n noisey yo! The alternator side weighed 3oz less than stock but the a/c side weight 2oz over. Damn you Gates, Damn you! I'm gonna rip your lips off and kiss my ass wit dem shits. I'm gonna rip your tongue out and lick my balls wif'em (an ode to D. Chappelle).
Anyway, using my fingers to simulate the pinch points, I spun both of'em and I could here the balls chewing around in the bearings. They were on there way out. Engine bay noise stepped down a decibel. I also cleaned up the brackets, painted'em and greased the drive bolts.
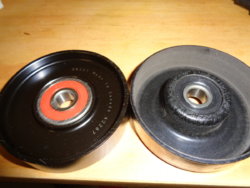
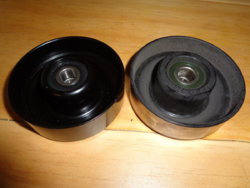
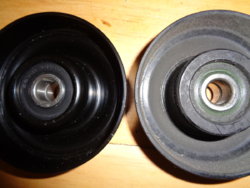
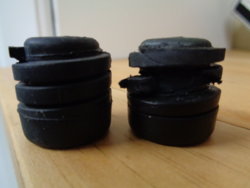
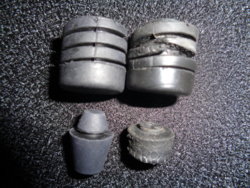
Also replaced these hood bump adjusters. Them shits was trashed.
Anyway, using my fingers to simulate the pinch points, I spun both of'em and I could here the balls chewing around in the bearings. They were on there way out. Engine bay noise stepped down a decibel. I also cleaned up the brackets, painted'em and greased the drive bolts.


Also replaced these hood bump adjusters. Them shits was trashed.


Last edited:
onthemove
Member
- Car
- 2003 FX35 AWD
- Name
- Michael
Can I? I would if I could.You gotta change the title of this here thread ;0
I assume those are lightweight pulleys?
No. Never saw lightweight belt tensioner pulleys but would buy'em if they made'em.
STILLEN Performance Lightweight PulleysNo. Never saw lightweight belt tensioner pulleys but would buy'em if they made'em.
FX35 - Unorthodox racing pulley set reliabilty vs performance, recommendations??
onthemove
Member
- Car
- 2003 FX35 AWD
- Name
- Michael
Belt tensioner pulleys bra. Already got UR crank & alt pulleys.
Trying to get rid of the UR idler pulley on ebay.
Hmmm... Looks like something else I'll hafta replace this spring...Belt tensioner pulleys bra. Already got UR crank & alt pulleys.
Trying to get rid of the UR idler pulley on ebay.
onthemove
Member
- Car
- 2003 FX35 AWD
- Name
- Michael
If your going to start replacing pulley's, might as well delete your idler pulley while your at it. Really easy to do. I bought the 3 piece Un. Racing under drive set only to learn later about deleting the idler. I've read of people thinking the idler was the water pump. Ha. For those who think that manufacturers do everything so well, that they don't do something unless it's absolutely necessary, why then did Infiniti/Nissan keep this dumb ass pulley for absolutely no reason year after year? Probably because they had a contract with the manufacturer to fulfill.
Here's my notes off my spreadsheet;
IDLER PULLEY DELETE
Idler Pulley Removal Mod with Pics - MY350Z.COM - Nissan 350Z and 370Z Forum Discussion
PART # 13298-4P10A $3.85 FOR SPACER TO REPLACE IDLER PULLEY BRACKET
BELT - BANDO 6PK1100 OR GATES KO60435
Here's my notes off my spreadsheet;
IDLER PULLEY DELETE
Idler Pulley Removal Mod with Pics - MY350Z.COM - Nissan 350Z and 370Z Forum Discussion
PART # 13298-4P10A $3.85 FOR SPACER TO REPLACE IDLER PULLEY BRACKET
BELT - BANDO 6PK1100 OR GATES KO60435
Last edited:
onthemove
Member
- Car
- 2003 FX35 AWD
- Name
- Michael
This is a much closer race than the one above.
A few days after spending the better part of the day making the air box I found I needed to trash it. I went back and forth with Moncef from Admintuning (cool guy btw) and he didn't like the way the silicone 3-4" adapter looked as though it was binding on the t.b. I noticed, after all this time, that it's also too long. I started looking at photos of Admin's and LMT's, thought about how detrimental the 45* extension and added length I added to it a few weeks back and I can't believe I missed these obvious details. Similar to the check ball/spring switcharooney I pulled when installing the transgo.
I removed 4 1/2" from the length and got the coupler to sit straight on the t.b. Took it out for a spin and I think I got the rest of the hp/tq I expected from this mod. Got a 75mm 09-14 Maxima t.b. and pig tail on the way. That'll get installed but before it does Ima taper the inlet opening and both ends of the 4" aluminum pipe for a smooth transition. Also fittin on opening up the elbow on the inside bend of the v-plenum a bit. This elbow on the DE intake is a well known restriction and the composite material should make the work a breeze. Then I have to figure out a new heat shield for the filter. Idle is erratic and so are the iat's.
Will install 75mm t.b. straight to the v-plenum, no "adaptor plate". Just have to line up and drill new holes.
I'd like to make a new upper collector/plenum with the "neck" facing the battery box to straighten it out, then move some shit around in the brake box, cut a hole in that panel adjacent to the firewall and rather than install an air filter, line the inside with filter media, move the a/c heat fresh air intake vent and make a cowl induction intake there instead. I'll get right on it .
.
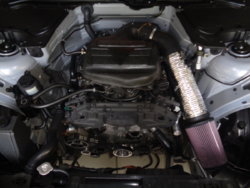
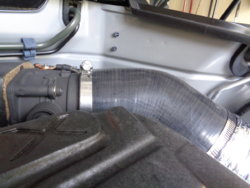
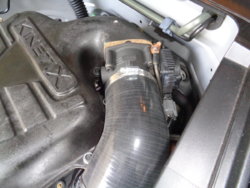
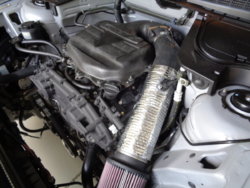
Found this recently. Titled this quote "FLOW DYNAMICS FOR INTAKE PIPE DIMENSIONS". Quote below;
"But, BY DEFINITION, the tubing is a restriction. The fact that air is flowing through it causes a loss of pressure. Make it large enough, or short enough, and it will become an insignificant restriction, but it is still causing a pressure loss, and reducing the density of the air in the cylinders = less power. Making a piece of tubing twice as long will double the pressure loss. Adding bends to the tubing will increase the pressure loss. Say going from a 3.5" inlet that is 3 feet in length to 4" inlet that is 4 feet in lenght? Or a 4" inlet that is 2 feet in length, etc? Making the diameter larger decreases the pressure loss, and making it longer adds some back in. Just playing with numbers, increasing the diameter from 3.5->4.0" decreased the pressure loss by about 25%. Changing the length from 3ft->4ft increased the pressure drop by 33%. So, your larger, longer pipe has more pressure drop than the smaller diameter, shorter one. (These are "rough" numbers for illustrational purposes only). If you increase from 3.5"->4", and shorten the length from 3ft->2ft, you will reduce the pressure loss. What you really need to look at is the magnitude of the pressure loss. You have 14.7psi available at the air filter to push air into the cylinder as the piston drops. If the ducting is costing you 1psi pressure loss, its reducing the potential power by 6.5%."
I removed 4 1/2" from the length and got the coupler to sit straight on the t.b. Took it out for a spin and I think I got the rest of the hp/tq I expected from this mod. Got a 75mm 09-14 Maxima t.b. and pig tail on the way. That'll get installed but before it does Ima taper the inlet opening and both ends of the 4" aluminum pipe for a smooth transition. Also fittin on opening up the elbow on the inside bend of the v-plenum a bit. This elbow on the DE intake is a well known restriction and the composite material should make the work a breeze. Then I have to figure out a new heat shield for the filter. Idle is erratic and so are the iat's.
Will install 75mm t.b. straight to the v-plenum, no "adaptor plate". Just have to line up and drill new holes.
I'd like to make a new upper collector/plenum with the "neck" facing the battery box to straighten it out, then move some shit around in the brake box, cut a hole in that panel adjacent to the firewall and rather than install an air filter, line the inside with filter media, move the a/c heat fresh air intake vent and make a cowl induction intake there instead. I'll get right on it


Found this recently. Titled this quote "FLOW DYNAMICS FOR INTAKE PIPE DIMENSIONS". Quote below;
"But, BY DEFINITION, the tubing is a restriction. The fact that air is flowing through it causes a loss of pressure. Make it large enough, or short enough, and it will become an insignificant restriction, but it is still causing a pressure loss, and reducing the density of the air in the cylinders = less power. Making a piece of tubing twice as long will double the pressure loss. Adding bends to the tubing will increase the pressure loss. Say going from a 3.5" inlet that is 3 feet in length to 4" inlet that is 4 feet in lenght? Or a 4" inlet that is 2 feet in length, etc? Making the diameter larger decreases the pressure loss, and making it longer adds some back in. Just playing with numbers, increasing the diameter from 3.5->4.0" decreased the pressure loss by about 25%. Changing the length from 3ft->4ft increased the pressure drop by 33%. So, your larger, longer pipe has more pressure drop than the smaller diameter, shorter one. (These are "rough" numbers for illustrational purposes only). If you increase from 3.5"->4", and shorten the length from 3ft->2ft, you will reduce the pressure loss. What you really need to look at is the magnitude of the pressure loss. You have 14.7psi available at the air filter to push air into the cylinder as the piston drops. If the ducting is costing you 1psi pressure loss, its reducing the potential power by 6.5%."
Last edited:
onthemove
Member
- Car
- 2003 FX35 AWD
- Name
- Michael
I don't see a way around a big ass box to get the benefits of both the intake mod and cool air from outside the engine bay. This is the largest yet due to an even shorter intake pipe. I think I can shrink it down some but I'm not gonna make another box from abs until all the intake and plenum work is done. Getting air from outside the bay is such a big deal that whatever I have to do, I'll do it. There's an area in the core support behind the grill that could function as a ram-air type of deal like the 350z but I'll have to do some cutting.
The Tomei V2 headers will be either wrapped in their titanium wrap or I'll ditch the wrap and go with heatshield products header armor over the headers and just beyond the cats but leaving the bottom of the cats open. That'll keep a lot of heat out of the bay and off the engine and transmission. That's a ménage à trois of heat reduction right there I reckon.
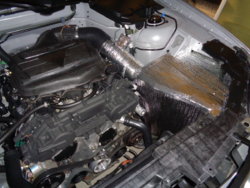
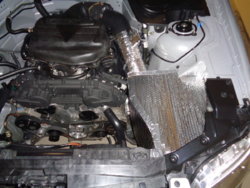
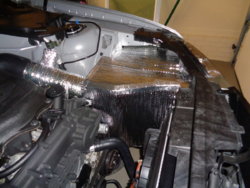
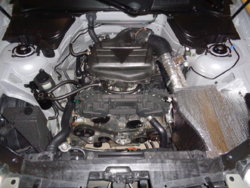
Removed the weather strip that runs the length of the cowl awhile back. Just removed the plastic on the cowl that the weather strip attached to. It does allow more engine bay heat out for sure but I can smell the bay with the heater on now (no recirculating option for heat) so I'll have to block off the one side of the vent that faces the bay and leave the one that faces the windshield open. No big deal and can do it from the underside of the vent so it's not noticeable and use abs plastic.
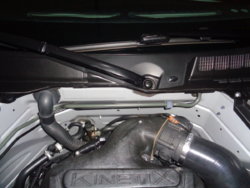
The Tomei V2 headers will be either wrapped in their titanium wrap or I'll ditch the wrap and go with heatshield products header armor over the headers and just beyond the cats but leaving the bottom of the cats open. That'll keep a lot of heat out of the bay and off the engine and transmission. That's a ménage à trois of heat reduction right there I reckon.


Removed the weather strip that runs the length of the cowl awhile back. Just removed the plastic on the cowl that the weather strip attached to. It does allow more engine bay heat out for sure but I can smell the bay with the heater on now (no recirculating option for heat) so I'll have to block off the one side of the vent that faces the bay and leave the one that faces the windshield open. No big deal and can do it from the underside of the vent so it's not noticeable and use abs plastic.

onthemove
Member
- Car
- 2003 FX35 AWD
- Name
- Michael
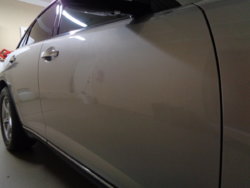
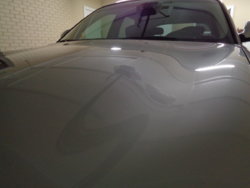
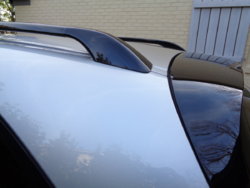
I haven't waxed the FX in a long time. Thought I'd wait so the body shop wouldn't get pissed but I don't have to worry about that anymore. After having done what I've done, body work is no longer necessary. I wanted to paint the lower black trim to match the body but fuc dat. It's just gonna get beat to shit anyway + I'm so used to the black bottom trim. Painting this would be a mistake for me. The owner of the shop I planned on going to told me he had a guy who does paint correction but was booked for 2 months and would charge $1500-$2k. After doing this for the first time, I understand the cost.
Bought Chem. Guys Torqx kit with v32-v38 sample bottles. Those are some large samples as the v36 and v38 was used the most and I have enough left over for another round. This FX has never been machine polished. I clay it once and wax once or twice a year. Only the black gloss areas had noticeable swirls. The paint had signs of wear but 95% of it wasn't visible unless I was really looking for it in just the right light. Now, it just so damn glossy and that's just the paint, no glaze or carnauba, just 2 coats of the ICE sealer on everything from the windows to the black trim which only added shine to the plastic black trim. While I worked, I could see more of the minor imperfections that take away the glossiness of the clear coat.
Got some 3m 1080 gloss black vinyl and tools on the way to deal with the upper and lower window trim. Even the polish couldn't save these trim pieces but it did help them out a bit. I'm glad I did this and am fortunate I have the time to do it myself.

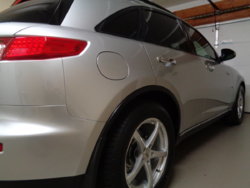
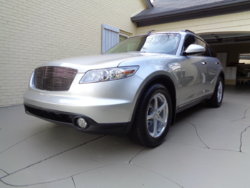
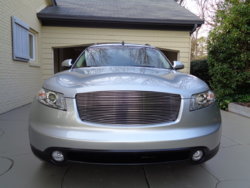
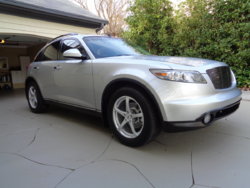



Last edited:
Have you looked into the STILLEN CAI?I don't see a way around a big ass box to get the benefits of both the intake mod and cool air from outside the engine bay.
onthemove
Member
- Car
- 2003 FX35 AWD
- Name
- Michael
Yeah, when I first started modding I checked it out along with many others. Had a z-tube, k&n drop in, modified box and deleted all baffles. Believe me when I tell you this 4" intake, or any other properly built and tuned 3.5 to 4" just blows the doors off any of the typical aftermarket intakes, so it's well worth it to work within its confines. It's just a shame to muck up the bay I've worked so hard to declutter.
Share:
