Jumbo's exterior care

A brief thread diversion? Each time I see this title come up "Jumbos exterior care" I think its going to be a picture of Brad is the shower soaping up. NOT that it makes me want to open it all up or anything :eek.: but it makes me laugh just a little bit. Sorry B, carry on brother.......

:laugh: It really shows where your mind wanders off to.:rofl:
 
I spent about 8 hours on the Miata paint this weekend, experimenting for the first time with wet sanding. I did the two front quarter panels in full. No photo at this time since I was just figuring things out - I will definitely post up a series of wetsanding photos when I attempt the hood and/or trunk lid.

My quarter panel paint had scratches, paint chips that had been previously repaired, new paint chips, swirls, scratches, etching, oxidation... just about every surface defect you can imagine. Even wetsanding did not remove everything but I wanted to see what kind of improvement I could make while learning how to wetsand and polish.

Sat on a short stool in front of the panel and I used my Turtle ICE claybar lubricant as the wetsanding fluid, along with some 3M 2000 grit finishing sandpaper. I tried to wetsand the entire panel so that the finish looked compeltely uniform. Tried to avoid sanding marks and moved the paper in only one direction. This took a couple of sanding sessions because you have to rinse and dry the sanded areas to see any missed spots. Once sanding was complete, the panel looked like it was a matte finish. For a brief moment, I considered wetsanding the entire car and then leaving it like that. Paint chips that had been repaired showed up very quickly while sanding. Each repair had what looked like a shallow "donut" around it. Sanding it flat removed any evidence of extra paint, but the outline of the rock chip is still visible. It's much improved, no doubt.

Just for info, it took me about four hours to do ONE fender.

Wetsanding with 2000 grit 3M wetordry w/Turtle ICE claybar lube
PC 7424 and CCS yellow 4.5" pad:
3 applications of XMT agressive cut
CCS 5.5" orange pad:
2 applications of Sonus SF-1 swirl remover
CCS 5.5" white pad:
Sonus SF-3 polish
CCS 5.5" red pad:
Sonus SF-4 sealant
By hand:
2 applications of Meguire's NXT paste wax

I realize this post isn't too informative without photos but in the 8 hours of work that I put in, I learned a lot about technique. In fact, just going through the process I have gained enough confidence to know I am capable of removing just about any scratch that doesn't penetrate all the way through the layer. I saw my sandpaper marks fade to light swirls, then transform into what can only be described as new looking paint. In one or two small areas I can see where there are still swirls if I view it at certain angles - I know this means I really need to re-polish the entire panel again before it is as perfect as it can be. I'm just happy I had the experience and understand a lot more about the whole process now. Will definitely continue to develop these skills so that I can have total confidence I can repair severe paint defects.

During the week I will try to get the quarter panels perfect. This coming weekend I'll attack the hood and photodocument that effort. Stay tuned!
 
Last edited:
You are definitely starting out on the right track. The PC is an excellent DA machine and it's really hard (compared to a rotary) to burn the paint. You are correct also in starting with a less aggressive compound and working your way up to more aggressive ones. I have spent a long time studying the forums at Meguiar's http://www.meguiarsonline.com/forums/forum.php and Adam's http://www.adamspolishes.com/ . Check out the YouTube videos that Junkman2000 has.
I realize that you're just learning and taking your time. That's good; however 4 hours for a quarter panel is excessive, unless you're wet sanding the rear quarter of a '57 caddy.
If the rest of the car is as rough as your fenders, I'd try stepping up to 1500 if you're set on wet sanding.
I've used Meguiars 105 / 205 with the PC7424 with great results on a black honda:
View attachment 232134
View attachment 232137
View attachment 232140
This car is an '02 that never got a hand wash or had ever been waxed (as far as I know) before 2 years ago (My wife's ex-husband bought it new). This picture was taken 10/15/11. Unfortunately, I didn't take before/after pics the first time since I really did not expect to get the results that I did.
I did wet sand the hood since, like yours, someone had left bird droppings for far too long. I was able to make them look better, but never got them out.
The rest of the car got the 105 - 205 - Show car glaze - NXT 2.0 treatment. This year, I only did the 205 - NXT.

I feel your pain on the touch-up paint! I had several chips on my GMC that I tackled. I learned a lot of what not to do, and if I ever try my hand at it again, will do a few things differently. I am pleased with the end result; however, had I known what I know now, the process would have gone far quicker with even better results.

Keep up the good work, and POST MORE PICS!:top:
 
hey man, just to make it a little easier on you, you can wet sand with just water no problem & you can also do circular movements also no problem. actually I'd encourage overlapping circular movements really because this will promote a more even sanding of the finish than just sanding in a straight line. either way the polishing will remove the 2000 grit sanding scratches so you don't have to worry too much about that. the more confidence you have in what your doing the faster the next panels will go...
 
Thanks Spent & turbo - I'm learning a lot and having fun. There's something satisfying about learning a skill rather than just following directions.

I wasn't going to post any in process photos because I know the completed polishing is still not up to standard. But just for kicks, here are a couple so it can't be said I haven't posted photos. Makes for a more interesting thread anyway.

Bird dropping etch - close up with my point and shoot camera
IMG_8537.jpg

Before polish - no wetsanding on the hood. The bird dropping etch is on the left side, center of the photo.
IMG_3104.jpg

After polish - again with point and shoot camera
IMG_3126.jpg

Like I said, it's a lot better but not up to my own standard.
 

Attachments

  • IMG_8537.jpg
    IMG_8537.jpg
    32.4 KB · Views: 39
  • IMG_3126.jpg
    IMG_3126.jpg
    29.4 KB · Views: 29
  • IMG_3104.jpg
    IMG_3104.jpg
    49.4 KB · Views: 26
  • IMG_3104.jpg
    IMG_3104.jpg
    49.4 KB · Views: 36
  • IMG_8537.jpg
    IMG_8537.jpg
    32.4 KB · Views: 31
  • IMG_3126.jpg
    IMG_3126.jpg
    29.4 KB · Views: 27
Still looks better than what I was able to accomplish with the Civic. I sanded until I was concerned about getting into the base coat.
 
Well I hit Bondo. Wet sanded the hood this weekend and where I thought I had bird dropping etching, it turns out the paint was crazing on top of bondo. I uncovered three patched areas on the front left side of the hood. I also identified poor paint preparation as the reason for some of the hood defects - there are quite a few.

This also explains why there was no clearcoat on the hood, while the fenders have clearcoat. Wetsanding the hood gave me black grit while the fenders gave me white grit. The clearcoat is also softer than the single stage hood paint. I was able to wetsand and polish the hood with good success (minus uncovering the bondo and then touching up those areas). The fenders still show wetsanding marks in the clearcoat. Last night I ordered some 3M rubbing compound and some 3000 grit sandpaper to try to bridge the gap.

I guess what I learned this weekend is that there's pretty much no saving this paint job. To fix it correctly, I need to sand and prep the entire car, then have it painted. Or go straight to a vinyl wrap.

I'm going to continue using the Miata as practice. There are a couple different areas I can learn how to repair. Some rust, some serious dents, old repairs... still plenty to learn by trial.

I also put the machine polisher on the FX for the first time. I used very mild combinations - white CCS pad with Meguire's ultimate compound. The paint came out great. I also found that running the PC 7424 over the black window trim and the plastic roof trim under the rails restores them to a shine. Both had oxidized to a dull uneven finish. The polish fixed them right up. My pinstripe has begun to wear off and I noticed that the polisher started to remove them further. I think I decided I want to remove the pinstripes entirely.
 
I can only assume that's the case - I can't see any type of repair from underneath the hood.

There is also some bondo on the driver's side rear fender - same situation.
 
Dave, you are absolutely correct and I'm pretty sure that's the plan. While at SEMA, I found a distributor for vinyl wrap - going to give it a try since the price is right.

Until I pull the trigger, I'm going to continue learning how to correct the Miata - need to fill the chips, remove the dents & dings, correct the scratches... learn all I can before attacking the wrap. Since I posted last, I have done a LOT of learning on my Porter Cable Dual Action polisher. I can now wetsand with 2000 and with combinations of pads and compounds, can make the surface of the paint shine like new. I've come a long way. Enough to try compounding the FX, which I did successfully with the PC.

I actually spray painted the bumper, headlight covers and part of the Miata hood after uncovering the bondo. With some wetsanding and polish, the finish looks professional, but the color match is off. Still learned a ton about how to finish spray paint, but want to do it again at some point.

This past week I bought a pinstripe eraser. It's a rubber wheel that attaches to my drill, used to abrade off the pinstripe on the FX. I have confidence I can remove the stripe and polish out the paint underneath so you can't tell it was ever there. Looking forward to attacking that. In some places the pinstripe has worn off partially and it's time to clean it all up.

After that is complete, I'm planning to use the eraser to try to remove the clear bra. I've started the removal process and didn't get very far using solvents and the tools I own. Now that I have the eraser wheel and I bought plastic razor blade scrapers, I'm going to try to remove the bra. It's been on there since I bought the car in 2004. Once again, I never would have even tried taking off the bra if I didn't have confidence I could polish out anything I do to the paint during removal.
 
Jumbo, you're like a learning and polishing machine! Lol
What kind of polishing compound do you recommend for a beginner to hand polish stock plastic mirror covers?
 
Jumbo, you're like a learning and polishing machine! Lol
What kind of polishing compound do you recommend for a beginner to hand polish stock plastic mirror covers?

Start with McGuire's Ultimate Compound and a few microfiber towels. If you are doing it by hand it's going to take some elbow grease. You'll definitely see color come off on the towel. After it looks as shiny as you can make it, keep it waxed. Every single wash, wax those plastic mirror covers.

For the first time in this thread I have done a little work on the FX, with photos.

My pinstripe eraser arrived and I hooked it up to my drill this evening.

IMG_9086.jpg

Here are a couple of before shots - I'm trying to show where the pinstripe is worn - the reason I want to remove the rest of it.

IMG_9085.jpg

This is the passenger side front fender - the pinstripe is gone except for the little Infiniti symbol.

IMG_9083.jpg

So it was the first thing to get erased!

IMG_9088.jpg

I dusted off the surface and I was prepared to break out the machine polisher to polish up after the eraser but to my surprise, all it took was a microfiber and some quick detailer. I had to rub pretty hard but I see no swirls now that all the residue has been cleaned off.

You can see where the eraser removed the pinstripe right up until the clear bra - and it even took a bite out of the clear bra! Here it is, buffed with nothing but McGuire's quick detailer and a MF.

IMG_9089-1.jpg

You can see what look like scratches in the clear bra - they are actually cracks. I plan to try to use the eraser to remove the clear bra after I'm done with the pinstripe.

Then I removed the entire passenger door pinstripe.

IMG_9091.jpg

Just as I was finishing this door, my drill ran out of battery. It was getting dark anyway. I'll continue with the other panels during the week - my goal to have no pinstripe and some of the clear bra removed for this weekend's Coffee and Cars here in Houston.
 

Attachments

  • IMG_9085.jpg
    IMG_9085.jpg
    56.3 KB · Views: 43
  • IMG_9086.jpg
    IMG_9086.jpg
    91.6 KB · Views: 24
  • IMG_9086.jpg
    IMG_9086.jpg
    91.6 KB · Views: 39
  • IMG_9088.jpg
    IMG_9088.jpg
    80.6 KB · Views: 35
  • IMG_9088.jpg
    IMG_9088.jpg
    80.6 KB · Views: 29
  • IMG_9083.jpg
    IMG_9083.jpg
    46.7 KB · Views: 28
  • IMG_9083.jpg
    IMG_9083.jpg
    46.7 KB · Views: 25
  • IMG_9085.jpg
    IMG_9085.jpg
    56.3 KB · Views: 38
  • IMG_9091.jpg
    IMG_9091.jpg
    117.9 KB · Views: 36
  • IMG_9091.jpg
    IMG_9091.jpg
    117.9 KB · Views: 43
  • IMG_9089-1.jpg
    IMG_9089-1.jpg
    28.8 KB · Views: 30
  • IMG_9089-1.jpg
    IMG_9089-1.jpg
    28.8 KB · Views: 28
Finished up the passenger side of the car - she's stripeless! Tonight I'll start on the driver's side. My drill battery life has been the limit of how long I can work. Need to get a second battery.

--------

Not to jump around so much but I found some great info on sanding paint, which I have been doing on the Miata. I've cut and paste this from Autogeek - my forum source for detailing.

Two Schools of Thought when Hand Sanding - Straight-lines or Crosshatch Pattern

Copyright ©PBMA - Autogeekonline.net® All Rights Reserved


There's two schools of thought on the correct method or best method on which direction to move your hand and backing pad when hand-sanding.

Straight-line School of Thought
This method means to to sand in only one direction with all sanding steps. The perceived benefit is it will keep all your sanding marks in the same direction. Then, if you want to take this thought deeper this would mean if you don't get all your sanding marks out of the paint then at least they're all running in the same direction and my guess is most people will think this won't look as bad as sanding marks left in the paint that are in a crosshatch pattern and to some level straight-line scratches might be less noticeable and less unsightly than crosshatch scratches.
Crosshatch School of Thought
This method means that with each change in grit size of sanding or finishing papers, you sand in a different direction 90 degrees away from the previous direction. The goal is as you move to a higher grit paper you completely sand-out all the previous sanding marks that were running in the 90 degree angle opposite from the direction you're sanding with in subsequent steps.

Now assuming you sand all the previous sanding marks out you would then only be left with sanding marks running in one direction. If you don't remove all the sanding marks from previous sanding steps you'll have a crosshatch pattern of sanding scratches in the paint of varying depths. At this point you can either re-sand and try to remove the 90 degree sanding marks or move on to the compounding step and try to remove all the sanding marks with a rotary buffer. If you don't remove all the sanding marks using a rotary buffer then you'll be left with a crosshatch pattern of sanding marks in the paint and these will tend to be easier to see than sanding marks all running in one direction.

Sanding in Circles
Don't sand in circles. Circular motions work great for spreading out of coat of wax over a painted panel but don't work well for sanding on car paint. One reason for this is because the idea behind sanding paint in the first place is to remove some type of defect, a lot of times this will be orange peel or some type of damage that caused deeper scratches or etchings. Whatever the defect is, the goal is still the same and that is to only remove as little paint as necessary to remove the defect so you leave the most amount of paint on the car so it will last over the service life of the car.

Now follow me on this...
When you sand in a repeatable pattern, for example straight-lines, you have some measure of control over the pattern of sanding marks you're putting into the paint and also the number of strokes and thus the amount of material being removed. If you sand in random, overlapping circles you have realistically no control over your sanding mark pattern and little or no way of gaging how much paint you're removing while you're sanding. Wet-sanding paint is already difficult and risky, there's no good reason to make it more difficult or more risky so I'm not going to recommend sanding in circular motions and common sense dictates to also avoid sanding in circles.

Big Picture
Of course the big picture goal is no matter how you sand the paint, in the end you remove ALL sanding marks and then there isn't any issue with which method you used. This is easier said than done and paint hardness is a crucial factor as to how easy or difficult it will be to buff out the sanding marks and film-build or paint thickness will be the limiting factor as to how much paint you can remove with both the sanding and the buffing process. (So be careful).


Personal Preference
Because in my life I've met seasoned Professionals that are proponents of both methods, choosing the best method becomes a personal preference. As long a there's enough paint or film-build on the car to work with then theoretically, both methods will work.

Ultimate Goal - Leave the most paint on the car
The most important part of any hand sanding project is to use the highest quality finishing papers you can obtain as this will reduce the potential for uneven sanding marks while leaving the most amount of paint on the car and making the removal process faster and easier.

Machine Sanding
And in this writer/detailer's opinion, generally speaking, machine sanding is a better option than hand sanding as it will leave more uniform sanding marks that will be a lot easier to remove and the machine compounding process will always be faster and easier versus trying to remove hand sanding marks.
 
I'm finished with pinstripe removal! The eraser wheel is about half way gone, so I'll move on to parts of the clear bra next.

Here's a shot of the pinstripe that goes under the clear bra near the headlight:
IMG_9089-1.jpg

And after removing both the clear bra and the pinstripe and Meguire's Ultimate compound:
IMG_9097.jpg
You can see where I stopped removing the clear bra at the corner of the headlight.

Rear panels forward. Eraser wheel, Porter Cable 7424 DA polisher, CCS orange pad with Sonus SF-2 swirl remover, CCS red pad with Wolfgang's Deep Gloss Paint Sealant, Meguire's Ultimate Spray Wax & hand buff

IMG_9098.jpg

IMG_9099.jpg

---------- Post added at 08:07 PM ---------- Previous post was at 08:03 PM ----------

I'm finished with pinstripe removal! The eraser wheel is about half way gone, so I'll move on to parts of the clear bra next.

Here's a shot of the pinstripe that goes under the clear bra near the headlight:
IMG_9089-1.jpg

And after removing both the clear bra and the pinstripe and Meguire's Ultimate compound:
IMG_9097.jpg
You can see where I stopped removing the clear bra at the corner of the headlight.

Rear panels forward. Eraser wheel, Porter Cable 7424 DA polisher, CCS orange pad with Sonus SF-2 swirl remover, CCS red pad with Wolfgang's Deep Gloss Paint Sealant, Meguire's Ultimate Spray Wax & hand buff

IMG_9098.jpg

IMG_9099.jpg

Couldn't be happier about the results since I took a chance on a $12 tool and just followed the instructions. I had faith I could polish out just about anything I did to the paint, short of scratches down to the base coat.

Plan to continue working on the clear bra but it is going to take weeks and at least one or two more eraser wheels. I'm thinking I might try to find somebody that has a steam cleaner. It's been suggested I try that given I've tried just about everything else.
 

Attachments

  • IMG_9089-1.jpg
    IMG_9089-1.jpg
    28.8 KB · Views: 32
  • IMG_9089-1.jpg
    IMG_9089-1.jpg
    28.8 KB · Views: 30
  • IMG_9098.jpg
    IMG_9098.jpg
    83.6 KB · Views: 41
  • IMG_9098.jpg
    IMG_9098.jpg
    83.6 KB · Views: 45
  • IMG_9097.jpg
    IMG_9097.jpg
    64.1 KB · Views: 29
  • IMG_9097.jpg
    IMG_9097.jpg
    64.1 KB · Views: 35
  • IMG_9097.jpg
    IMG_9097.jpg
    64.1 KB · Views: 26
  • IMG_9097.jpg
    IMG_9097.jpg
    64.1 KB · Views: 29
  • IMG_9097.jpg
    IMG_9097.jpg
    64.1 KB · Views: 30
  • IMG_9089-1.jpg
    IMG_9089-1.jpg
    28.8 KB · Views: 45
  • IMG_9089-1.jpg
    IMG_9089-1.jpg
    28.8 KB · Views: 26
  • IMG_9089-1.jpg
    IMG_9089-1.jpg
    28.8 KB · Views: 30
  • IMG_9099.jpg
    IMG_9099.jpg
    72.4 KB · Views: 35
  • IMG_9099.jpg
    IMG_9099.jpg
    72.4 KB · Views: 36
  • IMG_9099.jpg
    IMG_9099.jpg
    72.4 KB · Views: 26
  • IMG_9099.jpg
    IMG_9099.jpg
    72.4 KB · Views: 27
  • IMG_9099.jpg
    IMG_9099.jpg
    72.4 KB · Views: 31
  • IMG_9098.jpg
    IMG_9098.jpg
    83.6 KB · Views: 22
  • IMG_9098.jpg
    IMG_9098.jpg
    83.6 KB · Views: 29
  • IMG_9098.jpg
    IMG_9098.jpg
    83.6 KB · Views: 31
From these various electric drills,which polisched,preferably in the dark shine a flashlight on the paint,and see how beautiful are the uneven wheels relieved to paint ,how would it not watched the friction is in circle so the foot print will always be the one ,who has the falcon eye to see
 
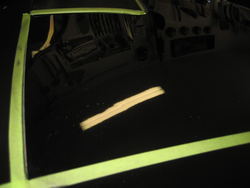
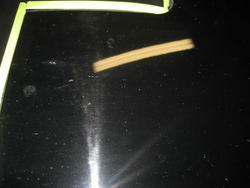
^^^ I'm guessing you said - the eraser swirls the paint. The paint has been machine polished - no swirls.

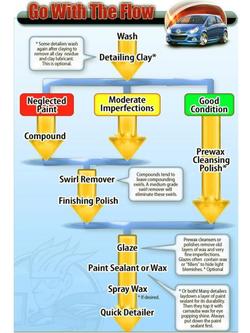
Found this on Autogeek and have been using it as my general guide with both the Miata and the FX.

detailflow.jpg

Here's a list of the products I have for each step. A, "collection" if you will. It's funny how many products I think I still need.

Wash
Turtle ICE car wash
10%IPA & water for chemical stripping (only before sealant)
Hope Depot 5 gallon bucket with Autogeek Grit-gaurd
Lambswool mitt

Dry
Toro yard blower
Synthetic chamois
Microfiber towels

Clay
Turtle ICE liquid clay cleaner
Turtle ICE clay bar

Neglected Paint
3M Heavy cut compound
XMT heavy cut compound
Sonus SF-1 defect remover

Moderate Imperfections
Meguire's Ultimate Compound
Sonus SF-2 swirl remover

Prewax Cleaning
Klasse AIO (cleaner, polish, wax)

Finishing Polish
Meguire's #7 showcar glaze
Wolfgang's Final finishing glaze

Sealants
Wolfgang's Deep Gloss Paint Sealant
Sonus SF-4 Paint Sealant

Wax
Meguire's NXT paste wax
Meguire's quick spray wax

Wheels & chrome
Daytona wheel Brush
3M wheel & tire cleaner
Mother's mirror metal polish - wheels & exhaust
Meguire's Gold Class Endurance High Gloss tire gel


Rain-X for front & rear windows
Mother's back to black for trim


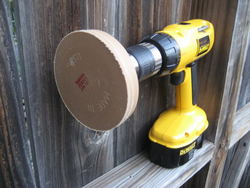
Porter Cable 7424 Dual Action polisher
4" flexible backing plate
6" flexible backing plate
4" Hydro-tech Tangerine
4" Hydro-tech Crimson
5" Lake country(LC) flat yellow pad
5" LC Closed Cell System(CCS) yellow pads
7.5" LC CCS orange
7.5" LC CCS white
7.5" LC CCS red

XMT Polishing pad conditioner
XMT Polishing pad cleaner
pad cleaning brush

50+ microfiber towels - each color a different purpose

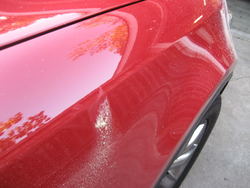
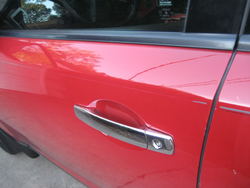
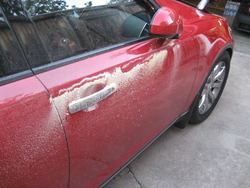
With this setup I can pretty much knock out any correction short of down to bare metal with the addition of some wetsanding supplies. I've had the chance to practice on the old, hard clearcoat on the Miata, plus the single stage paint on the Miata hood (repair & respray). I have been starting to work on problem areas on the FX - trying out skills I learned on the Miata. So far so good. Have not yet polished the whole car but plan to get there before the end of the winter.
 

Attachments

  • detailflow.jpg
    detailflow.jpg
    66 KB · Views: 27
  • detailflow.jpg
    detailflow.jpg
    66 KB · Views: 29
Dang brad that's a lot of cleaning supplies, so when do I get an invite to learn your cleaning ways? lol.

Sent from my HTC_Amaze_4G
 
Back
Top