
You are using an out of date browser. It may not display this or other websites correctly.
You should upgrade or use an alternative browser.
You should upgrade or use an alternative browser.
BIG "A" DETAILING Shop Introduction & Pricing
- Thread starter AndrewBigA
- Start date
- Status
- Not open for further replies.
AndrewBigA
Member
thank youGreat work.. Car looks Flawless
AndrewBigA
Member
E46 BMW VERT Correction + Nose Wetsanded 63 pics
Bavarian Motor Works


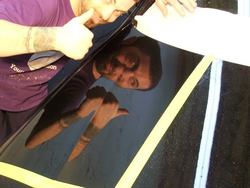
just thought id share this with all of you. getting a little artsy fartsy when i work late at night.
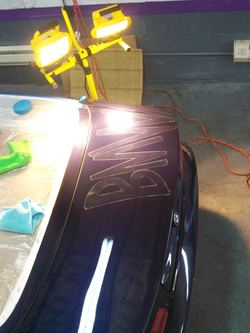
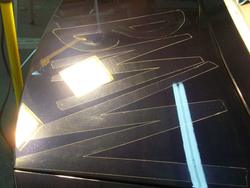
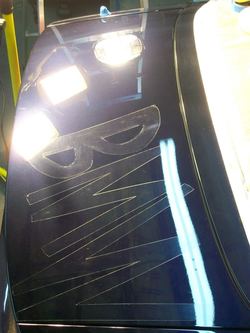
i had a lot of fun working on this one. you can tell from some of the wacky photos like the BMW 50/50 shot carved into the trunk with masking tape =P. detailing for the most part is fun to do. i enjoy doing the larger jobs more often then the rest of the work because you can see the huge difference from before to after.
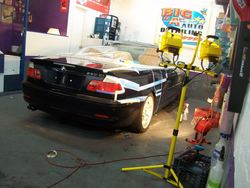
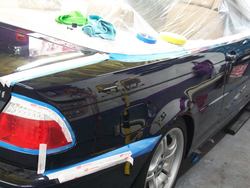
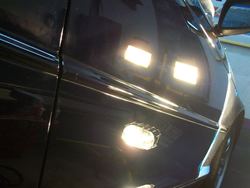
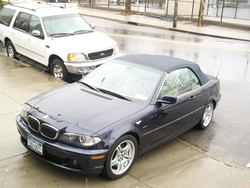
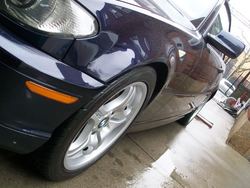
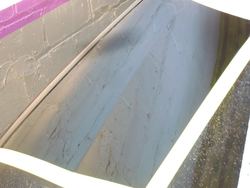
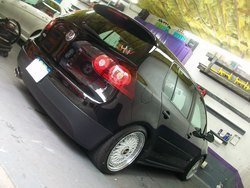
BMW E46 330ci VERT
clear coat correction + wet sanding to remove thick paint dots of overspray.
wetsanded: front bumper, both fenders & hood.
with 3M 2000 grit Imperial wet or dry sandpaper.
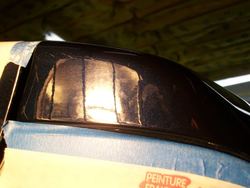
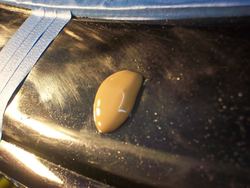
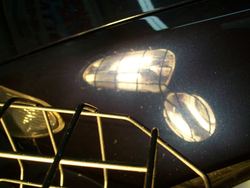
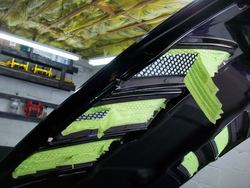
there were white dots of overspray on the entire nose of the car. they were thick & a little raised from the surface. they needed to be removed by wetsanding the clear coat.
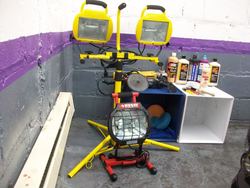
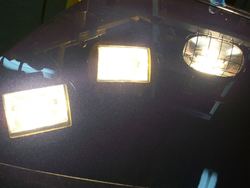
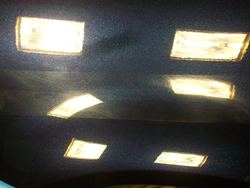
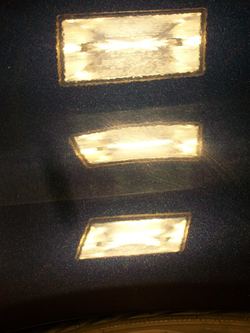
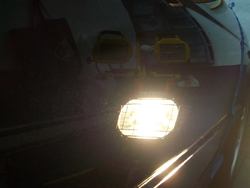
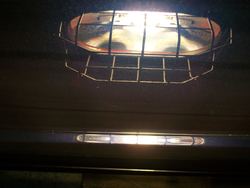
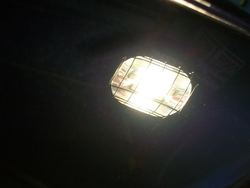
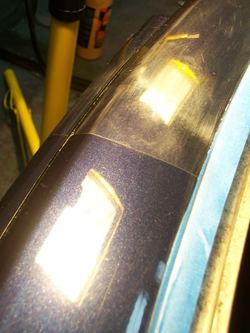
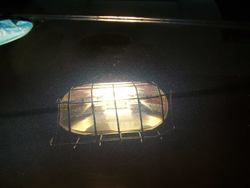
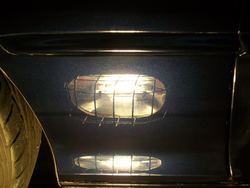
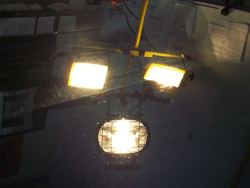
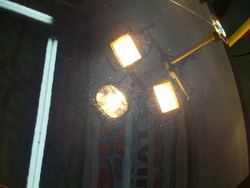
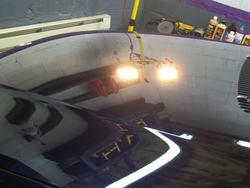
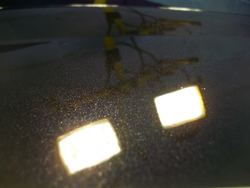
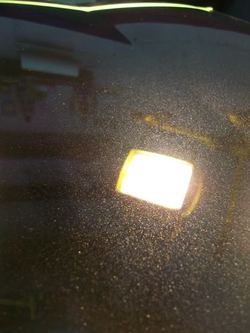
yellow unit puts out 1,000 watts of halogen light.
the red one puts out 700 watts of halogen light.
1

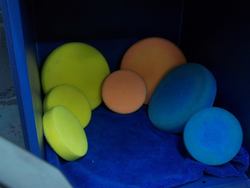
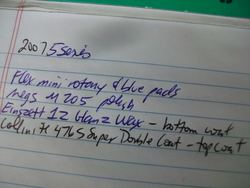
6.5" & 4.0" pads
2

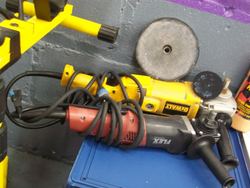
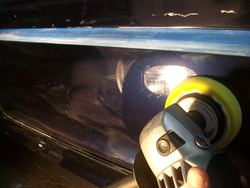
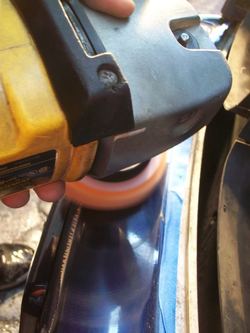
Dewalt DW849 Rotary
Flex L 3403 Mini Rotary
what are the differences between the two?
the Dewalt is a more advanced piece of equipment or at least they say. its roughly 3 lbs heavier than the Flex. the extra weight makes the Dewalt a more aggressive machine & can tire your body out quicker than the smaller Flex unit. it will cut faster as no body weight is needed to be pressed on the car during use. sometimes it helps to lean in a little bit & apply light pressure on the lighter Flex machine.
the extra weight also makes the Dewalt more difficult to master. i remember about 13 years ago when i was an apprentice at the first body shop that i ever worked for. this is the machine i learned on & boy was it difficult to master. at first the Dewalt would skip all over the place. i either didn't have enough product on the machine, the pad was dry or the RPM speed was set too high. i was also having a hard time keeping the machine lifted above my chest when i was wetsanding & compounding a white van thatt had some company lettering on it. yes i remember the first car i ever wetsanded & compounded lol! i just cant remember if it was a ford or a dodge but whatever.
the Dewalt DW849 is still my favorite machine to work with.
it produces the best results while saving some time as well.
to close this out the Dewalt is a much more durable machine. ive had this one for about 3 years now & never had any problems with it. i remember years ago sometimes the trigger would need to be replaced but that was an easy fix. my Flex had to go back for service 2 times because of the cord that wasn't working properly. it was the way i wrapped up the cord too tightly around the machine each day that made the wires pull out, making the Flex stop working while i was in the middle of doing a panel. it would work, then shut off, then work again.
i will always own & use a Dewalt DW849 Rotary but as a backup i think the next one i will buy is a Makita.
i like to keep a few good condition polishing machines around the shop. if something brakes, i gotta have a back up.
3

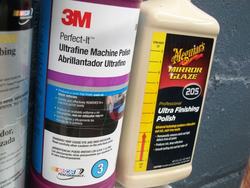
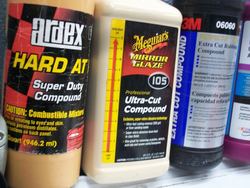
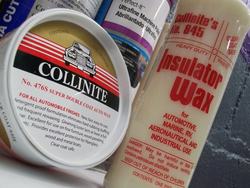
here are the products used to complete this job.
4

5

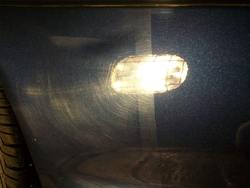
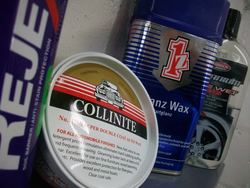
the car was finished off with a bottom coat of Collinite 476S SUper Double Coat Paste wax - hand applied
& topped off with Collinite #845 Liquid Insulator Wax - hand applied as well
man, what a great combo for durability & a nice wet, deep shine!
6

Ardex Hard At It Super Duty Compound on a toothbrush to remove baked on brake dust on all 4 wheels
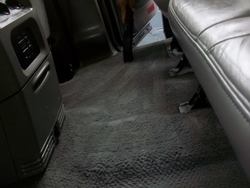
with the interior already shampooed & treated i dropped the top & covered it in plastic. i left a little 12" section under the drivers mirror open by using a double edged razor blade. i wanted the carpet to finish airing out so this is what i did. i made a little window & outlined it with some masking tape. when i was done with the exterior detail, i double checked the interior to see if i missed a spot or if i got anything dirty by accident. the car was here for a full week so it needed to leave the shop fresh as if we just cleaned it.
7

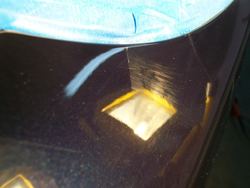
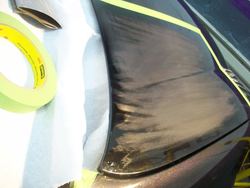
drivers fender 50/50
8

right quarter panel just at the corner, right in front of the convertible top. above the trunk as well.
working
9

it
10

out!
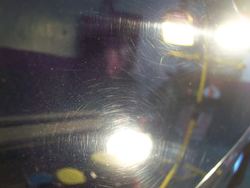
i went over the left side to get the last deep little piece.
the swirls & deep scratches are removed 100% now.
11

12

---------- Post added at 03:36 PM ---------- Previous post was at 03:36 PM ----------
needs a bit more machine work. i can see some defects still there.
13

that looks a lot better
14

little piece right above the right side tail light
15

i think this is the top flat edge of the quarter panel. please forgive me if im wrong, i forgot lol.
16

little piece right below the right side tail light
17

door molding after correction
18

quarter panel all corrected
19

passenger door before
20

21

this car needed a lot of love!
just compounding the rear bumper. the paint will be even more deep after polishing.
22

---------- Post added at 03:38 PM ---------- Previous post was at 03:36 PM ----------
i do strange things late at night. i will have to frame this & hang it on the wall in the shop.
i get a good laugh every time i see these next few pictures =D Ha!
23

24

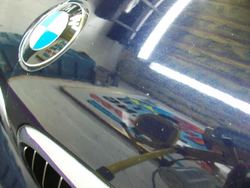
i covered up BMW with masking tape to use for before & after shots. these turned out pretty cool.
what do you think?
25

BMW is all gone. correction after compounding & polishing is 100% perfect!
26

bottom of the door after correction. top of the door still needs to be worked out.
27

top of the passenger door after correction.
28

a little closer
29

passenger door & molding after correction.
30

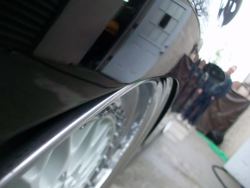
passenger fender after wetsanding
31

some Ardex Hard At It Super Duty Compound on the front bumper.
32

Dewalt in action with a 4.0" orange foam pad.
33

some 3M Perfect-It Ultrafine Machine Polish
34

Dewalt in action again but this time with a 4.0" blue foam pad.
35

50/50
36

the right side still needs another few pases with the machine. its not 100% glassed out like i want it to be. i went over it again with some compound then polish & now its looking how it should.
37

---------- Post added at 03:39 PM ---------- Previous post was at 03:38 PM ----------
bottom of the driverer fender
after wetsanding, compounding & polishing
38

and the top of that fender
39

passenger fender after correction
40

hood before correction
41

lets get a little closer
42

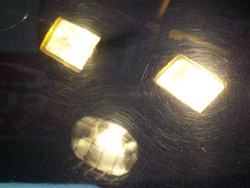
overspray on the hood. those dots are little raised pieces of white paint.
43

44

50/50 shot on the hood. the right side needs to be gone over again.
45

looking better. i still see a few stone chips. i cant get the hood to have a crystal clear reflection.
the nose of the car is not BMW factory paint.
46

corrected the left side & went over the right side to clean it up just a bit.
what do you think? you like?
47

some more dots of white paint overspray on the front of the hood. those are not stone chips, i promise you.
48

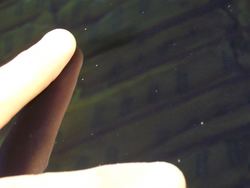
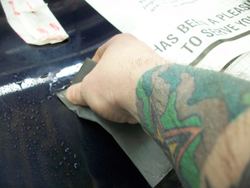
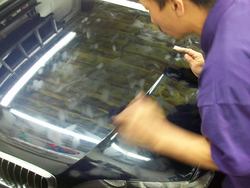
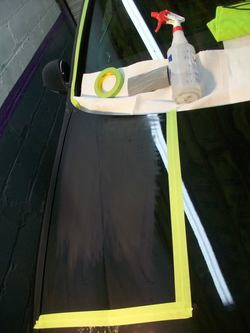
spraying a little water onto the surface. there are a few drops of car soap in the bottle to make a better lubrication between the sandpaper & the clear coat. you can use straight water but the paper might not glide across the panel as easily as the soapy water does.
49

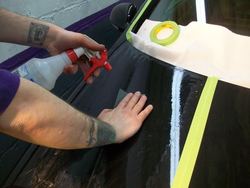
tickeling the clear coat gently with just 2 fingers. i dont want to sand too much material off. i have to rub the surface very lightly. the main purpose of this is to lift the tiny little of pieces of white paint from the clearcoat. if i was wetsanding for a 100% flat finish i wouldve went in a little deeper with the sandpaper. the job was to remove the overspray & remove the least amount of clearcoat material.
50

wet sanding the hood with the corner of my thumb.
im trying to pull each little piece out of the clear coat one by one.
51

52

me in action with my hair all fuzzy. all these late nights recently has left me with no time for a haircut lol.
i need to get back to my once a week cut!
53

johnny helping me out with the wet sanding.
54

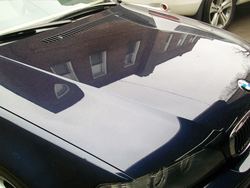
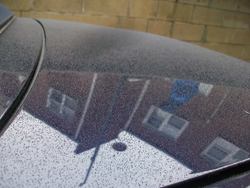
i didn't like the reflection the hood was giving off after correction. there was still some orange peel to it & that really buggged me. i spent the time to lift up the paint from the clear coat, i might as well wetsand the hood one more time to level & flatten out surface. im happy i made this decision, i was impressed so the customer has to be as well when he sees the final results of his car.
no over spray, no swirl marks, no orange peel. this is a 100% flat & leveled out clear coat on the hood for a perfect reflection. the clear is extremely deep & wet looking! i wish the sun was out when the customer picked up the car but it wasnt. dark clouds started to hover above the shop & the sky got a little dark.
55

---------- Post added at 03:39 PM ---------- Previous post was at 03:39 PM ----------
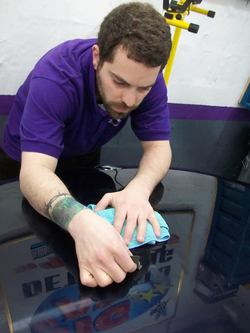
HERE ARE SOME FINAL PICTURES.
i felt bad for the rain, especially after working hard on this car for almost 1 full week. i didn't want to take it outside to get wet on but i had no choice. i offered the customer a free wax in a few months & he thanked me for that.
56

57

58
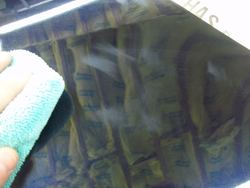
the sun kept sneaking out through the clouds but then it would go back behind them =(

as soon as i took the car outside to release it to the customer, the sky got dark again.
a few drops started to fall.
59

60

not the best after shots but these will have to do for now. this is why i really need to buy a nice fancy camera. mine doesn't take good pics if the lighting is poor.
61

</3
=*(
62

bye, bye, sorry it drizzled on you a little bit.
hope to see you soon for that hand wax application i promised i owe you now.
63

the nose was a bit challenging with the wet sanding to pull out the white chips of paint over spray,
but that was the fun part! i enjoyed working on this car & i enjoyed putting together this writeup for all of you. i hope this was a very good & entertaining read =)
these writeups are a lot of work to put together but well worth the extra time i spend at night typing them up.
please check back in with me on the next one.
questions & comments are welcomed
and while on E46fanatics tonight, i spot the customer with his new sig.
i had to end the writeup with this pic.
check out Jeury "DontWriteGraff" rolling with the top down on a sunny day.

THE END
Bavarian Motor Works
just thought id share this with all of you. getting a little artsy fartsy when i work late at night.
i had a lot of fun working on this one. you can tell from some of the wacky photos like the BMW 50/50 shot carved into the trunk with masking tape =P. detailing for the most part is fun to do. i enjoy doing the larger jobs more often then the rest of the work because you can see the huge difference from before to after.
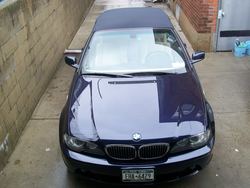
BMW E46 330ci VERT
clear coat correction + wet sanding to remove thick paint dots of overspray.
wetsanded: front bumper, both fenders & hood.
with 3M 2000 grit Imperial wet or dry sandpaper.
there were white dots of overspray on the entire nose of the car. they were thick & a little raised from the surface. they needed to be removed by wetsanding the clear coat.
yellow unit puts out 1,000 watts of halogen light.
the red one puts out 700 watts of halogen light.
1
6.5" & 4.0" pads
2
Dewalt DW849 Rotary
Flex L 3403 Mini Rotary
what are the differences between the two?
the Dewalt is a more advanced piece of equipment or at least they say. its roughly 3 lbs heavier than the Flex. the extra weight makes the Dewalt a more aggressive machine & can tire your body out quicker than the smaller Flex unit. it will cut faster as no body weight is needed to be pressed on the car during use. sometimes it helps to lean in a little bit & apply light pressure on the lighter Flex machine.
the extra weight also makes the Dewalt more difficult to master. i remember about 13 years ago when i was an apprentice at the first body shop that i ever worked for. this is the machine i learned on & boy was it difficult to master. at first the Dewalt would skip all over the place. i either didn't have enough product on the machine, the pad was dry or the RPM speed was set too high. i was also having a hard time keeping the machine lifted above my chest when i was wetsanding & compounding a white van thatt had some company lettering on it. yes i remember the first car i ever wetsanded & compounded lol! i just cant remember if it was a ford or a dodge but whatever.
the Dewalt DW849 is still my favorite machine to work with.
it produces the best results while saving some time as well.
to close this out the Dewalt is a much more durable machine. ive had this one for about 3 years now & never had any problems with it. i remember years ago sometimes the trigger would need to be replaced but that was an easy fix. my Flex had to go back for service 2 times because of the cord that wasn't working properly. it was the way i wrapped up the cord too tightly around the machine each day that made the wires pull out, making the Flex stop working while i was in the middle of doing a panel. it would work, then shut off, then work again.
i will always own & use a Dewalt DW849 Rotary but as a backup i think the next one i will buy is a Makita.
i like to keep a few good condition polishing machines around the shop. if something brakes, i gotta have a back up.
3
here are the products used to complete this job.
4
5
the car was finished off with a bottom coat of Collinite 476S SUper Double Coat Paste wax - hand applied
& topped off with Collinite #845 Liquid Insulator Wax - hand applied as well
man, what a great combo for durability & a nice wet, deep shine!
6
Ardex Hard At It Super Duty Compound on a toothbrush to remove baked on brake dust on all 4 wheels
with the interior already shampooed & treated i dropped the top & covered it in plastic. i left a little 12" section under the drivers mirror open by using a double edged razor blade. i wanted the carpet to finish airing out so this is what i did. i made a little window & outlined it with some masking tape. when i was done with the exterior detail, i double checked the interior to see if i missed a spot or if i got anything dirty by accident. the car was here for a full week so it needed to leave the shop fresh as if we just cleaned it.
7
drivers fender 50/50
8
right quarter panel just at the corner, right in front of the convertible top. above the trunk as well.
working
9
it
10
out!
i went over the left side to get the last deep little piece.
the swirls & deep scratches are removed 100% now.
11
12
---------- Post added at 03:36 PM ---------- Previous post was at 03:36 PM ----------
needs a bit more machine work. i can see some defects still there.
13
that looks a lot better
14
little piece right above the right side tail light
15
i think this is the top flat edge of the quarter panel. please forgive me if im wrong, i forgot lol.
16
little piece right below the right side tail light
17
door molding after correction
18
quarter panel all corrected
19
passenger door before
20
21
this car needed a lot of love!
just compounding the rear bumper. the paint will be even more deep after polishing.
22
---------- Post added at 03:38 PM ---------- Previous post was at 03:36 PM ----------
i do strange things late at night. i will have to frame this & hang it on the wall in the shop.
i get a good laugh every time i see these next few pictures =D Ha!
23
24
i covered up BMW with masking tape to use for before & after shots. these turned out pretty cool.
what do you think?
25
BMW is all gone. correction after compounding & polishing is 100% perfect!
26
bottom of the door after correction. top of the door still needs to be worked out.
27
top of the passenger door after correction.
28
a little closer
29
passenger door & molding after correction.
30
passenger fender after wetsanding
31
some Ardex Hard At It Super Duty Compound on the front bumper.
32
Dewalt in action with a 4.0" orange foam pad.
33
some 3M Perfect-It Ultrafine Machine Polish
34
Dewalt in action again but this time with a 4.0" blue foam pad.
35
50/50
36
the right side still needs another few pases with the machine. its not 100% glassed out like i want it to be. i went over it again with some compound then polish & now its looking how it should.
37
---------- Post added at 03:39 PM ---------- Previous post was at 03:38 PM ----------
bottom of the driverer fender
after wetsanding, compounding & polishing
38
and the top of that fender
39
passenger fender after correction
40
hood before correction
41
lets get a little closer
42
overspray on the hood. those dots are little raised pieces of white paint.
43
44
50/50 shot on the hood. the right side needs to be gone over again.
45
looking better. i still see a few stone chips. i cant get the hood to have a crystal clear reflection.
the nose of the car is not BMW factory paint.
46
corrected the left side & went over the right side to clean it up just a bit.
what do you think? you like?
47
some more dots of white paint overspray on the front of the hood. those are not stone chips, i promise you.
48
spraying a little water onto the surface. there are a few drops of car soap in the bottle to make a better lubrication between the sandpaper & the clear coat. you can use straight water but the paper might not glide across the panel as easily as the soapy water does.
49
tickeling the clear coat gently with just 2 fingers. i dont want to sand too much material off. i have to rub the surface very lightly. the main purpose of this is to lift the tiny little of pieces of white paint from the clearcoat. if i was wetsanding for a 100% flat finish i wouldve went in a little deeper with the sandpaper. the job was to remove the overspray & remove the least amount of clearcoat material.
50
wet sanding the hood with the corner of my thumb.
im trying to pull each little piece out of the clear coat one by one.
51
52
me in action with my hair all fuzzy. all these late nights recently has left me with no time for a haircut lol.
i need to get back to my once a week cut!
53
johnny helping me out with the wet sanding.
54
i didn't like the reflection the hood was giving off after correction. there was still some orange peel to it & that really buggged me. i spent the time to lift up the paint from the clear coat, i might as well wetsand the hood one more time to level & flatten out surface. im happy i made this decision, i was impressed so the customer has to be as well when he sees the final results of his car.
no over spray, no swirl marks, no orange peel. this is a 100% flat & leveled out clear coat on the hood for a perfect reflection. the clear is extremely deep & wet looking! i wish the sun was out when the customer picked up the car but it wasnt. dark clouds started to hover above the shop & the sky got a little dark.
55
---------- Post added at 03:39 PM ---------- Previous post was at 03:39 PM ----------
HERE ARE SOME FINAL PICTURES.
i felt bad for the rain, especially after working hard on this car for almost 1 full week. i didn't want to take it outside to get wet on but i had no choice. i offered the customer a free wax in a few months & he thanked me for that.
56
57
58
the sun kept sneaking out through the clouds but then it would go back behind them =(
as soon as i took the car outside to release it to the customer, the sky got dark again.
a few drops started to fall.
59
60
not the best after shots but these will have to do for now. this is why i really need to buy a nice fancy camera. mine doesn't take good pics if the lighting is poor.
61
</3
=*(
62
bye, bye, sorry it drizzled on you a little bit.
hope to see you soon for that hand wax application i promised i owe you now.
63
the nose was a bit challenging with the wet sanding to pull out the white chips of paint over spray,
but that was the fun part! i enjoyed working on this car & i enjoyed putting together this writeup for all of you. i hope this was a very good & entertaining read =)
these writeups are a lot of work to put together but well worth the extra time i spend at night typing them up.
please check back in with me on the next one.
questions & comments are welcomed
and while on E46fanatics tonight, i spot the customer with his new sig.
i had to end the writeup with this pic.
check out Jeury "DontWriteGraff" rolling with the top down on a sunny day.
THE END
Attachments
-
 100_4437.jpg124.8 KB · Views: 13
 -
 100_4451.jpg125 KB · Views: 17
 -
 100_4450.jpg137.3 KB · Views: 15
 -
 100_4450.jpg137.3 KB · Views: 17
 -
 100_4438.jpg140.5 KB · Views: 19
 -
 100_4438.jpg140.5 KB · Views: 25
 -
 100_4437.jpg124.8 KB · Views: 18
 -
 c-2.jpg81.4 KB · Views: 17
 -
 b-2.jpg194.7 KB · Views: 12
 -
 b-2.jpg194.7 KB · Views: 12
 -
 100_4451.jpg125 KB · Views: 21
 -
 f-2.jpg150.7 KB · Views: 14
 -
 f-2.jpg150.7 KB · Views: 16
 -
 e-2.jpg178.1 KB · Views: 15
 -
 e-2.jpg178.1 KB · Views: 14
 -
 d-2.jpg147.8 KB · Views: 15
 -
 c-2.jpg81.4 KB · Views: 15
 -
 d-2.jpg147.8 KB · Views: 14
 -
 1-18.jpg176 KB · Views: 18
 -
 1-18.jpg176 KB · Views: 17
 -
 g-1.jpg162.9 KB · Views: 11
 -
 g-1.jpg162.9 KB · Views: 19
 -
 3-12.jpg106.5 KB · Views: 11
 -
 3-12.jpg106.5 KB · Views: 12
 -
 2-18.jpg151.3 KB · Views: 14
 -
 2-18.jpg151.3 KB · Views: 17
 -
 10-3.jpg137.8 KB · Views: 17
 -
 10-3.jpg137.8 KB · Views: 16
 -
 5-8.jpg202.7 KB · Views: 15
 -
 12-1.jpg147.8 KB · Views: 13
 -
 12-1.jpg147.8 KB · Views: 17
 -
 4-11.jpg82.1 KB · Views: 16
 -
 4-11.jpg82.1 KB · Views: 15
 -
 8-5.jpg125.3 KB · Views: 16
 -
 8-5.jpg125.3 KB · Views: 20
 -
 7-5.jpg133.5 KB · Views: 15
 -
 7-5.jpg133.5 KB · Views: 17
 -
 6-7.jpg169.4 KB · Views: 18
 -
 6-7.jpg169.4 KB · Views: 15
 -
 5-8.jpg202.7 KB · Views: 16
 -
 11-2.jpg95.9 KB · Views: 12
 -
 11-2.jpg95.9 KB · Views: 14
 -
 9-3.jpg162.7 KB · Views: 13
 -
 9-3.jpg162.7 KB · Views: 14
 -
 15.jpg107.8 KB · Views: 15
 -
 15.jpg107.8 KB · Views: 16
 -
 14.jpg118.4 KB · Views: 19
 -
 14.jpg118.4 KB · Views: 16
 -
 13.jpg150.5 KB · Views: 15
 -
 13.jpg150.5 KB · Views: 16
 -
 17.jpg124.8 KB · Views: 19
 -
 17.jpg124.8 KB · Views: 15
 -
 16.jpg141.3 KB · Views: 18
 -
 16.jpg141.3 KB · Views: 13
 -
 20.jpg125 KB · Views: 16
 -
 20.jpg125 KB · Views: 15
 -
 19.jpg137.3 KB · Views: 17
 -
 19.jpg137.3 KB · Views: 16
 -
 18.jpg140.5 KB · Views: 18
 -
 18.jpg140.5 KB · Views: 21
 -
 23.jpg77.1 KB · Views: 16
 -
 23.jpg77.1 KB · Views: 19
 -
 21.jpg112.1 KB · Views: 16
 -
 21.jpg112.1 KB · Views: 15
 -
 25.jpg119.1 KB · Views: 15
 -
 24.jpg114.6 KB · Views: 13
 -
 24.jpg114.6 KB · Views: 15
 -
 22.jpg85.4 KB · Views: 17
 -
 22.jpg85.4 KB · Views: 15
 -
 27.jpg116 KB · Views: 17
 -
 27.jpg116 KB · Views: 17
 -
 26.jpg141.1 KB · Views: 12
 -
 26.jpg141.1 KB · Views: 17
 -
 25.jpg119.1 KB · Views: 16
 -
 31.jpg152.6 KB · Views: 14
 -
 31.jpg152.6 KB · Views: 15
 -
 29.jpg116 KB · Views: 15
 -
 29.jpg116 KB · Views: 16
 -
 28.jpg127.4 KB · Views: 19
 -
 28.jpg127.4 KB · Views: 17
 -
 33-1.jpg135.3 KB · Views: 16
 -
 33-1.jpg135.3 KB · Views: 13
 -
 32.jpg144.5 KB · Views: 15
 -
 32.jpg144.5 KB · Views: 18
 -
 30.jpg162.7 KB · Views: 12
 -
 30.jpg162.7 KB · Views: 19
 -
 35.jpg130.1 KB · Views: 12
 -
 35.jpg130.1 KB · Views: 14
 -
 34.jpg109.1 KB · Views: 19
 -
 34.jpg109.1 KB · Views: 13
 -
 37.jpg89.1 KB · Views: 14
 -
 36.jpg168.2 KB · Views: 14
 -
 36.jpg168.2 KB · Views: 19
 -
 40.jpg114.1 KB · Views: 19
 -
 40.jpg114.1 KB · Views: 14
 -
 39.jpg89 KB · Views: 14
 -
 39.jpg89 KB · Views: 11
 -
 38.jpg72 KB · Views: 15
 -
 38.jpg72 KB · Views: 16
 -
 37.jpg89.1 KB · Views: 19
 -
 43.jpg135.8 KB · Views: 14
 -
 43.jpg135.8 KB · Views: 14
 -
 41.jpg128.2 KB · Views: 15
 -
 41.jpg128.2 KB · Views: 13
 -
 46.jpg106.4 KB · Views: 18
 -
 46.jpg106.4 KB · Views: 19
 -
 45.jpg145.6 KB · Views: 16
 -
 45.jpg145.6 KB · Views: 19
 -
 44.jpg106.5 KB · Views: 14
 -
 44.jpg106.5 KB · Views: 25
 -
 48.jpg113.9 KB · Views: 17
 -
 48.jpg113.9 KB · Views: 14
 -
 47.jpg102.2 KB · Views: 13
 -
 47.jpg102.2 KB · Views: 18
 -
 50.jpg121.2 KB · Views: 15
 -
 50.jpg121.2 KB · Views: 14
 -
 42.jpg92.5 KB · Views: 15
 -
 42.jpg92.5 KB · Views: 17
 -
 49.jpg118.7 KB · Views: 16
 -
 49.jpg118.7 KB · Views: 17
 -
 53.jpg181.5 KB · Views: 14
 -
 53.jpg181.5 KB · Views: 15
 -
 54.jpg169.7 KB · Views: 13
 -
 54.jpg169.7 KB · Views: 14
 -
 52.jpg123.3 KB · Views: 16
 -
 51.jpg106.1 KB · Views: 13
 -
 51.jpg106.1 KB · Views: 11
 -
 52.jpg123.3 KB · Views: 19
 -
 dontwritegraflastpic.jpg46.9 KB · Views: 13
 -
 57.jpg182.1 KB · Views: 14
 -
 57.jpg182.1 KB · Views: 13
 -
 56.jpg179.5 KB · Views: 15
 -
 56.jpg179.5 KB · Views: 15
 -
 55.jpg200.4 KB · Views: 17
 -
 55.jpg200.4 KB · Views: 15
 -
 dontwritegraflastpic.jpg46.9 KB · Views: 17
AndrewBigA
Member
thank youMan that was in pretty bad shape and now looks brand new... Great work Andrew..

AndrewBigA
Member
where is the sun?
where is the warm weather?
when will it return?
do want to see hot girls in booty shorts licking an ice cream cone =P
do want to see hot girls jogging around the block all sweaty with theyre bunns all firm & round =)
anyways.......look for a few big writeups to be posted pretty soon.
last week i finished a nasty white gti that was pretty much brown in color on the entire rear half of the car.
all these little dots of road tar & grime with oxidation & heavy swirl marks discolored the paint so bad it coulve passed for tan in some areas.
i spent a few days on this one while working under over 1000 watts of halogen lighting.
multi step compounding with a rotary machine was followed up with multiple polishing steps with the rotary machine again.
Attachments
-
 b-1.jpg93.9 KB · Views: 15
 -
 a-1.jpg87.3 KB · Views: 15
 -
 a-1.jpg87.3 KB · Views: 18
 -
 b-1.jpg93.9 KB · Views: 15
 -
 001.jpg110.2 KB · Views: 17
 -
 001.jpg110.2 KB · Views: 17
 -
 e-1.jpg136.3 KB · Views: 19
 -
 e-1.jpg136.3 KB · Views: 18
 -
 c-1.jpg111.5 KB · Views: 16
 -
 c-1.jpg111.5 KB · Views: 18
 -
 d-1.jpg125 KB · Views: 15
 -
 d-1.jpg125 KB · Views: 14
AndrewBigA
Member
lol the only thing missing is a korean car (hyundai) :tonguey:dang.. someones been busy. german, japanese, american, niceee
AndrewBigA
Member
get some girls and beer, then I'll be there in flash.
nice work andrew!
im all set up for a stripper party here but i couldnt live with the guilt afterwords. i would go to kiss my gf & thats the only thing i would think about is the sluts that danced on the pole the night before lol.
AndrewBigA
Member
$175 -$225 if the car is in good condition. paint decent, interior not trashed.how much would you charge me to do a full detail on my car take all the swerlls out there not major
AndrewBigA
Member
ok sounds good to me. your welcome.Iight coolill call you tomorrow and let u know the next time I'm free may be you can fit me in thanks
AndrewBigA
Member
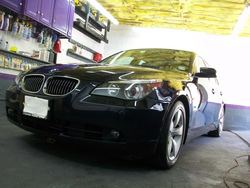
from sat, may 15, 2010
the owner of the BMW contacted me through Bimmerfest.com, one of the Bimmer forums that we sponsor. he made the trip from northern new jersey, woodbridge/edison area to be exact. that's about a 1.50 hour drive without traffic + you have to cross 2 bridges to get here.
thank you Ram for making the trip up here.
enjoy the new shine that we put back onto your car today.


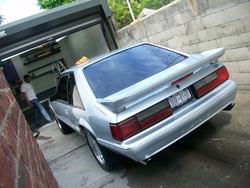
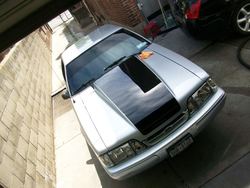
Gus from Americanredline.com, one of the Mustang forums that we sponsor came in for his first wax on the new show season. we polished & waxed his car a few months ago in the winter so it came here in pretty nice shape. what a difference having a garage makes!
they call this a fox body & boy what a sexy old stang she is! this is one of my fav body styles, its up there with the best of them. that huge rear wing still looks good, man i love the 80s!. good music & great looking cars! that hood makes the front end so mean looking!


That's Ram taking a look at the Stang. my guys were taking care of this one while i continued to polish the BMW. i think he likes it lol.
the owner of the BMW contacted me through Bimmerfest.com, one of the Bimmer forums that we sponsor. he made the trip from northern new jersey, woodbridge/edison area to be exact. that's about a 1.50 hour drive without traffic + you have to cross 2 bridges to get here.
thank you Ram for making the trip up here.
enjoy the new shine that we put back onto your car today.
Gus from Americanredline.com, one of the Mustang forums that we sponsor came in for his first wax on the new show season. we polished & waxed his car a few months ago in the winter so it came here in pretty nice shape. what a difference having a garage makes!
they call this a fox body & boy what a sexy old stang she is! this is one of my fav body styles, its up there with the best of them. that huge rear wing still looks good, man i love the 80s!. good music & great looking cars! that hood makes the front end so mean looking!
That's Ram taking a look at the Stang. my guys were taking care of this one while i continued to polish the BMW. i think he likes it lol.
Attachments
-
 bmw1.jpg96 KB · Views: 14
 -
 bmw3.jpg163.6 KB · Views: 18
 -
 bmw3.jpg163.6 KB · Views: 15
 -
 bmw2.jpg125.6 KB · Views: 14
 -
 bmw2.jpg125.6 KB · Views: 17
 -
 bmw1.jpg96 KB · Views: 14
 -
 bmw10.jpg178.3 KB · Views: 11
 -
 fox1.jpg72.2 KB · Views: 15
 -
 fox1.jpg72.2 KB · Views: 17
 -
 bmw10.jpg178.3 KB · Views: 19
 -
 bmw4.jpg135.6 KB · Views: 16
 -
 bmw4.jpg135.6 KB · Views: 16
 -
 bmw5.jpg91.8 KB · Views: 11
 -
 bmw5.jpg91.8 KB · Views: 16
 -
 fox4.jpg177.4 KB · Views: 13
 -
 fox4.jpg177.4 KB · Views: 14
 -
 fox3.jpg175.9 KB · Views: 16
 -
 fox3.jpg175.9 KB · Views: 24
 -
 fox2.jpg152.9 KB · Views: 17
 -
 fox2.jpg152.9 KB · Views: 19
Last edited:
AndrewBigA
Member
08 Viper + Bagged BBS GTI Seal,Wax,Wetsand Cat Scratches 21pix
2008 Viper hand wash
tape off hood vents before washing to play it on the safe side.
scott came in last month with the top down & smile on his face. he had just taken the drive in from the city & it was a beautifull sunny, warm day for driving. the job today was to give his Viper a nice hand wash & then inspect his clear coat under halogen lighting. we wanted to see what kind of exterior detail it would need to get the paint glowing & ready for the spring & summer seasons.
i found some light swirls here & there, nothing too bad at all. being in the garage for the 1.5 years of ownership makes a huge difference in preserving the finish of any car.
scott & i are waiting for the next sunday or monday that both of us are available. im not open regularly on sundays, just once in a while if i need to squeeze a job in that a customer is not available for me mon-sat.
i would also prefer to work on his car when the shop is less busy thats why a sunday or a monday is best.
i know this was just a hand wash, i had to snap a few pics of one my favorite all time american muscle cars!
maybe one day i will have one of these parked next to a corvette, porsche, 1950s ford pick up truck & a fully restored vw mk1 rabbit!
1
2
look for a 130+ pic writeup on the 350Z you see in the background.
ill have that posted soon, just have to finish putting the pics & writeup together.
3
warrrrrrrrens GTI
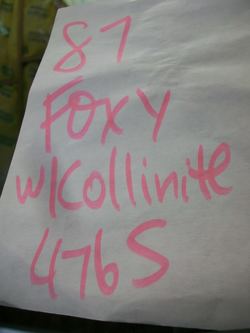
Rejex on: wheels, head & tail lights, glass
1Z Einszett Glanz Wax Sealant: bottom coat
Collinite 476 S Super Double Coat: top coat
4
stray cat claws made deep scratches that had to be wetsanded out with 2000 grit by hand.
your hands are imo still the best tools for wetsanding.
those dam cats, warren was not happy about this. the scratches were removed 100%.
5
6
7
after compounding & polishing
8
not waxed yet & look at my reflection lol
9
under 1000 watts of halogen lighting
10
11
another shot after compounding & polishing. looks perfect under both halogen & fluorescent lighting
12
some final shots
13
BBS were sent out to a guy in PA for a restoration.
the lips were polished & the centers powder coated. its not pure white. its got a hint of green in there.
14
slammed with bagggzzz & BBS for the show car season. warren is not playing around this year!
15
16
17
18
there he is, the man himself warreeeeeeeeeeeeen in his hood reflection lol.
it was a dam cloudy day. not much sun for some blinging pics =/
19
20
21
2008 Viper hand wash
tape off hood vents before washing to play it on the safe side.
scott came in last month with the top down & smile on his face. he had just taken the drive in from the city & it was a beautifull sunny, warm day for driving. the job today was to give his Viper a nice hand wash & then inspect his clear coat under halogen lighting. we wanted to see what kind of exterior detail it would need to get the paint glowing & ready for the spring & summer seasons.
i found some light swirls here & there, nothing too bad at all. being in the garage for the 1.5 years of ownership makes a huge difference in preserving the finish of any car.
scott & i are waiting for the next sunday or monday that both of us are available. im not open regularly on sundays, just once in a while if i need to squeeze a job in that a customer is not available for me mon-sat.
i would also prefer to work on his car when the shop is less busy thats why a sunday or a monday is best.
i know this was just a hand wash, i had to snap a few pics of one my favorite all time american muscle cars!
maybe one day i will have one of these parked next to a corvette, porsche, 1950s ford pick up truck & a fully restored vw mk1 rabbit!
1
2
look for a 130+ pic writeup on the 350Z you see in the background.
ill have that posted soon, just have to finish putting the pics & writeup together.
3
warrrrrrrrens GTI
Rejex on: wheels, head & tail lights, glass
1Z Einszett Glanz Wax Sealant: bottom coat
Collinite 476 S Super Double Coat: top coat
4
stray cat claws made deep scratches that had to be wetsanded out with 2000 grit by hand.
your hands are imo still the best tools for wetsanding.
those dam cats, warren was not happy about this. the scratches were removed 100%.
5
6
7
after compounding & polishing
8
not waxed yet & look at my reflection lol
9
under 1000 watts of halogen lighting
10
11
another shot after compounding & polishing. looks perfect under both halogen & fluorescent lighting
12
some final shots
13
BBS were sent out to a guy in PA for a restoration.
the lips were polished & the centers powder coated. its not pure white. its got a hint of green in there.
14
slammed with bagggzzz & BBS for the show car season. warren is not playing around this year!
15
16
17
18
there he is, the man himself warreeeeeeeeeeeeen in his hood reflection lol.
it was a dam cloudy day. not much sun for some blinging pics =/
19
20
21
Attachments
-
 viper2-1.jpg109.6 KB · Views: 18
 -
 viper2-1.jpg109.6 KB · Views: 16
 -
 viper1-1.jpg128.9 KB · Views: 15
 -
 viper1-1.jpg128.9 KB · Views: 15
 -
 waren2.jpg90.8 KB · Views: 17
 -
 waren2.jpg90.8 KB · Views: 15
 -
 waren1.jpg99.8 KB · Views: 13
 -
 waren1.jpg99.8 KB · Views: 17
 -
 waren9.jpg131 KB · Views: 12
 -
 waren9.jpg131 KB · Views: 13
 -
 viper3-1.jpg156.8 KB · Views: 14
 -
 viper3-1.jpg156.8 KB · Views: 20
 -
 waren5.jpg98.3 KB · Views: 14
 -
 waren5.jpg98.3 KB · Views: 16
 -
 waren6.jpg82.9 KB · Views: 19
 -
 waren6.jpg82.9 KB · Views: 11
 -
 waren4.jpg92.6 KB · Views: 13
 -
 waren3.jpg88.7 KB · Views: 14
 -
 waren3.jpg88.7 KB · Views: 17
 -
 waren4.jpg92.6 KB · Views: 13
 -
 waren10.jpg128.6 KB · Views: 16
 -
 waren10.jpg128.6 KB · Views: 14
 -
 waren8.jpg88.5 KB · Views: 14
 -
 waren8.jpg88.5 KB · Views: 13
 -
 waren7.jpg120.5 KB · Views: 12
 -
 waren7.jpg120.5 KB · Views: 19
 -
 waren14.jpg92.5 KB · Views: 17
 -
 waren13.jpg127.2 KB · Views: 18
 -
 waren13.jpg127.2 KB · Views: 18
 -
 waren12.jpg73.2 KB · Views: 16
 -
 waren12.jpg73.2 KB · Views: 14
 -
 waren11.jpg144 KB · Views: 16
 -
 waren11.jpg144 KB · Views: 17
 -
 waren18.jpg169 KB · Views: 14
 -
 waren16.jpg152.2 KB · Views: 17
 -
 waren15.jpg100.4 KB · Views: 15
 -
 waren16.jpg152.2 KB · Views: 13
 -
 waren14.jpg92.5 KB · Views: 16
 -
 waren15.jpg100.4 KB · Views: 22
 -
 waren19.jpg144.3 KB · Views: 19
 -
 waren19.jpg144.3 KB · Views: 15
 -
 waren18.jpg169 KB · Views: 13
when will you be ready to correct all of my swirls and slight peel?
AndrewBigA
Member
when are you available? im booked up untill thursday of this week. thursday is the next time im available for any detailing work. let me know when you want to come in.when will you be ready to correct all of my swirls and slight peel?
when are you available? im booked up untill thursday of this week. thursday is the next time im available for any detailing work. let me know when you want to come in.
I work every day but sunday lol
AndrewBigA
Member
well then you sir have a problem haha :tonguey:I work every day but sunday lol
- Status
- Not open for further replies.
Share: