Can't wait to see what your hood is going to look like

You are using an out of date browser. It may not display this or other websites correctly.
You should upgrade or use an alternative browser.
You should upgrade or use an alternative browser.
What did you do to your FX / QX70 today?
- Thread starter pmanliu
- Start date
NorcalFX
Member
- Location
- Bay Area, CA
- Car
- 2013 FX37 AWD
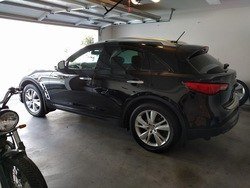
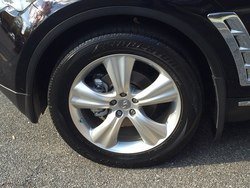
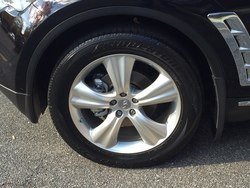
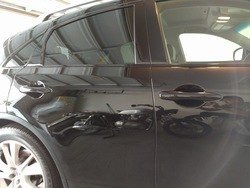
Wrapped the chrome window trim, lower chrome mouldings, and rear license plate trim in 3m gloss black vinyl. Been unsuccessful w/ the vents, so will probably have a shop wrap those in black chrome. Washed and waxed her too.

Attachments
-
 _W0rVj3WZPK5WS_Wul4eZLsElbwn9E61oxSKJRhvfSju210MURKdqUMCa5Xn6TR-fWvUGAnb6zzc8fRos=w1916-h1436-no.jpg150.1 KB · Views: 36
 -
 _W0rVj3WZPK5WS_Wul4eZLsElbwn9E61oxSKJRhvfSju210MURKdqUMCa5Xn6TR-fWvUGAnb6zzc8fRos=w1916-h1436-no.jpg150.1 KB · Views: 27
 -
 _W0rVj3WZPK5WS_Wul4eZLsElbwn9E61oxSKJRhvfSju210MURKdqUMCa5Xn6TR-fWvUGAnb6zzc8fRos=w1916-h1436-no.jpg183.4 KB · Views: 24
 -
 _W0rVj3WZPK5WS_Wul4eZLsElbwn9E61oxSKJRhvfSju210MURKdqUMCa5Xn6TR-fWvUGAnb6zzc8fRos=w1916-h1436-no.jpg183.4 KB · Views: 41
That looks pretty good
PEEJ
Weeeeeeee!!!
If you want to do it right, take them off. It's much easier and you won't get any lift around the outer edges. You can access them behind the wheel well cover.
The trim turned out great. Wrap your handles, too!
The trim turned out great. Wrap your handles, too!
What!!! No pics?Yesterday I had a bit of mudding fun and got it covered head to toe!! So today, I washed it :p
FXsurfer
Member
- Location
- San Diego, CA
- Car
- 2012 FX35
Replaced both front wheel hubs with Timkens. Took about an hour, it was easy, but I'm in California with no rust.
RRDorcel
Member
I washed mine ")

Looks good Raphael
Text
Member
- Location
- New Jersey
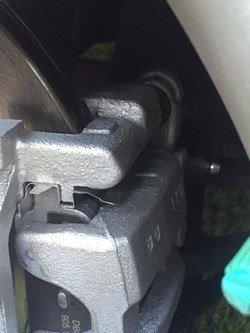
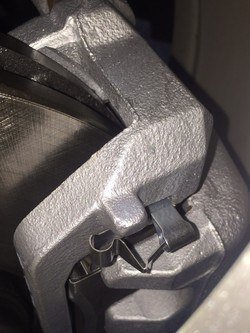
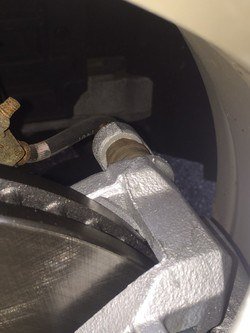
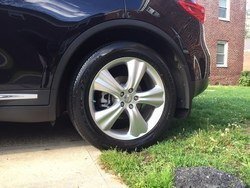
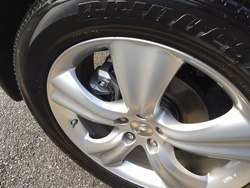
Got my rotors/pads replaced with the very best......that autozone has to offer - DURALAST. haha
Also got the calipers painted.


Also got the calipers painted.
Attachments
-
 ExKQNNX.jpg170.2 KB · Views: 37
 -
 ExKQNNX.jpg170.2 KB · Views: 35
 -
 ExKQNNX.jpg170.2 KB · Views: 24
 -
 ExKQNNX.jpg170.2 KB · Views: 35
 -
 IwSK9Ze.jpg236.6 KB · Views: 26
 -
 IwSK9Ze.jpg236.6 KB · Views: 28
 -
 IwSK9Ze.jpg236.6 KB · Views: 24
 -
 IwSK9Ze.jpg236.7 KB · Views: 37
 -
 9Zxp0Vl.jpg156.9 KB · Views: 50
 -
 9Zxp0Vl.jpg156.9 KB · Views: 28
 -
 9Zxp0Vl.jpg156.9 KB · Views: 47
 -
 9Zxp0Vl.jpg156.9 KB · Views: 27
 -
 9gjWgT8.jpg252.1 KB · Views: 27
 -
 9gjWgT8.jpg252.1 KB · Views: 34
 -
 9gjWgT8.jpg252.1 KB · Views: 21
 -
 9gjWgT8.jpg252.1 KB · Views: 21
 -
 VTkSGIS.jpg278.8 KB · Views: 30
 -
 VTkSGIS.jpg278.8 KB · Views: 34
 -
 VTkSGIS.jpg278.8 KB · Views: 34
 -
 VTkSGIS.jpg278.8 KB · Views: 46
 -
 CKTxC6u.jpg221.2 KB · Views: 48
 -
 CKTxC6u.jpg221.2 KB · Views: 41
 -
 CKTxC6u.jpg221.2 KB · Views: 25
 -
 CKTxC6u.jpg221.2 KB · Views: 50
Kanedean
Member
- Location
- Peace River, AB
- Car
- 2013 FX37 AWD
NorcalFX
Member
- Location
- Bay Area, CA
- Car
- 2013 FX37 AWD
If you want to do it right, take them off. It's much easier and you won't get any lift around the outer edges. You can access them behind the wheel well cover.
The trim turned out great. Wrap your handles, too!
I was apprehensive about wrapping my door handles, thinking they would turn out like crap, but they are surprisingly easy to do. Took Peej's advice, and wrapped all four handles in about 30 minutes.

I used this guy's video as a tutorial:
Attachments
-
 OaevB72W9D3LqhvJUjNMrl0HOfzRS3QbyQfha6K0OQcF3vOXRq-4_0CiKZn-CMvPd1KdMPAu4VO-w_fHr=w1916-h1436-no.jpg169.5 KB · Views: 41
 -
 OaevB72W9D3LqhvJUjNMrl0HOfzRS3QbyQfha6K0OQcF3vOXRq-4_0CiKZn-CMvPd1KdMPAu4VO-w_fHr=w1916-h1436-no.jpg169.5 KB · Views: 56
 -
 OaevB72W9D3LqhvJUjNMrl0HOfzRS3QbyQfha6K0OQcF3vOXRq-4_0CiKZn-CMvPd1KdMPAu4VO-w_fHr=w1916-h1436-no.jpg169.5 KB · Views: 51
 -
 OaevB72W9D3LqhvJUjNMrl0HOfzRS3QbyQfha6K0OQcF3vOXRq-4_0CiKZn-CMvPd1KdMPAu4VO-w_fHr=w1916-h1436-no.jpg169.5 KB · Views: 46
PEEJ
Weeeeeeee!!!
Nice job! You also might want to think about cutting holes for the drivers/passenger door handle buttons. They'll start to tear after awhile (personal experience). Just wait a week or so as to let the vinyl fully cure, then stick a razor in the seam and trace it out.
I used to have matte vinyl covering my trim once upon a time. In my opinion the gloss looks way better on black vehicles.
I used to have matte vinyl covering my trim once upon a time. In my opinion the gloss looks way better on black vehicles.
NorcalFX
Member
- Location
- Bay Area, CA
- Car
- 2013 FX37 AWD
Nice job! You also might want to think about cutting holes for the drivers/passenger door handle buttons. They'll start to tear after awhile (personal experience). Just wait a week or so as to let the vinyl fully cure, then stick a razor in the seam and trace it out.
I used to have matte vinyl covering my trim once upon a time. In my opinion the gloss looks way better on black vehicles.
I was originally thinking of not cutting the buttons out since it might look cleaner, but I actually ended up cutting them already (cut in the photo). I didn't know that vinyl has a cure time, I'll have to try that next time because the edges don't look as clean to me.
Thanks for the tip Peej, love your car!
- Location
- Miami
- Car
- 2004 Infiniti FX35 Supercharged
Automotive vinyl doesn't need to be cured!
PEEJ
Weeeeeeee!!!
Automotive vinyl doesn't need to be cured!
I ended up with different results from cutting the buttons immediately after wrapping vs cutting the buttons a couple months down the road. I noticed that the cuts went through a small bit of shrinkage within a couple weeks, whereas the cuts made later on didn't budge at all.
Also installed the INVIDIA Gemini exhaustFinished up my aero body kit and installing my ultra racing top and bottom strut bars
- Location
- Atlanta, GA
- Car
- 2007 FX35
I've found that with automotive vinyl, it needs a couple of heat cycles to really "set". So whenever wrapping intricate parts like door handles or interior pieces, I heat it up while installing, then let it cool off. Then heat it up again and see what parts lift or shrink. It's not really curing, but vinyl does have a tendency to go back to it's original shape which was flat. Heating it up a few times seems to help set the vinyl into the new shape. I learned this a long time ago when I owned a sign shop that did a lot of automotive graphics. Back then the vinyl wasn't nearly as advanced so when we did big jobs on cars it took a lot of heat cycles to get the vinyl to conform.
This is the same reason lots of people wrap their interior and it looks great then the corners lift on the first hot day.
This is the same reason lots of people wrap their interior and it looks great then the corners lift on the first hot day.
I ended up with different results from cutting the buttons immediately after wrapping vs cutting the buttons a couple months down the road. I noticed that the cuts went through a small bit of shrinkage within a couple weeks, whereas the cuts made later on didn't budge at all.
Share: