Member's other Modded rides

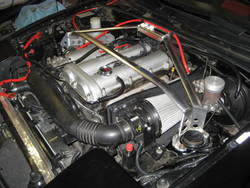
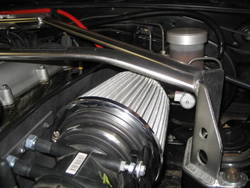
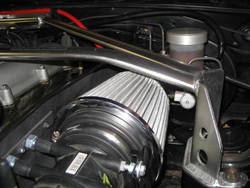
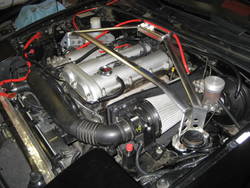
I was trying to resist getting pieces that are almost too nice for this particular car but the Carbing STB set had some sort of mind control over me. I had no choice. This weekend I installed the front STB. I encountered a couple of issues, but luckily had everything I needed to complete the install.

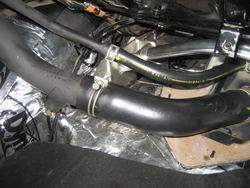
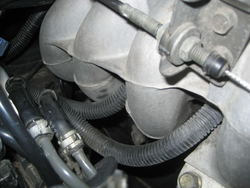
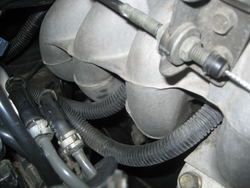
The brake vacuum line mounted to the firewall has to be removed/relocated. I removed the hard line and the two short hoses. The first one was connected to the brake booster and the second one was connected to the intake manifold. I had some short pieces of silicone hose but only the one that was on my catch can was long enough. I took it off the catch can and replaced the brake vacuum line. Then I used two short hoses along with the OEM hard line I saved from the front of the valve cover.

The top brake hydraulic line had to be moved down about a half inch. I used pliers and a towel, bending the line very small amounts about 1/4" apart until there was no interference. The throttle cable brackets are attached to the brake vacuum line, so the throttle cable needed to be secured after the brace was installed.

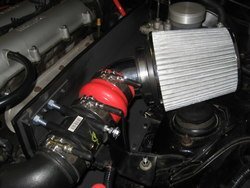
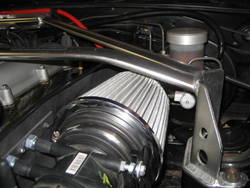
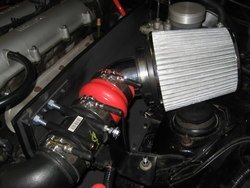
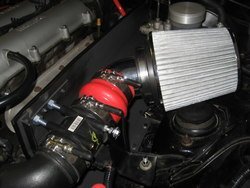
My DIY intake had to be moved to avoid interference with the strut tower bracket. All I did was remove the hump coupler and the 60 degree bend, attaching the filter directly to the sensor housing.

The heat shield did not clear the STB on the rear bar, so I had to bend the shield until there was no interference. It's not pretty anymore so I might have to remake it.

This particular STB came used from Japan and has a brake cylinder stopper welded into the tower bracket but unfortunately it is on the wrong side due to the JDM right hand drive models. Think I'll leave it on there.

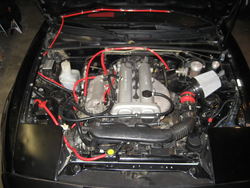
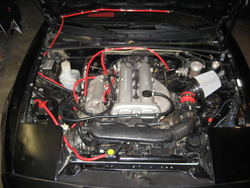
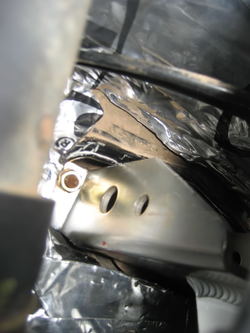
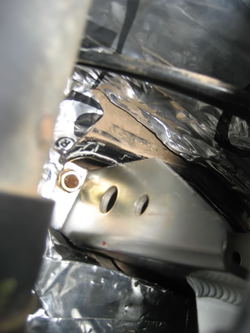
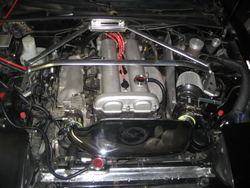
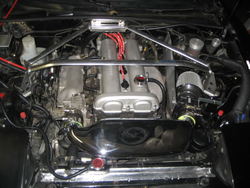
Here's two "before" shots:

IMG_2929.jpg

IMG_2944.jpg

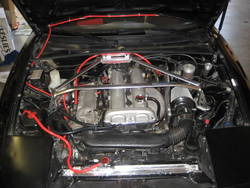
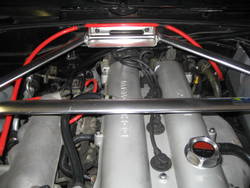
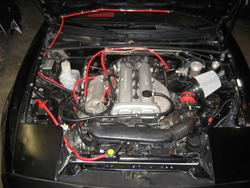
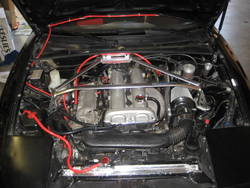
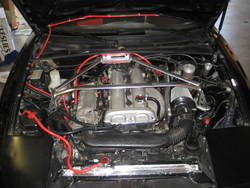
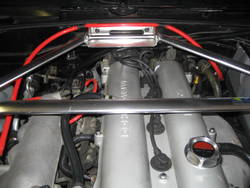
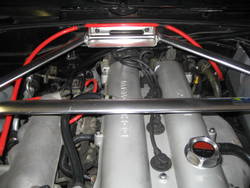
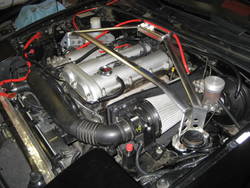
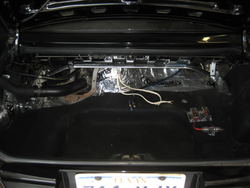
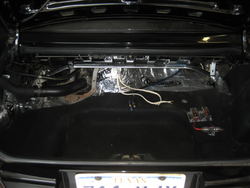
And after the install - my new bay!

IMG_8523.jpg

IMG_8525.jpg

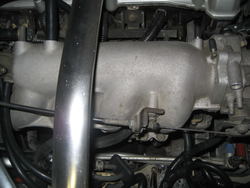
While I was dinking around with the intake, I noticed the throttle body clamp was completely loose! I must have been sucking ambient air but the car hasn't been behaving strangely so I don't know. It's fixed now.

IMG_8524.jpg

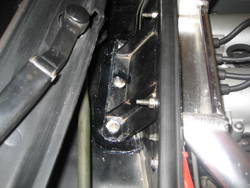
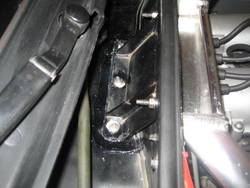
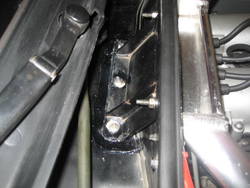
This bracket is more than stout. I think it helped pull my firewall back into proper shape, lol. The bottom of the bracket has a thick layer of silicone, which I smoothed around the edges. Also put silicone in each hole before screwing in the fastener.

IMG_8526.jpg

IMG_8527.jpg
 

Attachments

  • IMG_2929.jpg
    IMG_2929.jpg
    93.5 KB · Views: 13
  • IMG_8523.jpg
    IMG_8523.jpg
    53.7 KB · Views: 12
  • IMG_8523.jpg
    IMG_8523.jpg
    53.7 KB · Views: 10
  • IMG_2944.jpg
    IMG_2944.jpg
    87.3 KB · Views: 13
  • IMG_2944.jpg
    IMG_2944.jpg
    87.3 KB · Views: 15
  • IMG_2929.jpg
    IMG_2929.jpg
    93.5 KB · Views: 12
  • IMG_8526.jpg
    IMG_8526.jpg
    39.9 KB · Views: 14
  • IMG_8527.jpg
    IMG_8527.jpg
    43.3 KB · Views: 9
  • IMG_8527.jpg
    IMG_8527.jpg
    43.3 KB · Views: 12
  • IMG_8526.jpg
    IMG_8526.jpg
    39.9 KB · Views: 12
  • IMG_8525.jpg
    IMG_8525.jpg
    46.1 KB · Views: 11
  • IMG_8525.jpg
    IMG_8525.jpg
    46.1 KB · Views: 11
  • IMG_8524.jpg
    IMG_8524.jpg
    56.9 KB · Views: 12
  • IMG_8524.jpg
    IMG_8524.jpg
    56.9 KB · Views: 12
Last edited:
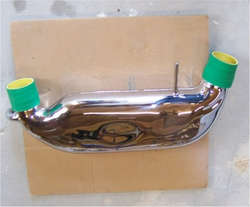
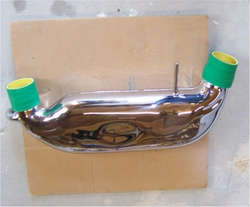
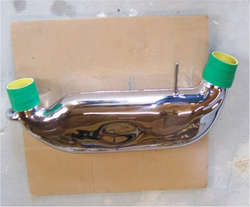
Lookee what fell into my lap! And when I say fell - a guy inherited this in a box when he purchased a Miata garage queen. Never been installed, he didn't want it or really know what it was for... long story short, he offered it to me for $50, shipped after I PM'd him telling him I'd take it if he was selling. I feel really lucky to have found this since I would have been willing to order from Japan. ARC Miata intake chamber - $500 plus shipping list price.

ARCchamber.jpg

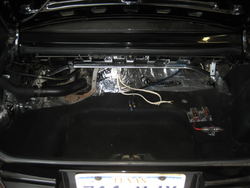
This past weekend I installed the Carbing rear STB. I got the matched set and I waited to install the rear brace because I had a bunch of audio gear back there. Had to remove it all for the track this weekend and got motivated to do the install. Here she is:

IMG_3170.jpg

While the install was not particularly complicated, it was freakin tough access. I have scratches and busted knuckles. I used wobble sockets, U-joints, extensions... check out the access on the left side:

IMG_3172.jpg

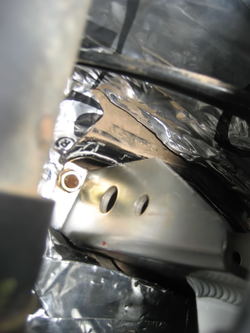
I replaced the rusted old nuts with some new grade 8 hardware. So this is the one that was "easy" to reach. Imagine how tough it was to reach and tighten the nut on the other side of this bracket. Yes, that's blood on the bracket.

IMG_3171.jpg

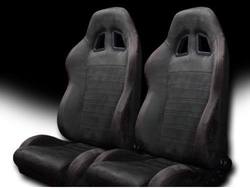
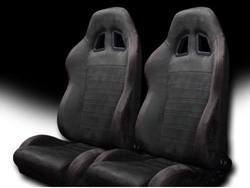
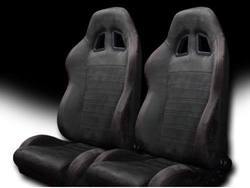
Seats shipped out via Fedex this morning, which means I should have them in a couple days. eBay specials!

Sparcostyleseats.jpg

I do believe I will have to call in sick at the end of the week. I plan to work a full day on the car - removing the old seats and cabin upholstery, then Dynamatting everything before reinstalling a clean carpet and the new seats.

MSR Houston this weekend - tracking the car all day on Saturday so she (we) should be ready!
 

Attachments

  • IMG_3170.jpg
    IMG_3170.jpg
    64.5 KB · Views: 10
  • IMG_3170.jpg
    IMG_3170.jpg
    64.5 KB · Views: 12
  • ARCchamber.jpg
    ARCchamber.jpg
    30.9 KB · Views: 10
  • ARCchamber.jpg
    ARCchamber.jpg
    30.9 KB · Views: 9
  • Sparcostyleseats.jpg
    Sparcostyleseats.jpg
    16.3 KB · Views: 9
  • Sparcostyleseats.jpg
    Sparcostyleseats.jpg
    16.3 KB · Views: 10
  • IMG_3171.jpg
    IMG_3171.jpg
    52 KB · Views: 13
  • IMG_3171.jpg
    IMG_3171.jpg
    52 KB · Views: 12
  • IMG_3172.jpg
    IMG_3172.jpg
    89.5 KB · Views: 12
  • IMG_3172.jpg
    IMG_3172.jpg
    89.5 KB · Views: 12
JUmbo where did you get the tow race brackets....?? I cannot use mine anymore due to the bodykit but still need a solution for this.
Want to be prepared if the engine ever would fail :wub:
 
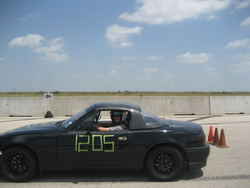
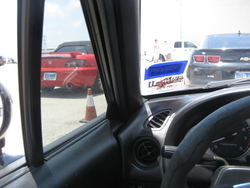
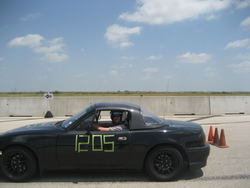
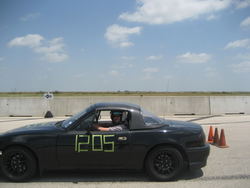
2.5 hours on the track at MSR Houston and I am BEAT. Tired, bruised... but hooked.

IMG_8564.jpg

Spun off the track once, drove off straight once and caught two spins and corrected them. I ran in 3rd gear almost all day. Top speed of about 90mph but bouncing off the rev limiter at 7200 on the straights. Shifting to 4th wasn't the problem. It was downshifting back to 3rd as you approach a friggin turn going 75 and hit the brakes juuuuust short of locking them up. Too much going on, so I just kept it in third and enjoyed pushing the curves and pointing by anybody on my tail in the straights.

I gotta say though, I was running with a new Camaro, a Porsche, a Lotus Exige, 350Z, 3.8 Genesis, BMW M3, a couple of S2000s and about five other Miatas.

In the hot pit about to go on track:

IMG_8569.jpg

Most other cars out there seemed to leave me behind in the straights but I'd gain ground in the turns. More than once I was pointed by (directed to pass) after sticking with faster cars through the turns and then at WOT on the straights I had a tough time making a move around them. I did get by the Porsche once.

Looking forward to my next time. I can see this being SO much more fun with a bunch of friends. I really wonder how the FX would have done out there. I can't imagine a full day at the track with the FX but a few runs might be fun.
 

Attachments

  • IMG_8569.jpg
    IMG_8569.jpg
    64.3 KB · Views: 12
  • IMG_8569.jpg
    IMG_8569.jpg
    64.3 KB · Views: 13
  • IMG_8564.jpg
    IMG_8564.jpg
    48.7 KB · Views: 11
  • IMG_8564.jpg
    IMG_8564.jpg
    48.7 KB · Views: 13
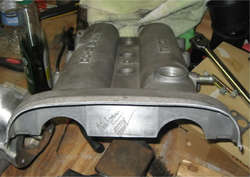
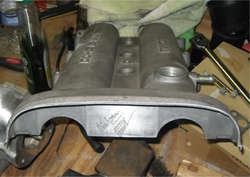
Originally I just painted the valve cover with a high temp enamel. Looks clean. But like a few other guys, I like the exposed cam gears and thought this would be another project that would be mostly time and not a lot of money if I do it myself. I also figured if I was cutting off the front of the valve cover, I will also shave the lettering on the cover to make it as clean as possible.

I went ahead and bought a used valve cover for $65, shipped. Using a cordless reciprocating saw I trimmed off the front of the valve cover. Then I used hand files to smooth out and shape the edge.
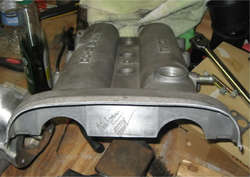
IMG_8691.jpg

Next up will be filing down the lettering. The "Mazda" is already gone, but the passenger side of the VC hasn't been touched yet. It's hot here in Texas.

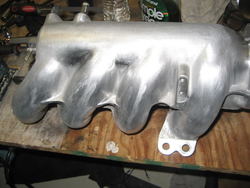
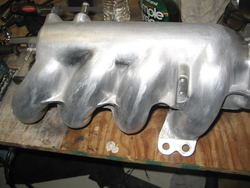
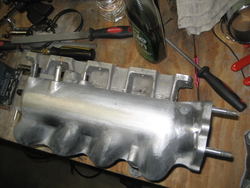
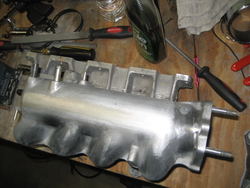
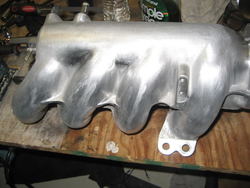
The Intake Manifold has been by far the most time consuming but I have high hopes for it. I got a free manifold from a local guy who was going to trash it. Dirty as hell so I cleaned it up before filing.

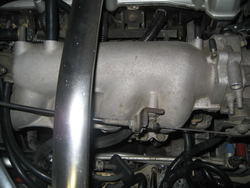
This one I'm winging. It's pretty much the same concept as shaving the tail lenses except with metal. Just looking at the manifold in the bay there are obvious cast lines as well as surface texture:
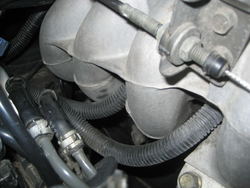
IMG_8686.jpg

On the right hand side of the manifold (by the Throttle body) there are two ports I capped off after deleting the Carbon canister. I decided when I shave the manifold, those ports and the metal humps at the base of the ports are going to disappear.
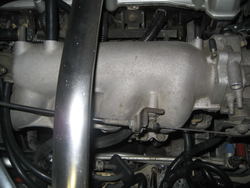
IMG_8685.jpg

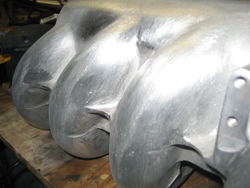
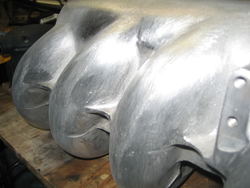
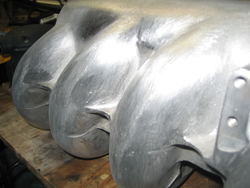
So when I say this is by far the most time consuming, it's just because of how complicated the surfaces of the manifold are. With the lens, it was easy to sand in one direction. On the manifold, getting an even surface finish is quite difficult. This is also still in progress, but here is some of the work.
IMG_8687.jpg

IMG_8688.jpg

So I hacked off the vacuum ports and just used a file to grind the area down flush with the rest of the base. That left me with a couple of small holes, which I filled with JB Weld. A sticky note is on the inside of the manifold, holding the JB weld in place till it cures. From this angle, the casting lines are not visible - which is how it would be mounted in the bay. After sanding down the JB weld flush, I'll go over the entire manifold with at least two more finer grits.
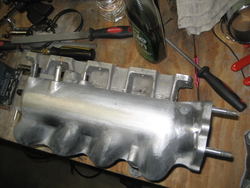
IMG_8690.jpg

I like how the ribs now curve in like webbing. Definitely sexier.

I was thinking gold or a metallic brass for the VC/mani/intake tube and then maybe some other color for the STB and/or the exhaust manifold heat shield. If y'all have opinions for paints/color, I'm in for suggestions.

Here is how she looks today with the original painted VC and the stock manifold.
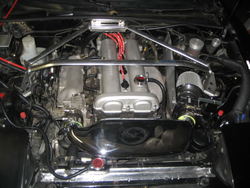
IMG_8684.jpg

I'd love to shave or tuck the wire harness and might do bits and pieces here and there. Again - open for suggestions on additional shave projects, as well as a color theme for the bay. I'm not satisfied with what it looks like right now.

 

Attachments

  • IMG_8686.jpg
    IMG_8686.jpg
    74.9 KB · Views: 14
  • IMG_8686.jpg
    IMG_8686.jpg
    74.9 KB · Views: 14
  • IMG_8691.jpg
    IMG_8691.jpg
    42.5 KB · Views: 12
  • IMG_8691.jpg
    IMG_8691.jpg
    42.5 KB · Views: 12
  • IMG_8687.jpg
    IMG_8687.jpg
    80.2 KB · Views: 9
  • IMG_8687.jpg
    IMG_8687.jpg
    80.2 KB · Views: 11
  • IMG_8685.jpg
    IMG_8685.jpg
    74.9 KB · Views: 13
  • IMG_8685.jpg
    IMG_8685.jpg
    74.9 KB · Views: 11
  • IMG_8684.jpg
    IMG_8684.jpg
    97.4 KB · Views: 10
  • IMG_8684.jpg
    IMG_8684.jpg
    97.4 KB · Views: 13
  • IMG_8690.jpg
    IMG_8690.jpg
    83.8 KB · Views: 13
  • IMG_8690.jpg
    IMG_8690.jpg
    83.8 KB · Views: 10
  • IMG_8688.jpg
    IMG_8688.jpg
    62.4 KB · Views: 13
  • IMG_8688.jpg
    IMG_8688.jpg
    62.4 KB · Views: 10
Just an idea, but I think if you reduce the number of colors/shades you'll get a more uniform and finished look.
-Anything aluminum should be either polished or brushed. Considering that ARC intake chamber and the V-band clamps, you're probably better off polishing.
-Anything plastic, steel, or remaining aluminum should be the same shade of black.
-Anything rubber or silicone should be the same shade of red.
-Tuck all wiring.

Posted from my BlackBerry using BerryBlab
 
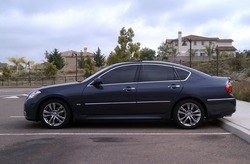
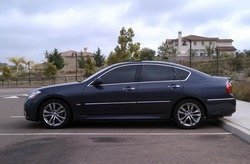
25% all around tint on my M.....Kind of worried now, because of the front windows and the Cali police..... and yes, the chrome rims will be the first to go.

Picture was taken with my Incredible
IMG_20110610_162007.png
 

Attachments

  • IMG_20110610_162007.png
    IMG_20110610_162007.png
    107.3 KB · Views: 20
  • IMG_20110610_162007.png
    IMG_20110610_162007.png
    102.6 KB · Views: 19
Thanks, I do love the tint...my arms don't burn up as much as they used to and hopefully my left arm won't stay darker than my right much longer :rofl:. Had a cop look at me today but just kept on going. Sucks not being able to roll down the windows till they cure.
 
Back
Top