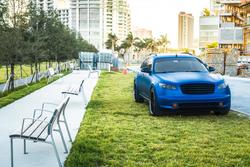
- Location
- Miami
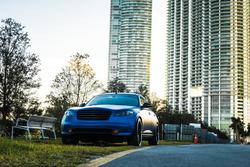
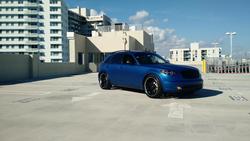
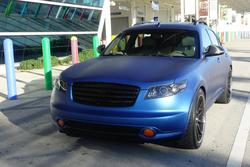
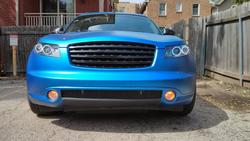
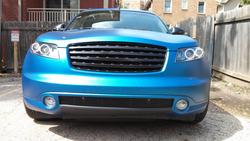
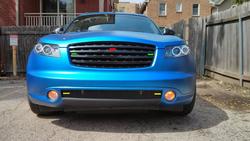
- Car
- 2004 Infiniti FX35 Supercharged
Here is the stuff I was doing to my FX since spring 2014. Besides the SC, Transgo, Paddles and bunch of other work that Andy kindly did it for me, if you missed that post see several pages before.
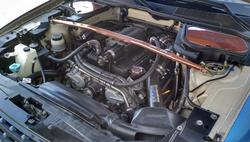
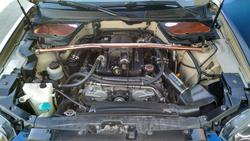
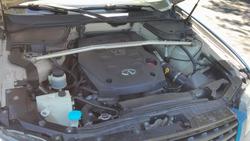
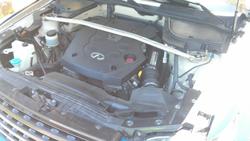
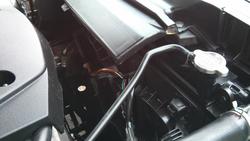
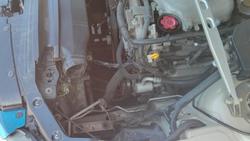
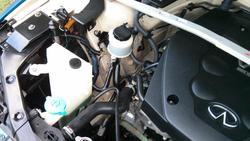
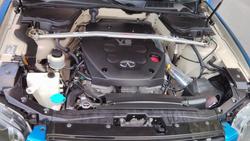
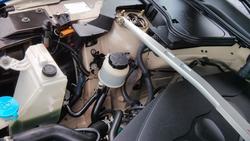
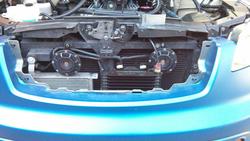
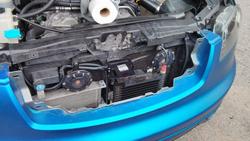
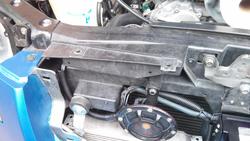
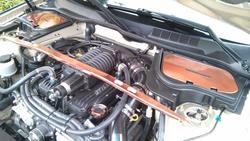
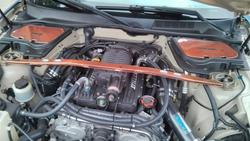
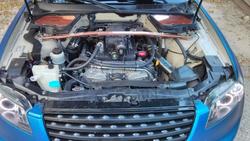
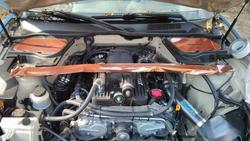
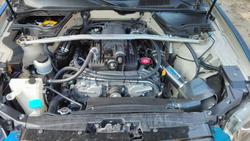
Detailed the engine bay using this guide.
Before:


After:


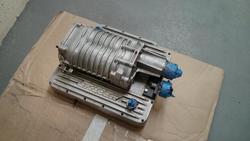
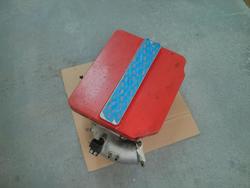
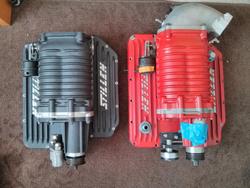
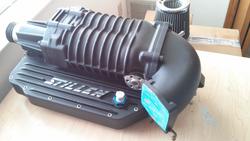
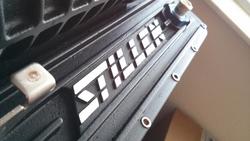
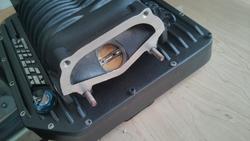
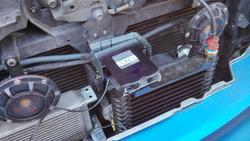
Repainted the Stillen SC and cleaned the internals a little bit. The black one was not the inter-cooled one and was recently sold.


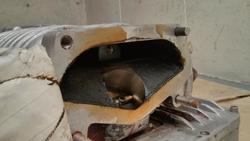
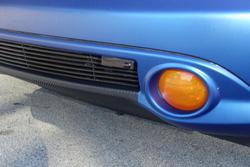
Installed the amber fog LED's, but they weren't too bright, so I wrapped them in translucent Oracal vinyl and put regular HID's bulbs back.


These guys helped me a bit, while I was wrapping the fogs

All done

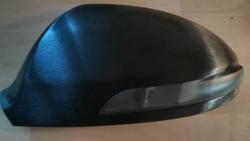
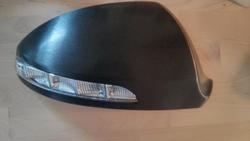
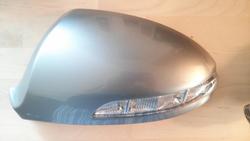
Found a set of super rare Turbocad's mirror covers and wrapped them in brushed aluminum 3M vinyl. The side marker was tinted with 35% satin tint vinyl.


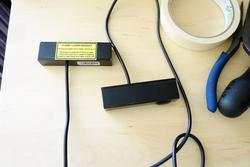
I started the 9500ci project when I was in WI and just recently finished it here. There was an issue with 9500ci control module, but Larry from Escort took care of everything. So far one of the best customer service experiences I've ever had.
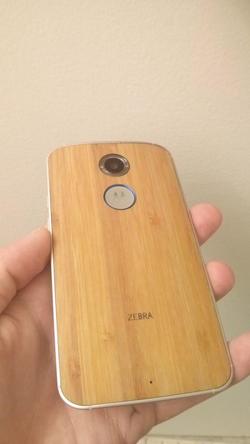
Speaking of customer service, Motorola was the worst to deal with, but I finally got my new phone

OK... back to the FX stuff...
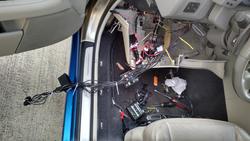
Mounting options

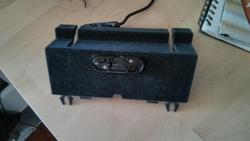
Decided to fit the external speaker and GPS Antenna in to the center channel speaker opening that wasn't used since the whole speaker upgrade awhile back.

Cut some plastic to fit them.
Speaker mounted. Sounds loud and clear BTW.

Cut the metal plate for GPS antenna.

Mounted and ready to go

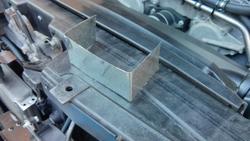
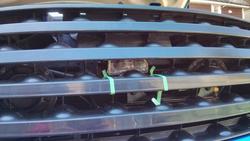
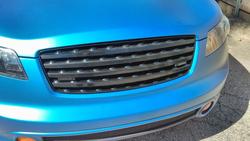
Made a bracket for the front receiver unit

Before:

After:


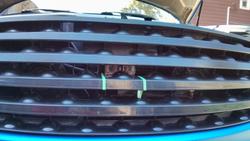
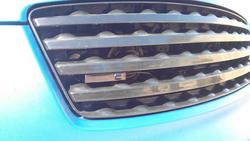
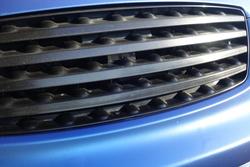
Trimmed the grille from the inside a little bit to fit the receiver


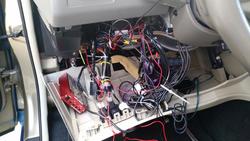
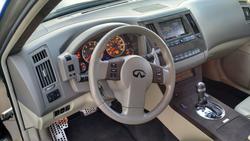
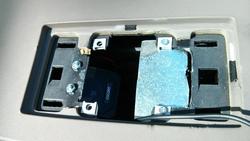
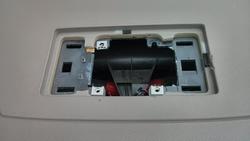
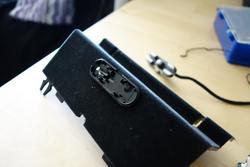
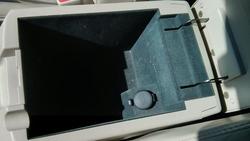
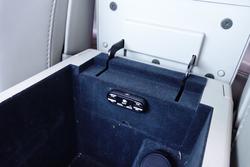
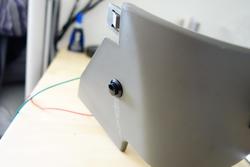
Decide to install the control module inside the center console for a cleaner look


Trimmed the front Laser Pro shifters mounting brackets

Was looking for ideal spot to install the front Laser Pro Shifters(brand new addition to 9500ci in 2014, the firmware is fully upgradable now, to keep up with new laser guns on the market). They need to be installed in a certain way with a bubble level. This was a no go...


The is a correct position, the little bubbles on the housing must be visible form the side. Leveled the shifters with several strips of VHB 3M Heavy duty double sided tape.


Bracket was wrapped in black vinyl and front receiver was installed with bubble level also


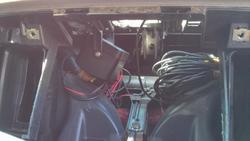
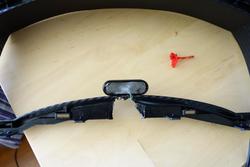
Routed the front receiver and shifter cables


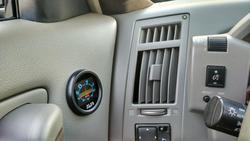
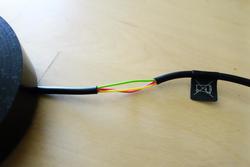
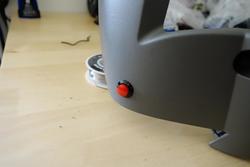
The external mute button(no such option on 9500ci) was installed under the steering wheel, so you don't need to reach out for the main control module all the time. The red NOS button was installed at the same time on other side.


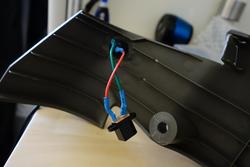
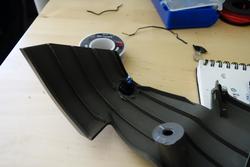
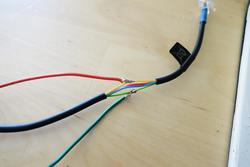
Wiring for the external mute button. You need to splice up the control module cable in order to connect the external mute button.


Quick release connectors for easy trim removal


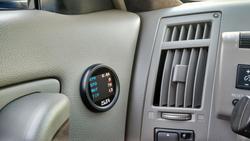
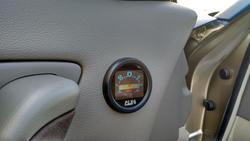
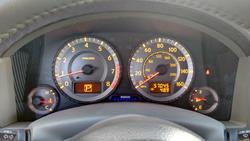
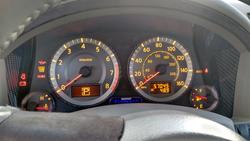
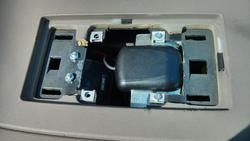
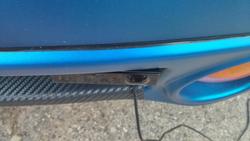
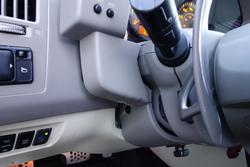
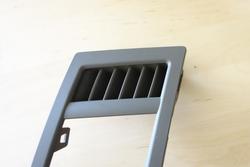
LED for radar alerts was installed by the left air vent, very helpful thing, you don't need to constantly look at the main display.


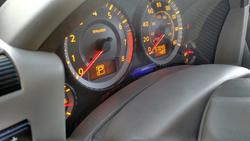
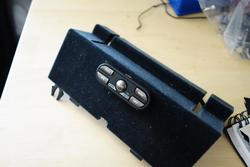
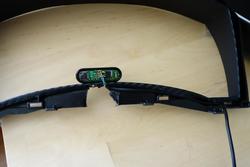
The main display unit was installed inside the instrumental cluster


The new setup is already saved me couple times against the laser. Compare to 9500ix and Valentine One that I had before, the 9500ci is at least 3 times better than those 2, the K and Ka bands detection is unbelievable.
I personally ruined my black anodized adapters with a chrome wheel cleaner by mistake and it was bothering me a lot, so I wrapped them in vinyl also, still holding up great after several thousands miles
Before


After


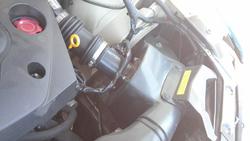
Was trying to find the copper vinyl for ages and wrap my wheel lips. Finally found some cheap stuff on eBay, but the material has no stretching abilities whatsoever. So I temporary wrapped the engine bay pieces from leftovers just for fun, still holding up great.
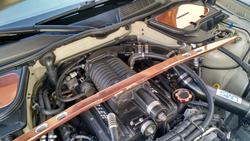
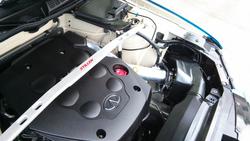
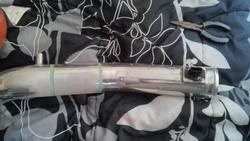
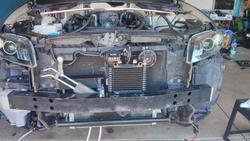
I also fitted the NOS cooling bullet to my LMS Z-tube and painted everything, including the throttle body in black.


Went back to “Andy's Garage” a week before I suppose to leave and he installed the HAWK braking pads for me, which I absolutely love, and new Mishimoto oil cooler.

After several days of road tripping and sightseeing I finally here

Detailed the engine bay using this guide.
Before:
After:
Repainted the Stillen SC and cleaned the internals a little bit. The black one was not the inter-cooled one and was recently sold.
Installed the amber fog LED's, but they weren't too bright, so I wrapped them in translucent Oracal vinyl and put regular HID's bulbs back.
These guys helped me a bit, while I was wrapping the fogs
All done
Found a set of super rare Turbocad's mirror covers and wrapped them in brushed aluminum 3M vinyl. The side marker was tinted with 35% satin tint vinyl.
I started the 9500ci project when I was in WI and just recently finished it here. There was an issue with 9500ci control module, but Larry from Escort took care of everything. So far one of the best customer service experiences I've ever had.
Speaking of customer service, Motorola was the worst to deal with, but I finally got my new phone
OK... back to the FX stuff...
Mounting options
Decided to fit the external speaker and GPS Antenna in to the center channel speaker opening that wasn't used since the whole speaker upgrade awhile back.
Cut some plastic to fit them.
Speaker mounted. Sounds loud and clear BTW.
Cut the metal plate for GPS antenna.
Mounted and ready to go
Made a bracket for the front receiver unit
Before:
After:
Trimmed the grille from the inside a little bit to fit the receiver
Decide to install the control module inside the center console for a cleaner look
Trimmed the front Laser Pro shifters mounting brackets
Was looking for ideal spot to install the front Laser Pro Shifters(brand new addition to 9500ci in 2014, the firmware is fully upgradable now, to keep up with new laser guns on the market). They need to be installed in a certain way with a bubble level. This was a no go...
The is a correct position, the little bubbles on the housing must be visible form the side. Leveled the shifters with several strips of VHB 3M Heavy duty double sided tape.
Bracket was wrapped in black vinyl and front receiver was installed with bubble level also
Routed the front receiver and shifter cables
The external mute button(no such option on 9500ci) was installed under the steering wheel, so you don't need to reach out for the main control module all the time. The red NOS button was installed at the same time on other side.
Wiring for the external mute button. You need to splice up the control module cable in order to connect the external mute button.
Quick release connectors for easy trim removal
LED for radar alerts was installed by the left air vent, very helpful thing, you don't need to constantly look at the main display.
The main display unit was installed inside the instrumental cluster
The new setup is already saved me couple times against the laser. Compare to 9500ix and Valentine One that I had before, the 9500ci is at least 3 times better than those 2, the K and Ka bands detection is unbelievable.
I personally ruined my black anodized adapters with a chrome wheel cleaner by mistake and it was bothering me a lot, so I wrapped them in vinyl also, still holding up great after several thousands miles
Before
After
Was trying to find the copper vinyl for ages and wrap my wheel lips. Finally found some cheap stuff on eBay, but the material has no stretching abilities whatsoever. So I temporary wrapped the engine bay pieces from leftovers just for fun, still holding up great.
I also fitted the NOS cooling bullet to my LMS Z-tube and painted everything, including the throttle body in black.
Went back to “Andy's Garage” a week before I suppose to leave and he installed the HAWK braking pads for me, which I absolutely love, and new Mishimoto oil cooler.
After several days of road tripping and sightseeing I finally here
Attachments
-
 IMG_20140617_131033_zps77776890.jpg81 KB · Views: 41
 -
 IMG_20140617_131043_zpsd568f748.jpg73.5 KB · Views: 44
 -
 IMG_20140617_131048_zps1915e319.jpg54.9 KB · Views: 41
 -
 IMG_20140617_131055_zps260160ae.jpg61.5 KB · Views: 49
 -
 IMG_20140618_132002_zps5d181875.jpg67 KB · Views: 35
 -
 IMG_20140617_132357_zps5ff60061.jpg64.8 KB · Views: 44
 -
 IMG_20140617_131107_zpsd0cc62c9.jpg62.6 KB · Views: 39
 -
 IMG_20140617_193018_zps91c56f8b.jpg83.9 KB · Views: 61
 -
 IMG_20140617_192942_zpsd07d789f.jpg79.8 KB · Views: 36
 -
 IMG_20140617_192934_zpse89565d6.jpg98.2 KB · Views: 43
 -
 IMG_20140621_115452_zpsdf9e6e01.jpg64.2 KB · Views: 56
 -
 IMG_20140402_131132_zpsbb8c4f07.jpg99 KB · Views: 39
 -
 IMG_20140402_113910_zpsa65892b5.jpg68.6 KB · Views: 42
 -
 IMG_20130916_121424_zpsba2505a1.jpg125.8 KB · Views: 56
 -
 IMG_20140618_131950_zps575ba9ff.jpg93.9 KB · Views: 39
 -
 IMG_20140625_124619_zpsb183531f.jpg71.5 KB · Views: 57
 -
 IMG_20140625_124549_zps29082282.jpg75.1 KB · Views: 48
 -
 IMG_20140624_111622_zps07d9757d.jpg64.7 KB · Views: 43
 -
 IMG_20140621_115621_zps2ba9c33d.jpg57 KB · Views: 52
 -
 DSC02889_zpscaf7aec8.jpg102.4 KB · Views: 40
 -
 IMG_20140917_135813_zps5dfde2e1.jpg119.8 KB · Views: 40
 -
 IMG_20140904_135255_zps4ffb9294.jpg104.6 KB · Views: 42
 -
 IMG_20140904_135328_zps2a472fb1.jpg108.9 KB · Views: 51
 -
 IMG_20140912_142905_zps782048ee.jpg30.5 KB · Views: 36
 -
 IMG_20140912_140310_zpsb0564c1f.jpg37 KB · Views: 38
 -
 IMG_20140912_120510_zps90994fb0.jpg34.2 KB · Views: 43
 -
 IMG_20140918_133008_zps6a0aef04.jpg92 KB · Views: 42
 -
 IMG_20140918_133109_zpsa8627a83.jpg55.6 KB · Views: 46
 -
 IMG_20140918_123938_zps1aa6b315.jpg49.5 KB · Views: 39
 -
 Radardetectormounts_zpsde7e2423.jpg105 KB · Views: 47
 -
 IMG_20141208_131458_zps1ce8f9bd.jpg36.6 KB · Views: 46
 -
 IMG_20140919_122037_zps7c3ec59f.jpg74.3 KB · Views: 43
 -
 IMG_20140918_132958_zps60d9a9b3.jpg75.4 KB · Views: 35
 -
 IMG_20140919_122047_zps7e225812.jpg96.2 KB · Views: 40
 -
 IMG_20140919_123535_zps75786e84.jpg93.2 KB · Views: 35
 -
 IMG_20140919_132142_zps02ff5a7e.jpg71.8 KB · Views: 43
 -
 IMG_20140919_132015_zpsc39b3081.jpg93.7 KB · Views: 36
 -
 DSC02701_zps3ae5c59b.jpg44.2 KB · Views: 45
 -
 IMG_20140922_110229_zps902b8f18.jpg44 KB · Views: 35
 -
 IMG_20140922_103819_zps167aa09b.jpg69.1 KB · Views: 43
 -
 IMG_20140919_133910_zps8bb98472.jpg67.8 KB · Views: 54
 -
 DSC02937_zps6a917534.jpg61.4 KB · Views: 41
 -
 DSC02702_zpsa1d9bf4e.jpg49.9 KB · Views: 40
 -
 IMG_20140923_140637_zps94366241.jpg75.2 KB · Views: 39
 -
 IMG_20140923_140630_zps00dad860.jpg79 KB · Views: 48
 -
 DSC02719_zps0adedfd7.jpg50.5 KB · Views: 42
 -
 DSC02891_zpsef9eb2ef.jpg64.4 KB · Views: 56
 -
 IMG_20140924_170856_zps2c317e11.jpg98.6 KB · Views: 41
 -
 DSC02890_zps1598c585.jpg78.5 KB · Views: 41
 -
 IMG_20140924_152854_zpsabcf8ddb.jpg56.3 KB · Views: 54
 -
 DSC02705_zps250567fd.jpg30 KB · Views: 41
 -
 IMG_20140924_170908_zps93a575e1.jpg94.4 KB · Views: 35
 -
 IMG_20140924_170902_zps93965fc8.jpg98.3 KB · Views: 35
 -
 DSC02706_zpsa697db05.jpg33.8 KB · Views: 48
 -
 DSC02936_zps1268e15c.jpg58.3 KB · Views: 45
 -
 DSC02707_zpsf5d989dd.jpg32.8 KB · Views: 38
 -
 DSC02710_zps6c8b2763.jpg39.2 KB · Views: 41
 -
 DSC02708_zps0749a673.jpg44.1 KB · Views: 39
 -
 DSC02709_zps5c89bf73.jpg40.8 KB · Views: 63
 -
 DSC02703_zps14c6cd66.jpg28.6 KB · Views: 46
 -
 DSC02704_zpsaae600b7.jpg26.2 KB · Views: 38
 -
 DSC02716_zpsd1225beb.jpg42.5 KB · Views: 48
 -
 DSC02718_zps83e22e65.jpg46.5 KB · Views: 39
 -
 IMG_20140929_132155_zpsd7cf618c.jpg61.3 KB · Views: 46
 -
 DSC02717_zps648ce162.jpg40.5 KB · Views: 42
 -
 IMG_20140908_171720_zpse153f42d.jpg67.7 KB · Views: 41
 -
 IMG_20140929_134136_zps020163c3.jpg56.3 KB · Views: 47
 -
 IMG_20140929_132542_zpsbdc8e39f.jpg67.8 KB · Views: 43
 -
 IMG_20140929_133753_zps682803eb.jpg61.7 KB · Views: 37
 -
 IMG_20141002_160658_zps743a7648.jpg115.5 KB · Views: 47
 -
 IMG_20141002_160650_zps5daca916.jpg104.7 KB · Views: 35
 -
 IMG_20140929_154022_zps1f797494.jpg108.6 KB · Views: 43
 -
 IMG_20140929_150849_zps30d8fe89.jpg110 KB · Views: 49
 -
 IMG_20140929_142613_zpsbeab4f14.jpg107 KB · Views: 35
 -
 IMG_20141019_145231_zps815fd643.jpg59.5 KB · Views: 36
 -
 IMG_20141009_123035_zpsdbf45f0f.jpg112.7 KB · Views: 54
Last edited: