
You are using an out of date browser. It may not display this or other websites correctly.
You should upgrade or use an alternative browser.
You should upgrade or use an alternative browser.
- Location
- Miami
- Car
- 2004 Infiniti FX35 Supercharged


FX45Chicago
Member
- Location
- Chicago
- Car
- 2005 FX45 AWD
Lol I know that Z are you near Project X
Sent from my iPhone
Sent from my iPhone
Just a little update
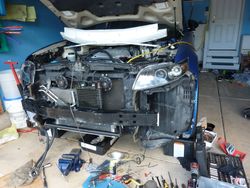
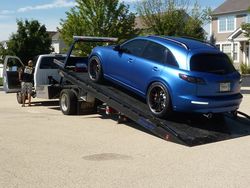
Here are pictures of the changes to the Blue Zebra the last two months. No I did not work on it everyday for the entire two months! :time-out:
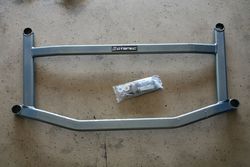
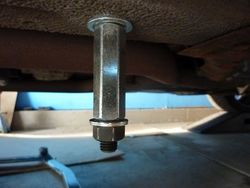
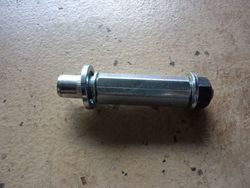
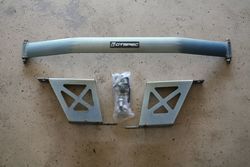
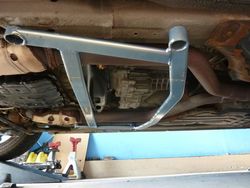
Install GTSPEC braces
Mid chassis

Front lower engine

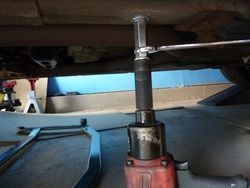
Installing rivet nut onto frame


Braces installed


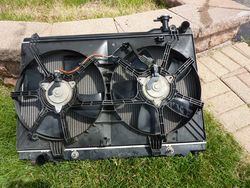
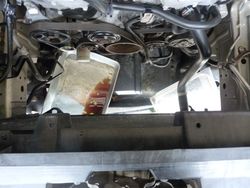
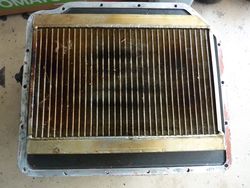
Replace Radiator and coolant flush
Disconnected the trans cooler lines at the bottom of the old radiator

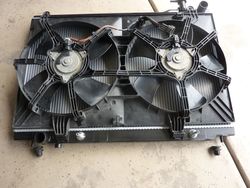
Out with old

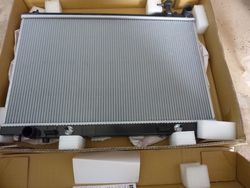
Here is new...Denso radiator

Existing fan onto back of new radiator

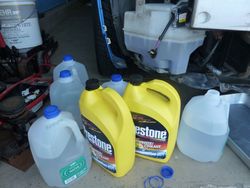
Flush supplies (2 gallons of 100% coolant and 5 gallons of distilled water... I think!)

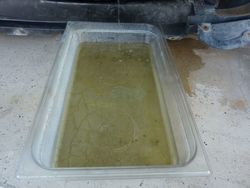
Forgot to take picture of old coolant when draining the old radiator.
Open this plug (corner of passenger side fender and firewall) as you slowly refill with fresh 50/50 mix coolant.
Refill until fresh coolant until you see coolant in the plug opening. Reinstall this plug after each refill. Continue to refill up to the neck of the radiator cap opening.
Don't forget to empty, clean the coolant reservoir and refill with proper amount of fresh 50/50 mix.

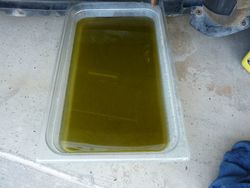
Drain from the first refill of fresh 50/50 mix.

Drain of second refill of fresh 50/50 mix.

Drain the third refill of fresh 50/50 mix

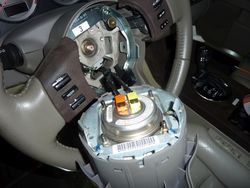
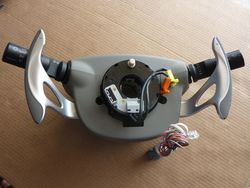
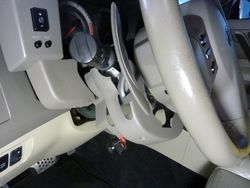
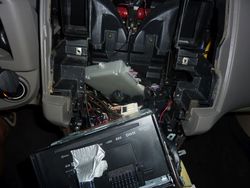
Retrofit paddle shifter
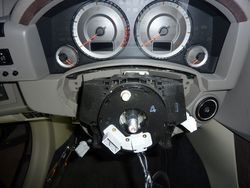
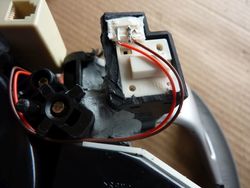
Remove airbag

Clock spring

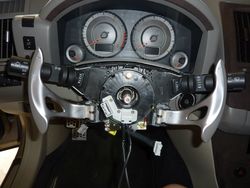
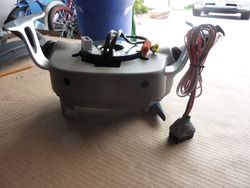
Naked steering column

Driver side paddle wiring

Passenger side paddle wiring

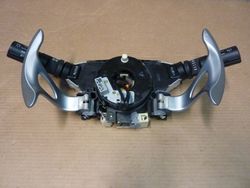
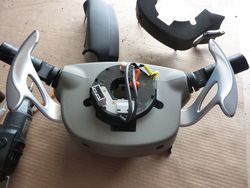
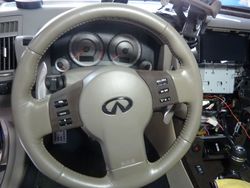
Finished paddle shifter, clock spring assembly

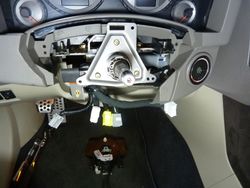
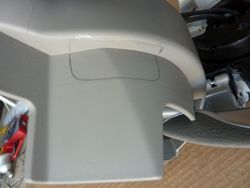
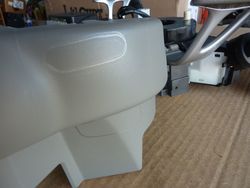
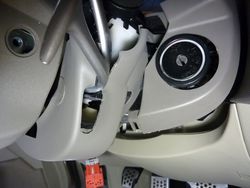
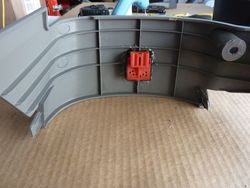
Passenger side steering column cover cutout


Driver side steering column cutout


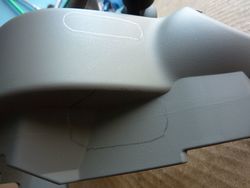
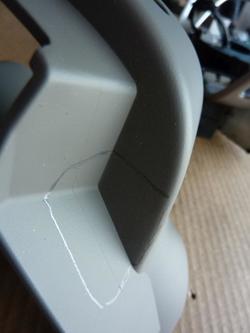
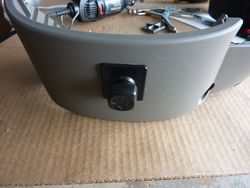
The cover is on

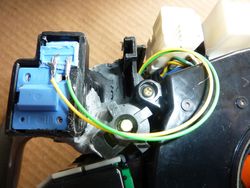
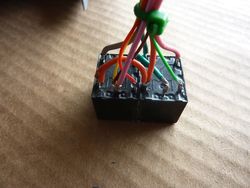
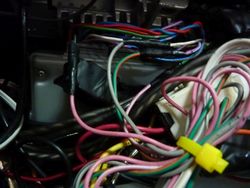
The relays

Ready to be install onto car


---------- Post added at 12:08 PM ---------- Previous post was at 12:07 PM ----------
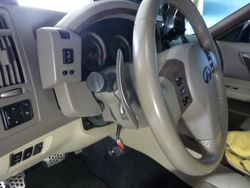
Paddle shifter back onto steering column


Relocate the steering column tilt switch


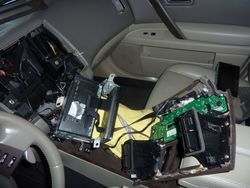
Not sure what this stuff are. :smile (2): Looks like a custom custom dash center console and after market headunit


The relay is tucked away and wired up

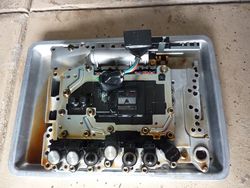
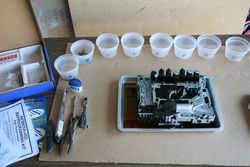
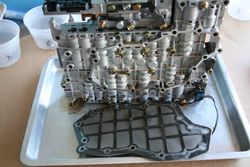
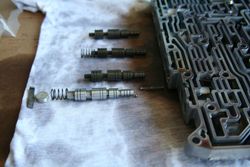
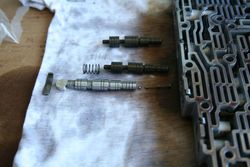
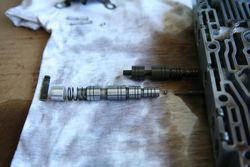
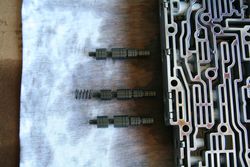
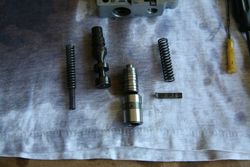
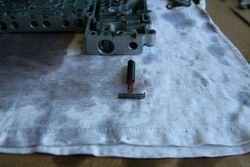
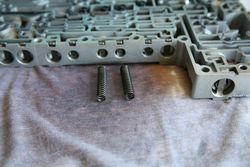
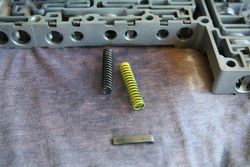
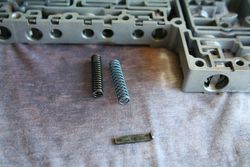
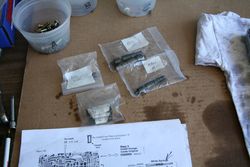
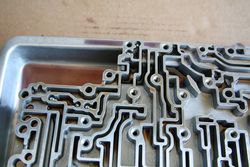
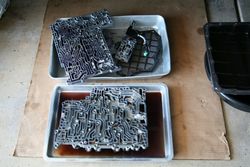
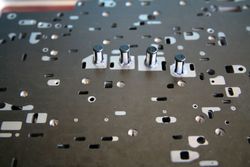
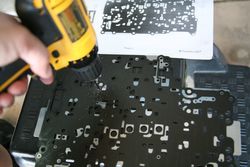
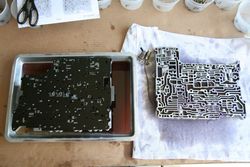
Transgo shift kit installation
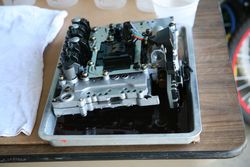
Getting ready the drain the trans fluid and remove the valve body from car

The never ending "waterfall of toxic strawberry death syrup"


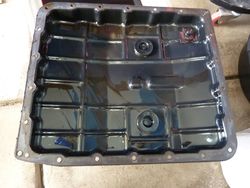
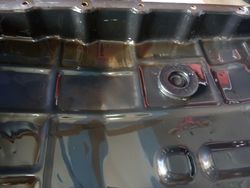
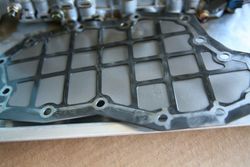
Trans fluid pan

Magnet in the pan

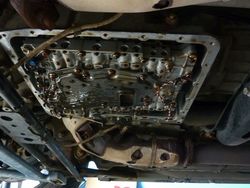
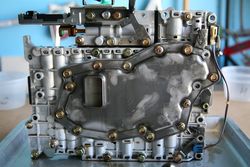
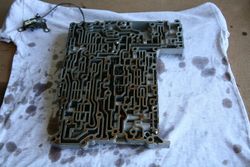
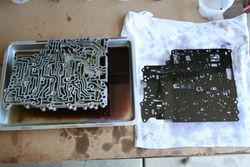
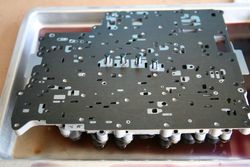
Valve body

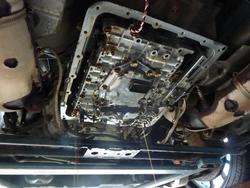
Ready for the real fun


---------- Post added at 12:09 PM ---------- Previous post was at 12:08 PM ----------


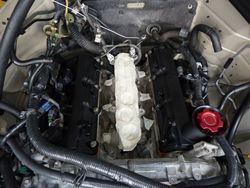
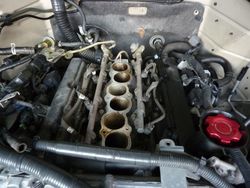
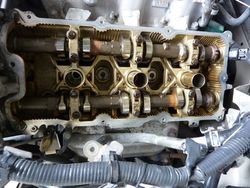
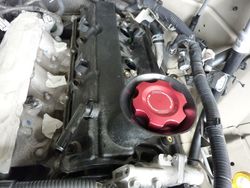
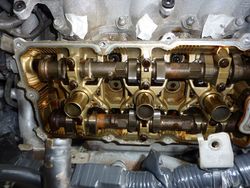
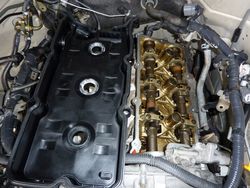
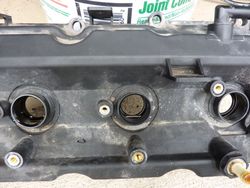
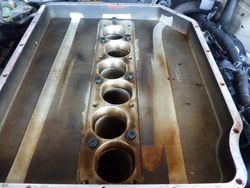
Replace valve covers


Tape up the lower plenum to prevent foreign objects to fall into the chambers


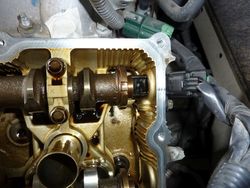
Driver side valve cover removed

Camshaft sensor

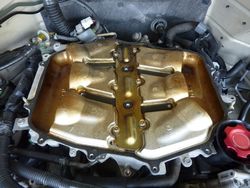
New valve cover

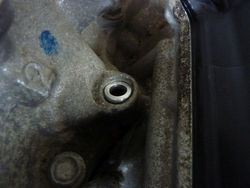
Passenger side valve cover removed

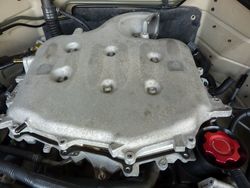
Leaky old valve cover

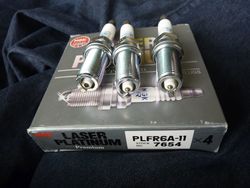
Colder spark plugs for Stillen SC

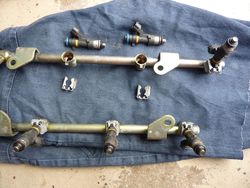
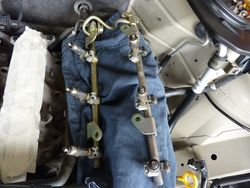
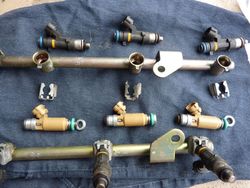
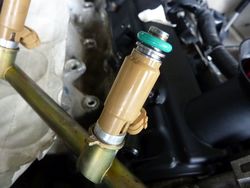
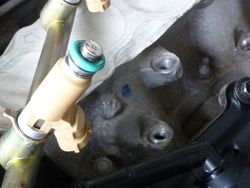
Install bigger injector upgrade for Stillen SC
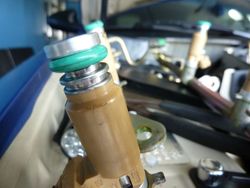
Fuel rail and injectors


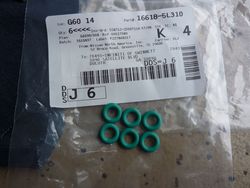
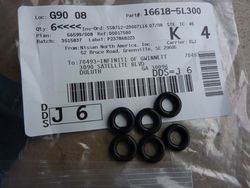
New injector o-rings


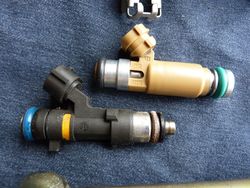
Old and new injectors


Ready to reinstalled


Here are pictures of the changes to the Blue Zebra the last two months. No I did not work on it everyday for the entire two months! :time-out:
Install GTSPEC braces
Mid chassis
Front lower engine
Installing rivet nut onto frame
Braces installed
Replace Radiator and coolant flush
Disconnected the trans cooler lines at the bottom of the old radiator
Out with old
Here is new...Denso radiator
Existing fan onto back of new radiator
Flush supplies (2 gallons of 100% coolant and 5 gallons of distilled water... I think!)
Forgot to take picture of old coolant when draining the old radiator.
Open this plug (corner of passenger side fender and firewall) as you slowly refill with fresh 50/50 mix coolant.
Refill until fresh coolant until you see coolant in the plug opening. Reinstall this plug after each refill. Continue to refill up to the neck of the radiator cap opening.
Don't forget to empty, clean the coolant reservoir and refill with proper amount of fresh 50/50 mix.
Drain from the first refill of fresh 50/50 mix.
Drain of second refill of fresh 50/50 mix.
Drain the third refill of fresh 50/50 mix
Retrofit paddle shifter
Remove airbag
Clock spring
Naked steering column
Driver side paddle wiring
Passenger side paddle wiring
Finished paddle shifter, clock spring assembly
Passenger side steering column cover cutout
Driver side steering column cutout
The cover is on
The relays
Ready to be install onto car
---------- Post added at 12:08 PM ---------- Previous post was at 12:07 PM ----------
Paddle shifter back onto steering column
Relocate the steering column tilt switch
Not sure what this stuff are. :smile (2): Looks like a custom custom dash center console and after market headunit
The relay is tucked away and wired up
Transgo shift kit installation
Getting ready the drain the trans fluid and remove the valve body from car
The never ending "waterfall of toxic strawberry death syrup"
Trans fluid pan
Magnet in the pan
Valve body
Ready for the real fun
---------- Post added at 12:09 PM ---------- Previous post was at 12:08 PM ----------
Replace valve covers
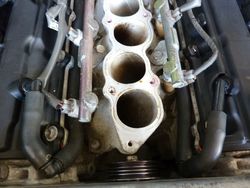
Tape up the lower plenum to prevent foreign objects to fall into the chambers
Driver side valve cover removed
Camshaft sensor
New valve cover
Passenger side valve cover removed
Leaky old valve cover
Colder spark plugs for Stillen SC
Install bigger injector upgrade for Stillen SC
Fuel rail and injectors
New injector o-rings
Old and new injectors
Ready to reinstalled
Attachments
-
 IMG_9976_zps9101bfd2.jpg128.7 KB · Views: 26
 -
 IMG_9976_zps9101bfd2.jpg128.7 KB · Views: 28
 -
 P1070301_zps5ecb5886.jpg107.2 KB · Views: 27
 -
 P1070301_zps5ecb5886.jpg107.2 KB · Views: 30
 -
 P1070304_zpsb81c586b.jpg148.2 KB · Views: 25
 -
 P1070304_zpsb81c586b.jpg148.2 KB · Views: 30
 -
 IMG_9977_zpsb88e882c.jpg128.3 KB · Views: 29
 -
 IMG_9977_zpsb88e882c.jpg128.3 KB · Views: 31
 -
 P1070310_zpscc11fe13.jpg140.3 KB · Views: 39
 -
 P1070310_zpscc11fe13.jpg140.3 KB · Views: 28
 -
 P1070307_zps13f252ce.jpg139.9 KB · Views: 34
 -
 P1070307_zps13f252ce.jpg139.9 KB · Views: 46
 -
 P1070302_zps81502ed2.jpg115.2 KB · Views: 58
 -
 P1070302_zps81502ed2.jpg115.2 KB · Views: 33
 -
 P1070261_zps059fc4a1.jpg285.2 KB · Views: 59
 -
 P1070261_zps059fc4a1.jpg285.2 KB · Views: 37
 -
 P1070263_zpsa2fecfaa.jpg134.4 KB · Views: 28
 -
 P1070263_zpsa2fecfaa.jpg134.4 KB · Views: 36
 -
 P1070272_zpsc6064cc4.jpg127.7 KB · Views: 60
 -
 P1070272_zpsc6064cc4.jpg127.7 KB · Views: 28
 -
 P1070264_zps65508d95.jpg171.9 KB · Views: 27
 -
 P1070264_zps65508d95.jpg171.9 KB · Views: 47
 -
 P1070260_zps957bb921.jpg167.6 KB · Views: 27
 -
 P1070260_zps957bb921.jpg167.6 KB · Views: 39
 -
 P1070275_zpsa6161e73.jpg125.1 KB · Views: 28
 -
 P1070275_zpsa6161e73.jpg125.1 KB · Views: 43
 -
 P1070274_zpsa3fcda6c.jpg132.1 KB · Views: 24
 -
 P1070274_zpsa3fcda6c.jpg132.1 KB · Views: 36
 -
 P1070270_zps9ceb5129.jpg95.3 KB · Views: 29
 -
 P1070270_zps9ceb5129.jpg95.3 KB · Views: 28
 -
 P1070317_zps1f321afd.jpg130.7 KB · Views: 41
 -
 P1070317_zps1f321afd.jpg130.7 KB · Views: 27
 -
 P1070315_zpsc23712ff.jpg138.6 KB · Views: 31
 -
 P1070315_zpsc23712ff.jpg138.6 KB · Views: 31
 -
 P1070276_zpsaa409381.jpg126.3 KB · Views: 27
 -
 P1070276_zpsaa409381.jpg126.3 KB · Views: 59
 -
 P1070323_zpsfef29cea.jpg127.7 KB · Views: 28
 -
 P1070323_zpsfef29cea.jpg127.7 KB · Views: 40
 -
 P1070333_zps9df2759e.jpg113.3 KB · Views: 37
 -
 P1070330_zps66221d0e.jpg120.1 KB · Views: 25
 -
 P1070354_zpsd93a852c.jpg107.8 KB · Views: 32
 -
 P1070353_zpsc98748d8.jpg138.7 KB · Views: 37
 -
 P1070353_zpsc98748d8.jpg138.7 KB · Views: 45
 -
 P1070337_zps78e49eb2.jpg88.4 KB · Views: 35
 -
 P1070336_zpsf55f84fc.jpg103.4 KB · Views: 37
 -
 P1070334_zps3b687df4.jpg43.5 KB · Views: 35
 -
 P1070346_zps313470be.jpg141.9 KB · Views: 31
 -
 P1070343_zpscedc1534.jpg127.1 KB · Views: 48
 -
 P1070359_zps1187d957.jpg132.8 KB · Views: 66
 -
 P1070351_zps1e4e3679.jpg129 KB · Views: 62
 -
 P1070350_zps61bf3c76.jpg129.6 KB · Views: 26
 -
 P1070391_zps730aa54c.jpg108.9 KB · Views: 25
 -
 P1070388_zpsa0f75dbd.jpg114.7 KB · Views: 38
 -
 P1070386_zps7f86f905.jpg112.9 KB · Views: 27
 -
 P1070397_zps762a8af1.jpg131.6 KB · Views: 44
 -
 P1070396_zps4fadce0a.jpg123.9 KB · Views: 43
 -
 P1070392_zps655c46e2.jpg124.5 KB · Views: 37
 -
 P1070368_zps5f0aa9ea.jpg135.1 KB · Views: 27
 -
 P1070366_zpsbc281680.jpg146.2 KB · Views: 29
 -
 P1070285_zps51e8f912.jpg155.8 KB · Views: 45
 -
 P1070284_zpsab7fd72a.jpg147 KB · Views: 35
 -
 P1070935_zps66d702a2.jpg120 KB · Views: 27
 -
 P1070298_zpsdca4ec81.jpg131.6 KB · Views: 24
 -
 P1070289_zps1b3b2977.jpg142.8 KB · Views: 45
 -
 P1070295_zpsf731426e.jpg108.1 KB · Views: 55
 -
 P1070300_zps2bedd0c3.jpg161.4 KB · Views: 45
 -
 P1070299_zps7b8ecbf8.jpg107.4 KB · Views: 29
 -
 IMG_9932_zps959857ae.jpg131 KB · Views: 34
 -
 IMG_9938_zps979f8163.jpg127.2 KB · Views: 49
 -
 IMG_9939_zps9e609e3e.jpg140.5 KB · Views: 26
 -
 IMG_9933_zps49745c42.jpg114 KB · Views: 66
 -
 IMG_9945_zps3f7704bb.jpg145.3 KB · Views: 40
 -
 IMG_9943_zps1b94d09b.jpg103.5 KB · Views: 32
 -
 IMG_9944_zps14a7777c.jpg127.9 KB · Views: 38
 -
 IMG_9951_zpsb96f8198.jpg117.5 KB · Views: 27
 -
 IMG_9950_zps289d30e5.jpg114.9 KB · Views: 49
 -
 IMG_9947_zpsa9cd0ea3.jpg103.6 KB · Views: 29
 -
 IMG_9954_zpsf4f2aa75.jpg160.7 KB · Views: 63
 -
 IMG_9953_zpsdf334aa3.jpg151.9 KB · Views: 55
 -
 IMG_9957_zps8ba2f95c.jpg110.4 KB · Views: 41
 -
 IMG_9956_zpsea932255.jpg147.2 KB · Views: 39
 -
 IMG_9955_zps827e63a2.jpg112 KB · Views: 36
 -
 IMG_9960_zps76194305.jpg123.6 KB · Views: 44
 -
 IMG_9959_zpsf6bfb7e8.jpg128.9 KB · Views: 33
 -
 IMG_9958_zps8a215494.jpg130.6 KB · Views: 60
 -
 IMG_9966_zps4d70d00c.jpg140.5 KB · Views: 36
 -
 IMG_9961_zpsbca22247.jpg114.1 KB · Views: 48
 -
 IMG_9967_zpsf837aeae.jpg134.1 KB · Views: 25
 -
 IMG_9968_zps541c2ba8.jpg147.6 KB · Views: 39
 -
 IMG_9971_zps388626bc.jpg78.3 KB · Views: 34
 -
 IMG_9970_zpsbf0e3f28.jpg100 KB · Views: 40
 -
 IMG_9969_zps23752581.jpg114.2 KB · Views: 56
 -
 IMG_9973_zps8a4a8bc0.jpg165.1 KB · Views: 60
 -
 IMG_9972_zpsdf917bdd.jpg99.5 KB · Views: 34
 -
 P1080067_zps04aad6c6.jpg163.7 KB · Views: 33
 -
 P1080068_zpsb69ac5bf.jpg156.2 KB · Views: 40
 -
 IMG_9974_zpsa735a795.jpg143 KB · Views: 27
 -
 P1080108_zps26217407.jpg161.9 KB · Views: 26
 -
 P1070939_zpsfd2a2189.jpg150.3 KB · Views: 27
 -
 P1080089_zps8f92cb17.jpg175.7 KB · Views: 30
 -
 P1080088_zpsb4cb4430.jpg179.6 KB · Views: 27
 -
 P1080084_zps95c36ada.jpg142.6 KB · Views: 38
 -
 P1080104_zps1223318e.jpg205.5 KB · Views: 26
 -
 P1080092_zps8dbb4646.jpg189.7 KB · Views: 32
 -
 P1080098_zps1fcb4b32.jpg186.7 KB · Views: 42
 -
 P1080095_zps40f6968d.jpg131.7 KB · Views: 61
 -
 P1080072_zps4f6e5e46.jpg214.1 KB · Views: 46
 -
 P1080071_zps638b7a5a.jpg152.7 KB · Views: 27
 -
 P1080073_zpsfb4d655a.jpg130.6 KB · Views: 51
 -
 P1080074_zps5e5ce930.jpg134.9 KB · Views: 28
 -
 P1080082_zpsf9c3741e.jpg102.4 KB · Views: 41
 -
 P1080076_zps0b32efe1.jpg263.6 KB · Views: 32
 -
 P1080075_zpsdfd86e9f.jpg234.5 KB · Views: 30
 -
 P1080140_zps3e7cecdc.jpg104.8 KB · Views: 30
 -
 P1080139_zpsf518f7ce.jpg110.2 KB · Views: 36
 -
 P1080146_zps623f337c.jpg115.5 KB · Views: 47
 -
 P1080159_zpsc73dc03a.jpg132.7 KB · Views: 25
Last edited:
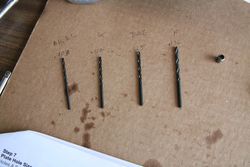
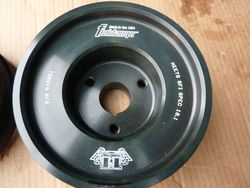
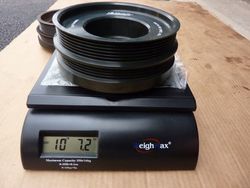
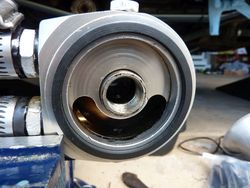
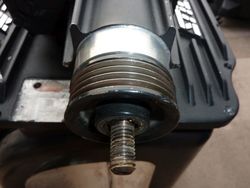
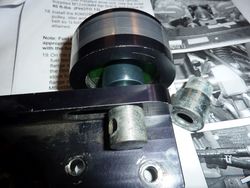
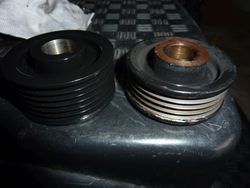
Fluipdampr crank pulley


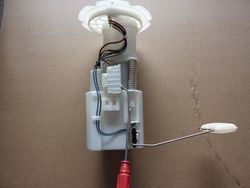
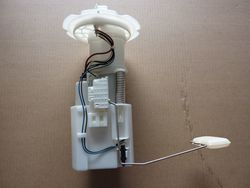
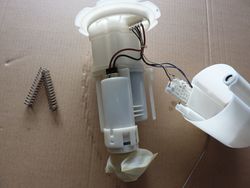
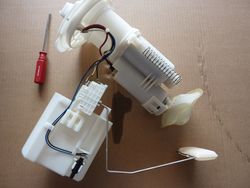
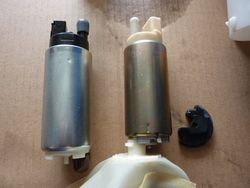
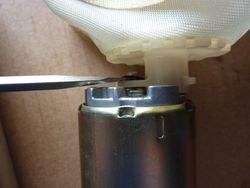
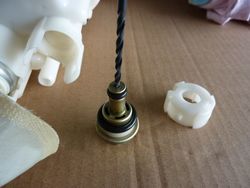
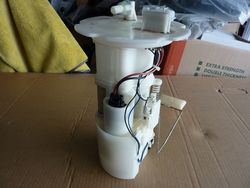
Walbro GSS342 fuel pump upgrade
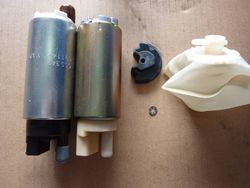
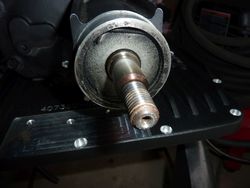
Factory fuel pump assembly

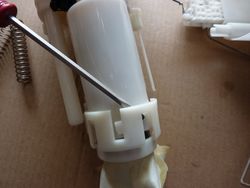
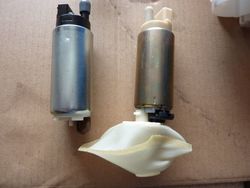
Disassemble the plastic components to release the factory pump


The pump is coming out

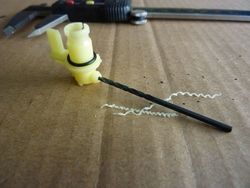
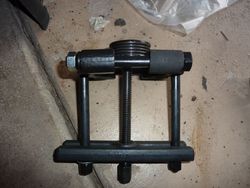
Walbro on the left


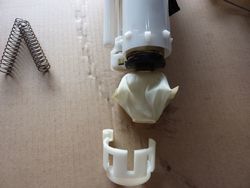
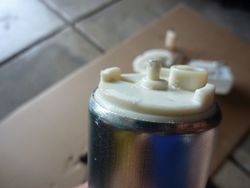
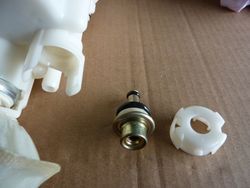
Remove the sock fliter from the factory pump


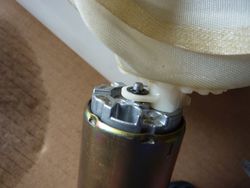
Modify the Walbro

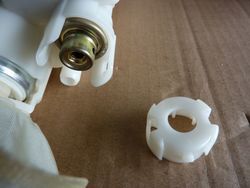
Install sock fliter onto the Walbro

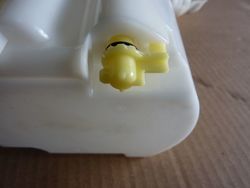
Enlarge the swirl jet


Enlarge the regulator outlet


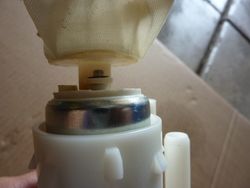
All done. Ready to go back into tank

---------- Post added at 12:12 PM ---------- Previous post was at 12:10 PM ----------
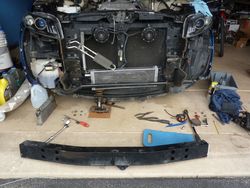
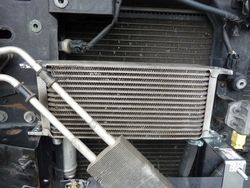
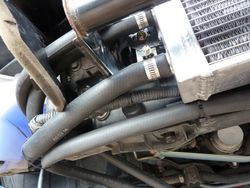
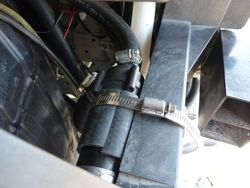
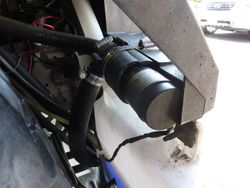
Coolers installation (oil, trans, an SC inter-cooler)
SC inter-cooler

Oil cooler

Trans fluid cooler

All three coolers mounted


Inter-cooler coolant pump


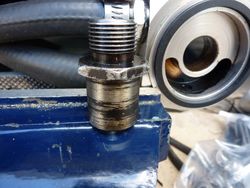
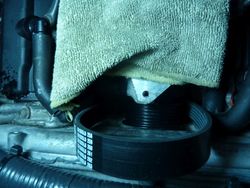
Oil cooler sandwich adapter


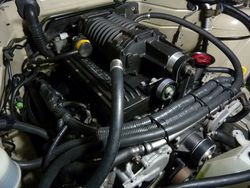
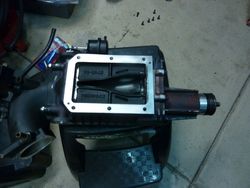
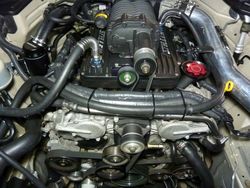
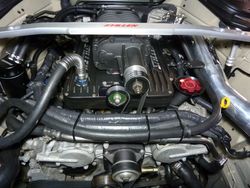
Stillen Stage 4 Installation
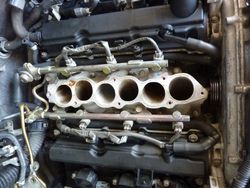
Stock plenum

Re-routed the crankcase breather hoses and installed the 4 rib pulley

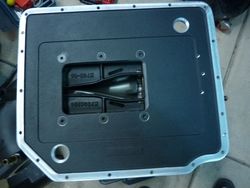
Stillen lower plenum mounted on the lower manifold

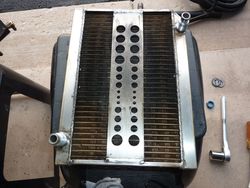
Underside of the Stillen top plenum with the cooler

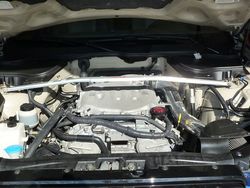
Tada


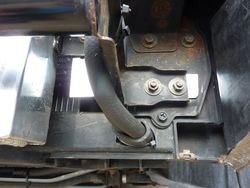
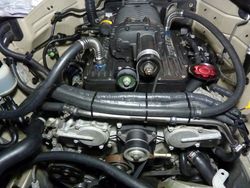
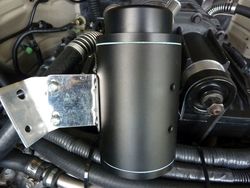
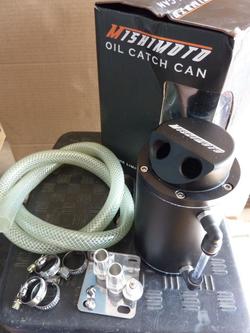
Oil catch can

Fabricated a bracket to mount the can

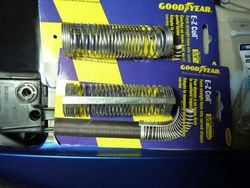
Goodyear EZ-Coil installed onto the two inter-cooler port to keep the coolant hose nicely bend

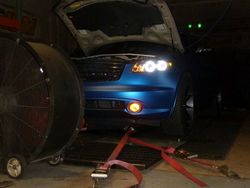
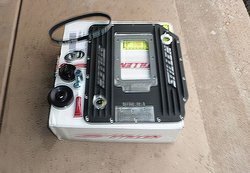
I'm ready for the dyno!!!!

Whose this dude?

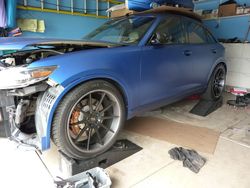
On the dyno

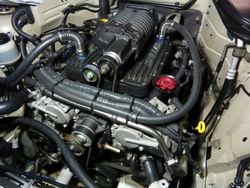
On the first dyno run, we found some serious leaks around the inter-cooler coolant ports due to aged seals and rear portion of the supercharger. The tuner made remarks on Stillen had an upgraded the the pulleys nose cone 4-rib pulley to a 6-rib pulley to help the belt slips. Since the leaks will results in taking the supercharger off the car, the opportunity for the 6-rib upgrade kit was ordered.
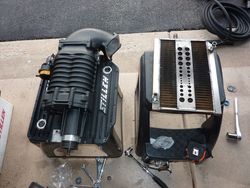
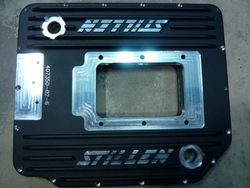
Here is the Stillen 407350-02-6 6-Rib Upgrade kit

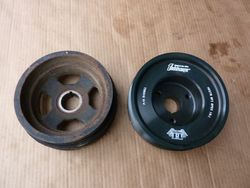
Old 4-rib pulley

Cooler removed from the Stillen top plate


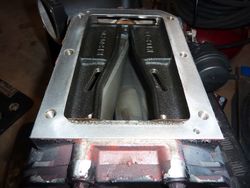
The underside of the Eaton MP62 supercharger


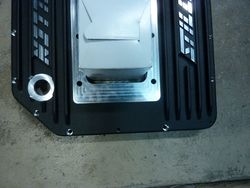
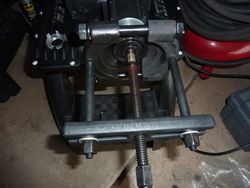
The new Stillen 407350-02-6 top plate. I stack the new top plate over the old plate to show hole the change to the plate. The new plate moved about 1/8 inch toward the rear as you can see the picture


The supercharger mounted onto the new plate

Top view of the new 6-rib pulley installed. The new bushing was installed onto the pulley shaft and it hidden from view. It is under the timing belt cover.

Old and new belt tensioner bushing

The belt tensioner with new bushing

Remove the 4-rib nose cone pulley


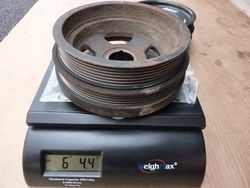
New 6-rib pulley


New 6-rib upgrade completed


All Done!!!!!!!
Walbro GSS342 fuel pump upgrade
Factory fuel pump assembly
Disassemble the plastic components to release the factory pump
The pump is coming out
Walbro on the left
Remove the sock fliter from the factory pump
Modify the Walbro
Install sock fliter onto the Walbro
Enlarge the swirl jet
Enlarge the regulator outlet
All done. Ready to go back into tank
---------- Post added at 12:12 PM ---------- Previous post was at 12:10 PM ----------
Coolers installation (oil, trans, an SC inter-cooler)
SC inter-cooler
Oil cooler
Trans fluid cooler
All three coolers mounted
Inter-cooler coolant pump
Oil cooler sandwich adapter
Stillen Stage 4 Installation
Stock plenum
Re-routed the crankcase breather hoses and installed the 4 rib pulley
Stillen lower plenum mounted on the lower manifold
Underside of the Stillen top plenum with the cooler
Tada
Oil catch can
Fabricated a bracket to mount the can
Goodyear EZ-Coil installed onto the two inter-cooler port to keep the coolant hose nicely bend
I'm ready for the dyno!!!!
Whose this dude?
On the dyno
On the first dyno run, we found some serious leaks around the inter-cooler coolant ports due to aged seals and rear portion of the supercharger. The tuner made remarks on Stillen had an upgraded the the pulleys nose cone 4-rib pulley to a 6-rib pulley to help the belt slips. Since the leaks will results in taking the supercharger off the car, the opportunity for the 6-rib upgrade kit was ordered.
Here is the Stillen 407350-02-6 6-Rib Upgrade kit
Old 4-rib pulley
Cooler removed from the Stillen top plate
The underside of the Eaton MP62 supercharger
The new Stillen 407350-02-6 top plate. I stack the new top plate over the old plate to show hole the change to the plate. The new plate moved about 1/8 inch toward the rear as you can see the picture
The supercharger mounted onto the new plate
Top view of the new 6-rib pulley installed. The new bushing was installed onto the pulley shaft and it hidden from view. It is under the timing belt cover.
Old and new belt tensioner bushing
The belt tensioner with new bushing
Remove the 4-rib nose cone pulley
New 6-rib pulley
New 6-rib upgrade completed
All Done!!!!!!!
Attachments
-
 P1080048_zps4e85002d.jpg119.5 KB · Views: 47
 -
 P1080050_zps4aa0778f.jpg127.4 KB · Views: 26
 -
 P1080054_zps8e584f6d.jpg128 KB · Views: 41
 -
 P1080055_zpsabbf0639.jpg126.6 KB · Views: 37
 -
 P1080112_zps4135ba79.jpg116.1 KB · Views: 45
 -
 P1080111_zps45f30dd2.jpg112.5 KB · Views: 26
 -
 P1080118_zps6078858b.jpg91.2 KB · Views: 28
 -
 P1080116_zpsa9b0b329.jpg116.6 KB · Views: 35
 -
 P1080114_zps82805bbd.jpg115.2 KB · Views: 60
 -
 P1080120_zps78c5f7f5.jpg115.8 KB · Views: 36
 -
 P1080119_zpsbfc29d4b.jpg115.9 KB · Views: 31
 -
 P1080123_zpsbee6e2fa.jpg96.2 KB · Views: 28
 -
 P1080122_zps857c59dc.jpg134.6 KB · Views: 26
 -
 P1080121_zps9a4edf34.jpg123.1 KB · Views: 37
 -
 P1080131_zps816d9b2b.jpg80.2 KB · Views: 48
 -
 P1080127_zpse95c017c.jpg132.9 KB · Views: 26
 -
 P1080124_zps5c4d9dcf.jpg105.2 KB · Views: 36
 -
 P1080138_zps511e77af.jpg124 KB · Views: 48
 -
 P1080136_zps47962cfc.jpg69.7 KB · Views: 62
 -
 P1080133_zps26ab13e0.jpg91.5 KB · Views: 62
 -
 P1080150_zpsd254ac99.jpg110.3 KB · Views: 37
 -
 P1080148_zpsd05e1e5a.jpg111.9 KB · Views: 30
 -
 P1080147_zps539f0cac.jpg121.9 KB · Views: 28
 -
 P1070283_zps4189a6ba.jpg187.4 KB · Views: 41
 -
 P1080151_zps4b10f2c5.jpg123.6 KB · Views: 36
 -
 P1070920_zps98575d04.jpg191 KB · Views: 35
 -
 P1070915_zps9f199fe4.jpg210.5 KB · Views: 34
 -
 P1080062_zpsb1e238fe.jpg198.4 KB · Views: 24
 -
 P1070922_zps79464928.jpg133.1 KB · Views: 32
 -
 P1070928_zps3a0ff902.jpg171.3 KB · Views: 39
 -
 P1070923_zpse68ee52f.jpg152.6 KB · Views: 32
 -
 P1070930_zps9ba01e10.jpg124.2 KB · Views: 39
 -
 P1070929_zps79ac8e33.jpg106.7 KB · Views: 32
 -
 P1070927_zps168a5f02.jpg144.3 KB · Views: 30
 -
 P1070926_zps8fc6ecb1.jpg145 KB · Views: 35
 -
 P1080162_zpsd854982e.jpg159.4 KB · Views: 39
 -
 P1070937_zps846d0b64.jpg174.8 KB · Views: 34
 -
 P1080177_zpsc4a9a5ca.jpg170.6 KB · Views: 35
 -
 P1080167_zpsad17311f.jpg203.3 KB · Views: 28
 -
 P1080164_zps6be0b483.jpg152.9 KB · Views: 36
 -
 P1080179_zps13960c37.jpg157.5 KB · Views: 40
 -
 P1080178_zps02f31703.jpg170.3 KB · Views: 25
 -
 P1080176_zpsdd2af592.jpg157.2 KB · Views: 22
 -
 P1080210_zps850ab50d.jpg138.2 KB · Views: 22
 -
 P1080174_zps244c4b2c.jpg92.7 KB · Views: 36
 -
 P1080231_zps5c101d58.jpg126.5 KB · Views: 55
 -
 P1080225_zps322cac6b.jpg219.4 KB · Views: 45
 -
 P1080224_zps249fde41.jpg203.2 KB · Views: 26
 -
 P1080236_zps12a3c7e7.jpg104 KB · Views: 37
 -
 P1080235_zps96f1234b.jpg101.1 KB · Views: 56
 -
 P1080243_zpse4dc5b2f.jpg150.9 KB · Views: 42
 -
 P1080239_zpsd03c53cb.jpg199.3 KB · Views: 24
 -
 P1080237_zps31a563c2.jpg192.2 KB · Views: 35
 -
 P1080250_zpsfd6a5691.jpg128.7 KB · Views: 34
 -
 P1080248_zps4ae67f1b.jpg122.3 KB · Views: 31
 -
 P1080247_zpse7c86ef9.jpg114.6 KB · Views: 33
 -
 P1080255_zpsb9c95c2e.jpg165.4 KB · Views: 29
 -
 P1080253_zpsb362eb07.jpg113.3 KB · Views: 27
 -
 P1080262_zps96031cb6.jpg132.2 KB · Views: 50
 -
 P1080260_zps4426a974.jpg149.1 KB · Views: 37
 -
 P1080258_zpsf37457ac.jpg94.3 KB · Views: 44
 -
 P1080264_zpsef18f4b8.jpg112 KB · Views: 56
 -
 P1080263_zpsfba05dcf.jpg159.8 KB · Views: 22
 -
 P1080269_zps97fe88c5.jpg174.9 KB · Views: 41
 -
 P1080267_zpsc00564d1.jpg110.4 KB · Views: 24
 -
 P1080266_zps67682635.jpg109 KB · Views: 40
 -
 P1080272_zps402e58c2.jpg169.5 KB · Views: 32
Last edited:
That's some great work you have done to the blue zebra
- Location
- Vancouver, BC
- Car
- 2008 FX35
Wow that's so epic Andy.
And Congrats to Zebra, next level stuff right here.
And Congrats to Zebra, next level stuff right here.
- Location
- Miami
- Car
- 2004 Infiniti FX35 Supercharged
Big props to Andy! Thanks for everything man. The only person I can fully trust to work on my FX. Thanks for taking and posting pictures also. Andy is an official Blue Zebra second owner right now")
Didn't it have a chance to drive it the way I want it yet, also moving to another place right now...
Will post a video from the final tune and a print out soon. We did tune the car when it was 94 degrees outside and very humid(60-80%), not ideal weather unfortunately. The tuner was aiming for 280 whp, but the best run was 265 whp. The car pulls like it has more than that, butt Dyno
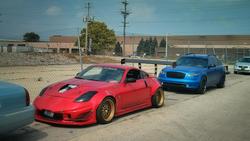
Also thanks to Eli(red Z on the picture) and Project X Customs in Shaumburg, IL for the tune.
Thanks everyone for the compliments.
Didn't it have a chance to drive it the way I want it yet, also moving to another place right now...
Will post a video from the final tune and a print out soon. We did tune the car when it was 94 degrees outside and very humid(60-80%), not ideal weather unfortunately. The tuner was aiming for 280 whp, but the best run was 265 whp. The car pulls like it has more than that, butt Dyno
Also thanks to Eli(red Z on the picture) and Project X Customs in Shaumburg, IL for the tune.
Thanks everyone for the compliments.
Last edited:
FX45Chicago
Member
- Location
- Chicago
- Car
- 2005 FX45 AWD
Holy Smokes Andy practically rebuilt the Z. Signature FX Andy Edition
Sent from my iPhone
Sent from my iPhone
- Location
- Miami
- Car
- 2004 Infiniti FX35 Supercharged

Thanks for the kind words guys. It was a huge project no doubt at all. I'm not going do that to me anymore. I too was a not disappointed with the number, but definite understand that the environmental condition affects the tune.
- Location
- Vancouver, BC
- Car
- 2008 FX35
Wait I am confused, I understand Dyno's measure very differently, and weather is a big factor, but isn't even 280 really low?
My car was measured at 257 with my NA engine. That is on a dyno which is locally referred to as "the heartbreaker".
My car was measured at 257 with my NA engine. That is on a dyno which is locally referred to as "the heartbreaker".
He didn't want to set the target too high since it an 03 and a 10 years old supercharger.
@meme, I have been thinking of get a tune too. Haven't gotten a price yet, but pretty sure it will around $700 - $800. Worth the $ to you? I have been running with Unichip. I took it off for them to dump my ECU at the dyno that day. Been driving around without the Unichip the last couple of days and swear, it not the same car.
@meme, I have been thinking of get a tune too. Haven't gotten a price yet, but pretty sure it will around $700 - $800. Worth the $ to you? I have been running with Unichip. I took it off for them to dump my ECU at the dyno that day. Been driving around without the Unichip the last couple of days and swear, it not the same car.
Unbelievable workmanship Andy, just unbelievable.
Share: