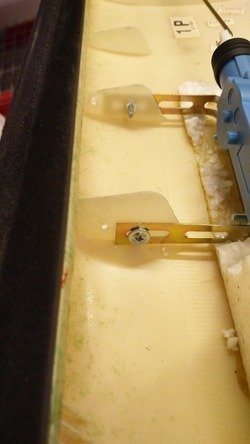
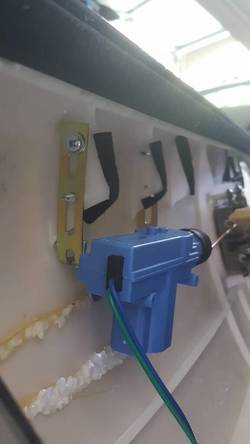
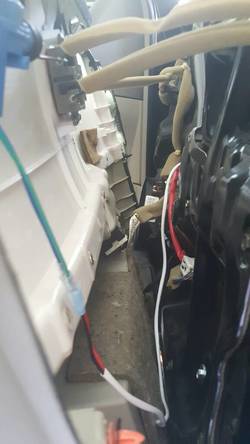
My daughter new car has kept me busy. The front 2 doors were acting up so i purchased the actuators from usactuators. com. They were shipped fast and came with some decent instructions. Started on the install thinking i could get both done in a couple hrs and call it a day, being that i am mechanically inclined [emoji2]. Followed the instructions to a tee and they were pretty good, but there are a couple areas that need better details. So, after 2.5 hrs I'm ready to put the panel back on. So i started on the left side and as I'm getting closed to the new actuator the clips wont stay on. of the clips won't stay on and keep popping off because the actuator is hitting the inside door frame, were it bows out on top [emoji35]. Did i mention i followed the instructions to a tee and I'm pretty mechanically inclined. I put the brackets were the pics had them etc. Not a fun day for me and 4 hrs later, I was done for today and will tackle it next weekend.
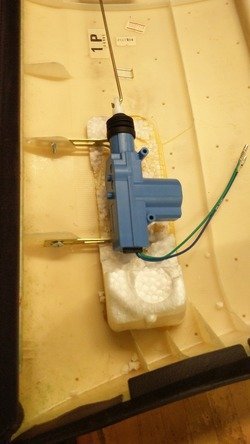
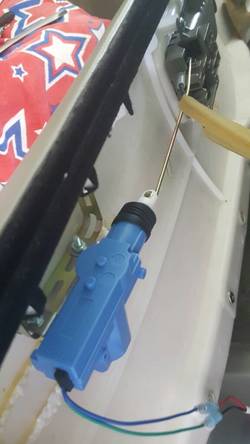
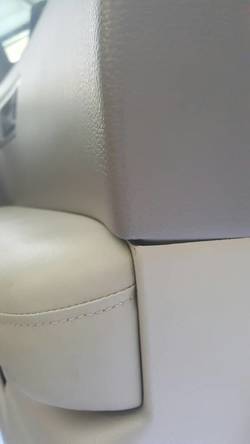
Anyone else have any issues like this? I think the actuator needs to be lowered etc. Here's some pics of the setup! In the one pic you can see it pressing on the armrest.
BTW, iI never got to the driver door, lmao!


Anyone else have any issues like this? I think the actuator needs to be lowered etc. Here's some pics of the setup! In the one pic you can see it pressing on the armrest.
BTW, iI never got to the driver door, lmao!
Attachments
-
 6326369970dcd7ea2baaff9f70142d42.jpg20.3 KB · Views: 76
 -
 460956e30a02fc43cb63d8600bb482c5.jpg43.6 KB · Views: 72
 -
 460956e30a02fc43cb63d8600bb482c5.jpg43.6 KB · Views: 81
 -
 6326369970dcd7ea2baaff9f70142d42.jpg20.3 KB · Views: 73
 -
 6326369970dcd7ea2baaff9f70142d42.jpg20.3 KB · Views: 93
 -
 6326369970dcd7ea2baaff9f70142d42.jpg20.3 KB · Views: 81
 -
 6326369970dcd7ea2baaff9f70142d42.jpg20.3 KB · Views: 83
 -
 41b7c35bf2c0eadc35fbd29da5836081.jpg46.1 KB · Views: 72
 -
 a42e477f5829664a88ce5a24d64127c7.jpg30.5 KB · Views: 83
 -
 41b7c35bf2c0eadc35fbd29da5836081.jpg46.1 KB · Views: 69
 -
 460956e30a02fc43cb63d8600bb482c5.jpg43.6 KB · Views: 78
 -
 460956e30a02fc43cb63d8600bb482c5.jpg43.6 KB · Views: 93
 -
 41b7c35bf2c0eadc35fbd29da5836081.jpg46.1 KB · Views: 86
 -
 41b7c35bf2c0eadc35fbd29da5836081.jpg46.1 KB · Views: 77
 -
 460956e30a02fc43cb63d8600bb482c5.jpg43.6 KB · Views: 79
 -
 a42e477f5829664a88ce5a24d64127c7.jpg30.5 KB · Views: 87
 -
 a42e477f5829664a88ce5a24d64127c7.jpg30.5 KB · Views: 79
 -
 a42e477f5829664a88ce5a24d64127c7.jpg30.5 KB · Views: 77
 -
 41b7c35bf2c0eadc35fbd29da5836081.jpg46.1 KB · Views: 80
 -
 a42e477f5829664a88ce5a24d64127c7.jpg30.5 KB · Views: 78