- Car
- 2010 White FX50S-sold
- Name
- Wayne
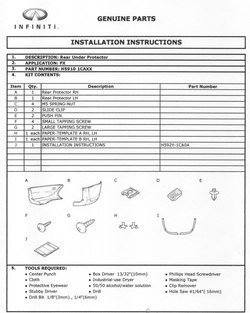
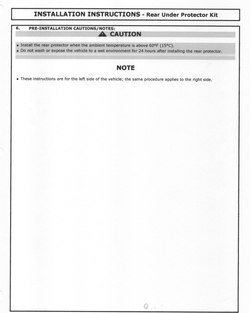
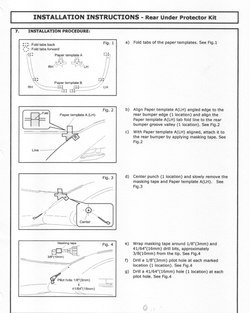
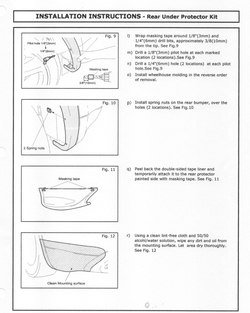
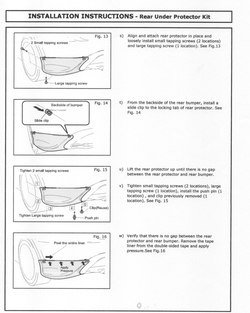
I have not installed this part yet but below are the OEM instructions for this part.


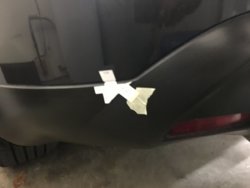
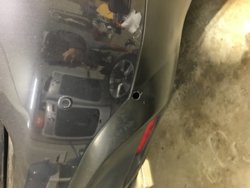
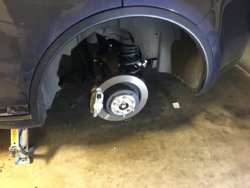
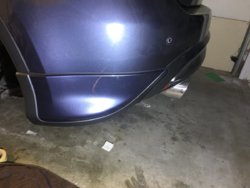
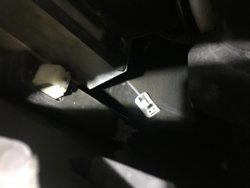
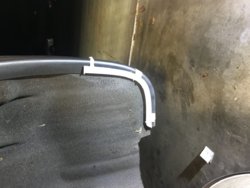
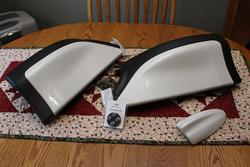
Here it is installed

Here it is installed
Attachments
-
 Aero%20Rear%20Under%20Protector%20P1_zpsdfq04zi9.jpg141.7 KB · Views: 129
 -
 Aero%20Rear%20Under%20Protector%20P2_zpswlkmebrk.jpg74.7 KB · Views: 116
 -
 Aero%20Rear%20Under%20Protector%20P2_zpswlkmebrk.jpg69 KB · Views: 130
 -
 Aero%20Rear%20Under%20Protector%20P1_zpsdfq04zi9.jpg141.7 KB · Views: 104
 -
 Aero%20Rear%20Under%20Protector%20P1_zpsdfq04zi9.jpg141.7 KB · Views: 131
 -
 Aero%20Rear%20Under%20Protector%20P2_zpswlkmebrk.jpg74.7 KB · Views: 99
 -
 Aero%20Rear%20Under%20Protector%20P3_zpsqlqv6sq0.jpg129 KB · Views: 108
 -
 Aero%20Rear%20Under%20Protector%20P3_zpsqlqv6sq0.jpg129 KB · Views: 121
 -
 Aero%20Rear%20Under%20Protector%20P3_zpsqlqv6sq0.jpg129 KB · Views: 132
 -
 Aero%20Rear%20Under%20Protector%20P4_zpsjimuogbc.jpg117.9 KB · Views: 123
 -
 Aero%20Rear%20Under%20Protector%20P4_zpsjimuogbc.jpg117.9 KB · Views: 100
 -
 Aero%20Rear%20Under%20Protector%20P4_zpsjimuogbc.jpg117.9 KB · Views: 125
 -
 Aero%20Rear%20Under%20Protector%20P5_zpsnuyycuoi.jpg128.3 KB · Views: 138
 -
 Aero%20Rear%20Under%20Protector%20P5_zpsnuyycuoi.jpg128.3 KB · Views: 97
 -
 Aero%20Rear%20Under%20Protector%20P5_zpsnuyycuoi.jpg128.3 KB · Views: 111
 -
 Aero%20Rear%20Under%20Protector%20P6_zpsiikop08m.jpg125.6 KB · Views: 124
 -
 Aero%20Rear%20Under%20Protector%20P6_zpsiikop08m.jpg125.6 KB · Views: 115
 -
 Aero%20Rear%20Under%20Protector%20P6_zpsiikop08m.jpg125.6 KB · Views: 108
 -
 IMG_1420_zps50e1e43f.jpg111.6 KB · Views: 97
 -
 IMG_1420_zps50e1e43f.jpg111.6 KB · Views: 124
 -
 IMG_1919_zpsypw7a8kb.jpg121 KB · Views: 116
 -
 IMG_1919_zpsypw7a8kb.jpg121 KB · Views: 113
 -
 IMG_1919_zpsypw7a8kb.jpg121 KB · Views: 129
 -
 IMG_1420_zps50e1e43f.jpg111.6 KB · Views: 107
Last edited: