TOOLS:
5/8” SPARK PLUG SOCKET
5/8” DEEP SOCKET
VARIOUS LENGTH EXTENSIONS (WOBBLE EXTENSIONS WOULD BE HELPFUL)
UNIVERSAL JOINT SOCKETS (WOULD OF PROBABLY MADE IT EASIER)
10MM SOCKET
SOCKET WRENCH
TORQUE WRENCH
SPARK PLUG GAPPER TOOL
MAGNETIC PICK-UP TOOL
SUPPLIES:
8 SPARK PLUGS (FACTORY USES NGK PLFR5A-11)
1-2 FOOT RUBBER HOSE (I USED 5/16”)
SAFETY:
EVEN IF THIS PROCEDURE DOESN’T REQUIRE GETTING UNDER THE VEHICLE, NEVER GET UNDER A VEHICLE WITHOUT THE USE OF HIGH QUALITY JACKSTANDS OR RAMPS.
==============================================================================
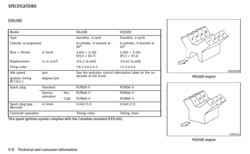
PROCEDURE:
REMOVE THE 3 ENGINE BAY COVERS.
STARTING ON THE PASSENGERS SIDE (WHICH IS THE HARDEST SIDE). UNPLUG ALL 4 COIL PACKS FROM CYLINDERS 2-4-6-8.
REMOVE THE COILPACKS BY UNSCREWING THE SINGLE 10MM BOLT THAT HOLDS EACH ON.
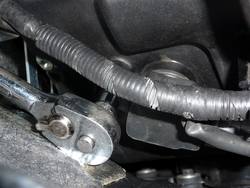
WORKING ON CYLINDER 8 IS A LITTLE TRICKY SO TEST OUT VARIOUS SOCKETS AND WRENCHES WHEN WORKING ON 8.
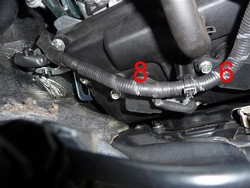
AFTER REMOVING THE COILPACKS, SOME PACKS YOU MAY HAVE TO BEND A LITTLE AS YOU PULL THEM OUT SINCE WE ARE WORKING VERY CLOSE TO THE WALLS OF THE ENGINE BAY. (YOUR HANDS PROBABLY WILL GET SCRAPED UP A BIT AFTER CHANGING YOUR PLUGS).
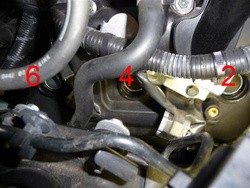
NOW THAT THE COILPACKS ARE GONE YOU CAN START REMOVING THE PLUGS. USING YOUR SPARK PLUG SOCKET REMOVE PLUG 8. THIS ONE IS A BIT OF A PAIN. TEST OUT VARIOUS LENGTH SOCKET EXTENSIONS AND FIND WHAT WORKS BEST FOR YOU.
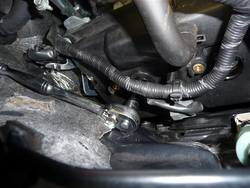
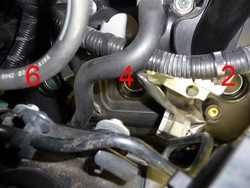
FINISH REMOVING PLUGS 6, 4, AND 2 (2 IS THE EASIEST).
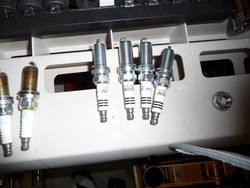
GET YOUR NEW PLUGS AND CHECK THE GAP, IF YOU DON’T KNOW HOW TO GAP YOUR PLUGS PLEASE RESEARCH GOOGLE. YOU DO NOT WANT TO BREAK THE PLUGS.
INSTALL THE PLUGS USING THE 5/16” RUBBER HOSE AS SHOWN.
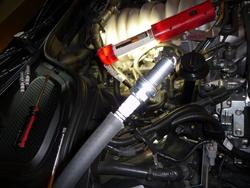
INSERT THE PLUGS INTO EACH CYLINDER AND SCREW THEM IN BY TURNING THE RUBBER HOSE CLOCKWISE. REMOVE THE HOSE.
TIGHTEN EACH PLUG USING A 5/8” DEEP SOCKET. TORQUE EACH PLUG TO 18FT/LBS (THERE WAS NO WAY I COULD HAVE USED MY TORQUE WRENCH IN THE SPACE, SO I GUESSTIMATED. YOU DO NOT WANT TO TIGHTEN THE PLUGS TOO TIGHT, YOU MAY STRIP THE THREADS).
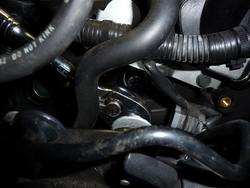
REPLACE THE COILPACKS, TIGHTEN THE 10MM BOLTS TO 62INCH/LBS (NOTE: INCH-POUNDS). REPLUG THE COILPACK WIRES.
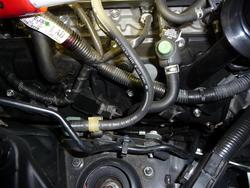
YOU ARE DONE WITH THE HARDEST SIDE!!!
NOW DO THE DRIVERS SIDE, YOU MAY HAVE TO REMOVE YOUR AIRBOX AND INTAKE…I AM NOT SURE, SINCE I HAVE AN INJEN. I AM NOT GOING INTO FULL DETAIL WITH THE DRIVERS SIDE SINCE YOU WILL NOW BE A PRO AFTER TACKLING THE PASSENGERS SIDE.
UNPLUG EACH COILPACK 1-3-5-7.
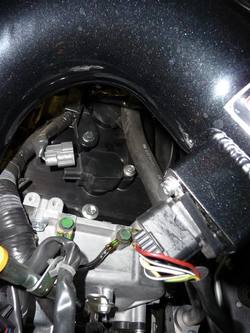
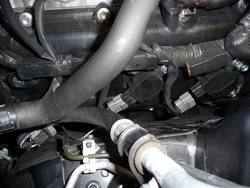
UNSCREW THE COILPACK BOLTS.
REMOVE THE COILPACKS.
REMOVE THE PLUGS USING VARIOUS EXTENSIONS FROM CYLINDERS 1-3-5-7 WITH YOUR 5/8” SPARK PLUG SOCKET WRENCH.
INSERT THE NEW PLUGS USING THE RUBBER HOSE.
TIGHTEN TO 18FT/LBS.
REPLACE THE COILPACKS AND TIGHTEN EACH COILPACK SCREW TO 62INCH/LBS.
REPLACE THE COILPACK WIRES.
REPLACE EVERYTHING ELSE YOU HAVE REMOVED (INTAKE, COVERS, ETC.).
START YOU CAR AND YOU ARE DONE…
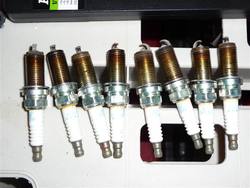
OLD PLUGS:
5/8” SPARK PLUG SOCKET
5/8” DEEP SOCKET
VARIOUS LENGTH EXTENSIONS (WOBBLE EXTENSIONS WOULD BE HELPFUL)
UNIVERSAL JOINT SOCKETS (WOULD OF PROBABLY MADE IT EASIER)
10MM SOCKET
SOCKET WRENCH
TORQUE WRENCH
SPARK PLUG GAPPER TOOL
MAGNETIC PICK-UP TOOL
SUPPLIES:
8 SPARK PLUGS (FACTORY USES NGK PLFR5A-11)
1-2 FOOT RUBBER HOSE (I USED 5/16”)
SAFETY:
EVEN IF THIS PROCEDURE DOESN’T REQUIRE GETTING UNDER THE VEHICLE, NEVER GET UNDER A VEHICLE WITHOUT THE USE OF HIGH QUALITY JACKSTANDS OR RAMPS.
==============================================================================

PROCEDURE:
REMOVE THE 3 ENGINE BAY COVERS.
STARTING ON THE PASSENGERS SIDE (WHICH IS THE HARDEST SIDE). UNPLUG ALL 4 COIL PACKS FROM CYLINDERS 2-4-6-8.
REMOVE THE COILPACKS BY UNSCREWING THE SINGLE 10MM BOLT THAT HOLDS EACH ON.

WORKING ON CYLINDER 8 IS A LITTLE TRICKY SO TEST OUT VARIOUS SOCKETS AND WRENCHES WHEN WORKING ON 8.

AFTER REMOVING THE COILPACKS, SOME PACKS YOU MAY HAVE TO BEND A LITTLE AS YOU PULL THEM OUT SINCE WE ARE WORKING VERY CLOSE TO THE WALLS OF THE ENGINE BAY. (YOUR HANDS PROBABLY WILL GET SCRAPED UP A BIT AFTER CHANGING YOUR PLUGS).

NOW THAT THE COILPACKS ARE GONE YOU CAN START REMOVING THE PLUGS. USING YOUR SPARK PLUG SOCKET REMOVE PLUG 8. THIS ONE IS A BIT OF A PAIN. TEST OUT VARIOUS LENGTH SOCKET EXTENSIONS AND FIND WHAT WORKS BEST FOR YOU.

FINISH REMOVING PLUGS 6, 4, AND 2 (2 IS THE EASIEST).

GET YOUR NEW PLUGS AND CHECK THE GAP, IF YOU DON’T KNOW HOW TO GAP YOUR PLUGS PLEASE RESEARCH GOOGLE. YOU DO NOT WANT TO BREAK THE PLUGS.

INSTALL THE PLUGS USING THE 5/16” RUBBER HOSE AS SHOWN.

INSERT THE PLUGS INTO EACH CYLINDER AND SCREW THEM IN BY TURNING THE RUBBER HOSE CLOCKWISE. REMOVE THE HOSE.
TIGHTEN EACH PLUG USING A 5/8” DEEP SOCKET. TORQUE EACH PLUG TO 18FT/LBS (THERE WAS NO WAY I COULD HAVE USED MY TORQUE WRENCH IN THE SPACE, SO I GUESSTIMATED. YOU DO NOT WANT TO TIGHTEN THE PLUGS TOO TIGHT, YOU MAY STRIP THE THREADS).

REPLACE THE COILPACKS, TIGHTEN THE 10MM BOLTS TO 62INCH/LBS (NOTE: INCH-POUNDS). REPLUG THE COILPACK WIRES.

YOU ARE DONE WITH THE HARDEST SIDE!!!
NOW DO THE DRIVERS SIDE, YOU MAY HAVE TO REMOVE YOUR AIRBOX AND INTAKE…I AM NOT SURE, SINCE I HAVE AN INJEN. I AM NOT GOING INTO FULL DETAIL WITH THE DRIVERS SIDE SINCE YOU WILL NOW BE A PRO AFTER TACKLING THE PASSENGERS SIDE.
UNPLUG EACH COILPACK 1-3-5-7.


UNSCREW THE COILPACK BOLTS.
REMOVE THE COILPACKS.
REMOVE THE PLUGS USING VARIOUS EXTENSIONS FROM CYLINDERS 1-3-5-7 WITH YOUR 5/8” SPARK PLUG SOCKET WRENCH.
INSERT THE NEW PLUGS USING THE RUBBER HOSE.
TIGHTEN TO 18FT/LBS.
REPLACE THE COILPACKS AND TIGHTEN EACH COILPACK SCREW TO 62INCH/LBS.
REPLACE THE COILPACK WIRES.
REPLACE EVERYTHING ELSE YOU HAVE REMOVED (INTAKE, COVERS, ETC.).
START YOU CAR AND YOU ARE DONE…
OLD PLUGS:

