Today I've recieved the button seat heating. And decided not to postpone for a long time and change immediately.

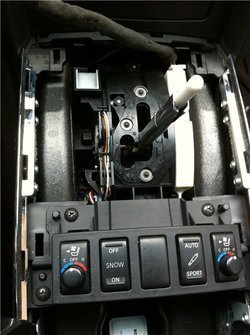
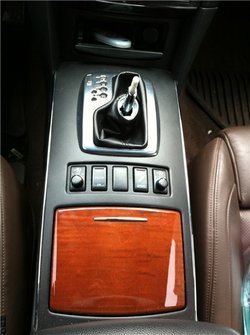
That's initially looked tunnel.
(Of course I took the handle AUTO)

Next, open the armrest and take out the front panel

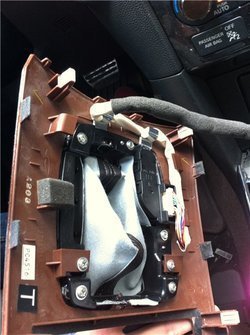
Next pry top of the tunnel and from the armrest pry her and gently take out:

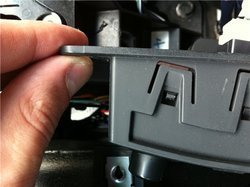
Here are clips on it. break them down is difficult:

and here it is the block that you want us to withdraw. For this untwists 4 black bolts and then take out all connectors for easy installation of new buttons

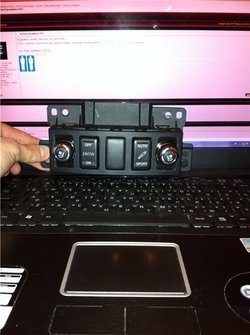
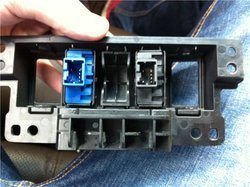
to remove the old buttons, you need to remove the clips holding them

For added convenience, first pry upper holder buttons, and then the lower (guided by the pictures)

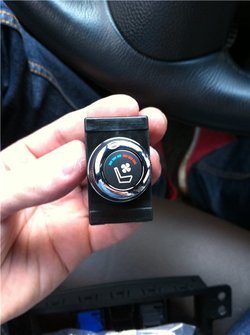
Here is a comparison of old and new buttons:

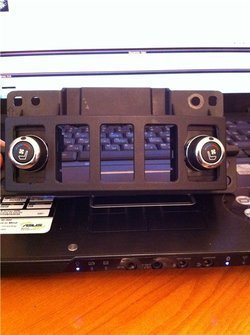
But try the new place to place, then found a slight problem. New buttons do not stand up as Twister at the base of more than a gap in which it must enter. This is due to the fact that mine is different from the new one. To solve this problem had little refine block, which should stand button.
However, since I did not have the normal tools and in school I did not have the drawing (in connection with what is ideally a straight line to me is rarely possible to draw), but it is not particularly noticeable.


The idea was Saw a small semi-circular hole that would Twister clearly went into it and everything was like a plant. But failed.
Here's how it looks in the end

Right now I think how to close the groove.
Who has any ideas?
have an idea to do it with splen or polyurethane foam or polystyrene (of course it will be painted in black or it will be coated by plasti dip)
That's initially looked tunnel.
(Of course I took the handle AUTO)
Next, open the armrest and take out the front panel
Next pry top of the tunnel and from the armrest pry her and gently take out:
Here are clips on it. break them down is difficult:
and here it is the block that you want us to withdraw. For this untwists 4 black bolts and then take out all connectors for easy installation of new buttons
to remove the old buttons, you need to remove the clips holding them
For added convenience, first pry upper holder buttons, and then the lower (guided by the pictures)
Here is a comparison of old and new buttons:
But try the new place to place, then found a slight problem. New buttons do not stand up as Twister at the base of more than a gap in which it must enter. This is due to the fact that mine is different from the new one. To solve this problem had little refine block, which should stand button.
However, since I did not have the normal tools and in school I did not have the drawing (in connection with what is ideally a straight line to me is rarely possible to draw), but it is not particularly noticeable.
The idea was Saw a small semi-circular hole that would Twister clearly went into it and everything was like a plant. But failed.
Here's how it looks in the end
Right now I think how to close the groove.
Who has any ideas?
have an idea to do it with splen or polyurethane foam or polystyrene (of course it will be painted in black or it will be coated by plasti dip)
Attachments
-
 9117d7c3ed4a.jpg41.9 KB · Views: 53
 -
 9117d7c3ed4a.jpg41.9 KB · Views: 65
 -
 c4a1ebce7dde.jpg52.3 KB · Views: 53
 -
 c4a1ebce7dde.jpg52.3 KB · Views: 70
 -
 3aa328a9dade.jpg66.2 KB · Views: 56
 -
 3aa328a9dade.jpg66.2 KB · Views: 62
 -
 c2d2a0256b27.jpg63 KB · Views: 50
 -
 c2d2a0256b27.jpg63 KB · Views: 46
 -
 a10ad51301be.jpg50.5 KB · Views: 59
 -
 a10ad51301be.jpg50.5 KB · Views: 48
 -
 bf44414c1215.jpg65.2 KB · Views: 66
 -
 bf44414c1215.jpg65.2 KB · Views: 60
 -
 c89d97659ce8.jpg53.7 KB · Views: 57
 -
 c89d97659ce8.jpg53.7 KB · Views: 54
 -
 ef4a734acefb.jpg53.7 KB · Views: 65
 -
 ef4a734acefb.jpg53.7 KB · Views: 77
 -
 75ece006852f.jpg60.1 KB · Views: 49
 -
 75ece006852f.jpg60.1 KB · Views: 66
 ?
?