Here's the finished product. Should the reader chose to go this route, I have a few tips rather than a formal type diy.
I cannot say one brand is better than the next. I used products from leatherworldtech.com and no other, so I wouldn't know. After degreasing with Krud Kutter and a vegetable brush, I used a cleaner from leathermajic.com as well as their conditioner, which is an oil based product. After determining from all I've read and several people in the business, I came to the conclusion that automotive leather conditioners are b.s. It's a painted surface. Best a conditioner can do is fill in micro-pores on the surface, like a wax does on the exterior paint. If it soaks in at all, it's going to be in the damaged, creased, high-wear areas where the top coat from the factory is gone. I cleaned that crap off and moved on.
LWT's cleaner/prep has denatured alcohol in it and I was advised by them to just use straight denatured alcohol. I used a combo of both, theirs for low wear, good condition areas and straight den. alcohol for the damaged and high-wear areas along with the grey scotch-bright pad, to agitate, that comes in the "deluxe kit". I cut this pad into smaller sections to make it easier to work with. I also used some old white dish towels so I could see the original color coming off on the towel which told me I had removed the original top coat and gotten down to the paint. Don't wipe it in, wipe it up. Do one panel at a time and then use the rag to lift the alcohol and everything that's coming off with it in one direction until the panel is dry, then move on to the next panel.
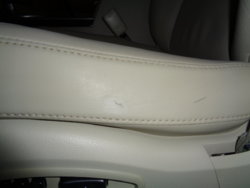
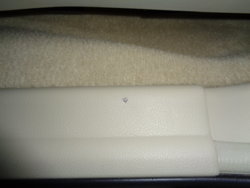
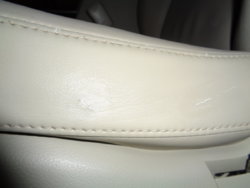
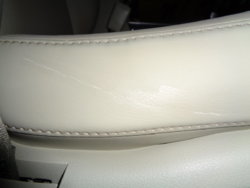
After cleaning the leather, I made the few minor repairs to the vinyl, which is such an easy thing to do, I'll skip that part. Whatever kit you chose, they'll have instructions.
I did some r&r (reading & research - wish I had time for rest & recoup.) and found that using steam might benefit the creases and wrinkling that comes with neglected, or at least improperly cared for, older auto leather. I also wanted to wash all the leather down, just in case there was some residual whatever still clinging on. I used an old upholstery steamer I had. It work really well. It helped loosen up the leather and add some warm hydration back to it, allowing me to work out some wrinkles and dramatically improve others. The holes in the perforated panels make it easy for the steam to get into the leather. I plan on lifting up the bolster on the driver side to work that top piece of leather with steam from underneath and work on the driver side seat area a bit more. You can fill these wrinkles in with the same flexible filler used for repairs. I may do some crack filling down the road but I appreciate the character of leather that's broken it. Besides, it's gonna wrinkle again anyway.
I let the interior air out over night before starting. Application of the paint can be done by spraying or stippling. I think it will be easier for most to get the uniform look one would expect using a sprayer and removing the seats as well, but I've done a lot of painting, having flipped a few homes, and getting into the areas where two panels meet and fold into each other is gonna be interesting with an air gun imo. Stippling is a bitch and takes much longer. You need to do one panel at a time and always keep the panel wet without applying too much paint and applying it evenly, especially with this leather paint. You also have to develop your way of handling the foam applicator your using. Once I stippled a panel, I used a small travel sized blow dryer to dry the panel then buffed it out with a dish towel. The first coat will give you a chance to get a feel for how you're going to get a clean, even finish on the 2nd coat.
To the lay person, I would recommend pulling the seats, use a small piece of foam to get into all the nooks & crannies so to speak with two light coats, preferably 1/2 to 1 day apart between coats and then spraying several coats over a period of 2-3 days for the best and lasting results. This is the first time I've applied paint to leather, so take my advice with a grain or the whole salt shaker!
If you chose the hard, long road of stippling the paint on, 2 coats that are just thick enough to cover 100% will do the trick, assuming you stay with the oem color.
LWT recommends 2 min - 4 max coats. If you happen to "lose" some of the holes in the perforated leather panels, use a toothpick. I had maybe 25 holes that were marginally covered after the 2nd coat. If you get a little somewhere you wish you hadn't, wait till your done with the panel your working on, then clean it off with a soap/water mix. I used about 7 3/4ths of the 8oz bottle of paint and did all the leather on all seating surfaces + all four head rests + the vinyl bolsters on both front seats. The whole deal, from cleaning to steaming to painting took about 30 hours.
Leathermajic wrote me an estimate for $1,350 to do less than what I did and then they backed out. Those companies that come to you or you to them get it all done way too fast. I think this is why reviews are all over the place. In the end, so long as the paint is of high quality, similar to oem, you're just painting over paint after removing the clear coat, not much different than repainting the exterior. Prep and application is key.
I'm really pleased with the way it came out. I was at my favorite restaurant this weekend. They always have at least one Maserati sitting out front as a form of advertisement for the local dealer. This time they had a Ghibli & Levante. I looked inside and the leather had a matte-egg shell finish. I guess that's how the Fx was new? Can't remember, but it's matte-egg shell now.
Now I'm considering how best to protect it. The paint has urethane built in. LWT sells a protective topcoat product... called Topcoat, which is essentially the paint without pigment. Guy @ LWT said topcoat, no topcoat, whatever. Conditioners are out for me now. I thought, what's the best way to protect paint from wear, dirt & uv. Wax. I looked online to see if anyone's thought of or has tried to wax their auto leather and I found 2 different products that are a leather/vinyl wax. That makes a lot more sense to me than these so called conditioners. I don't want the leather to pick up too much sheen though.
I've used turtle wax ICE since it was a paste. It works wonders for the black plastic outside the vehicle, so why not inside? I used this on the steering wheel and shift knob. The areas of the wheel that I painted black as well as the shift knob didn't seem to be affected in a negative way at all but the two sections of the wheel that are original became slick, like it was before I prepped it. Hmm... got some testing & tuning to do for this mod.
edited 11/1 - I spoke with Turtle Wax today. They haven't tested the ICE product on the interior but do have a leather/vinyl wax. It's got cleaning properties to it as well which is not what I'm looking for. I spoke with Collinite who also makes a leather/vinyl wax but it too has cleaning solvents in it. After speaking with another rep at LWT, I decided to go with their Topcoat which is a urethane coating, basically the paint without pigment but with additions to improve the feel of the topcoat. Got the matte finish which is the same as the paint I used. It, like the paint, is manufactured at or above oem standards. I found that using the wax will make any future repairs much more difficult but will leave it on the newly painted black sections of the wheel & knob to see how it holds up for now. Still very curious but don't want to be a guinea pig with the entire interior. You apply the Topcoat the same way as you would the paint, not only to the newly painted surfaces but also the original ones and that's what I'm going to do so that it's all got a refreshed protective matte finish.
There's a noticeable difference in the feel of the refinished leather. It feels similar to 1,200 grit sand paper, or sort of like an unfinished, weathered leather. It's not so noticeable until I glide my hand across a vinyl panel that's stock. Applying the topcoat to the refinished panels should improve the feel and applying it to the stock panels should even it all out. I'll post results.
Here's the passenger seat.


Here's the driver's seat.


And the back seat. Turned the 5 seater into a 4 seater.


I tried to paint around the Infiniti logo, but couldn't pull it off. Thought it would matter, but it didn't. Glad I didn't waste too much time attempting that.