
- Location
- Dallas, TX
- Car
- 2007 FX35 RWD
Here is the way I went about changing out my OEM filter for K&N. I think it takes a bit longer because more stuff is removed, but it should make things easier. You might be able to find another way that is easier for yourself.
For starters, everything below this blue line will come out, and everything above will stay.

Remove this part first to make getting the other stuff out easier.

To do so, remove these two plastic "screws" but first unscrewing them and then popping out the inner part. Be careful not to lose either part.


After that piece is removed, you need to unclip these 4 clips, as well as remove a bolt holding down the box. 2 clips on top(shown here), one on the right side, and one on the left side. Bolt is on the far right.


This is the right side clip, harder to see.

From here, you need to pull up on the box kinda hard to release it from the holes it sits in below the box. Then you can slide the closer half of the box to the left to remove the old filter and install the new. From this point, it's basically just everything in reverse order to put it all back together.
Any issues, let me know. I can update things as needed.
For starters, everything below this blue line will come out, and everything above will stay.
Remove this part first to make getting the other stuff out easier.
To do so, remove these two plastic "screws" but first unscrewing them and then popping out the inner part. Be careful not to lose either part.
After that piece is removed, you need to unclip these 4 clips, as well as remove a bolt holding down the box. 2 clips on top(shown here), one on the right side, and one on the left side. Bolt is on the far right.
This is the right side clip, harder to see.
From here, you need to pull up on the box kinda hard to release it from the holes it sits in below the box. Then you can slide the closer half of the box to the left to remove the old filter and install the new. From this point, it's basically just everything in reverse order to put it all back together.
Any issues, let me know. I can update things as needed.
Attachments
-
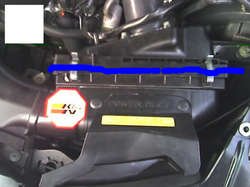 Photo_052208_008-1.jpg45.6 KB · Views: 39
 -
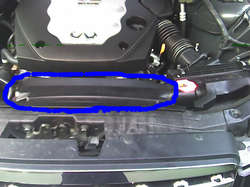 Photo_052208_007-1.jpg58.8 KB · Views: 43
 -
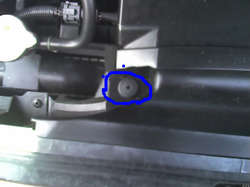 Photo_052208_006-1.jpg31.2 KB · Views: 41
 -
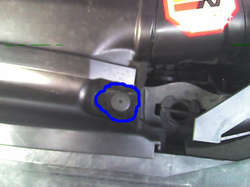 Photo_052208_005-1.jpg38.1 KB · Views: 34
 -
 Photo_052208_002-1.jpg49 KB · Views: 35
 -
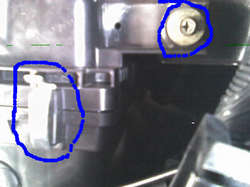 Photo_052208_004-1.jpg47.7 KB · Views: 55
 -
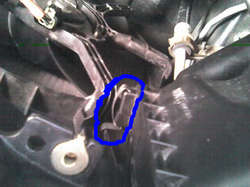 Photo_052208_003-1.jpg61.9 KB · Views: 45
 -
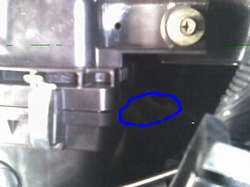 Photo_052208_004-3.jpg42.3 KB · Views: 54