*Brianna* :: 2008 Infiniti FX35

Wrapped and Bagged
Congrats bro, nice pick ups too
 
Last edited:
:congrats: :good: Wow, great job in taking home that award, meme. Glad you like the paddle shifters. You will love it more after it is installed. They really give the ride a fresh and up to date look and feel.
 
For my own records more than anything, since I havn't updated my build threads here or elsewhere really:

Stopped by BPG autosound (A local stereo shop) - They managed to almost immediately fix my poor subwoofer quality issues, basically the amp was setup incorrectly by the shop that did the install. I also talked with them about plans going forward once I am ready to rip out the rest of the Bose garbage and get something real going. Needless to say I have other priorities with the car so this will wait for awhile.

Car was broken into Saturday May 23, 2015. Luckily nothing much was stolen out of the vehicle. Damage to the vehicle was limited, but still very frustrating. Drivers side rear window was smashed, the various interior and exterior trim in that area was damaged, as well as the rear seat cushion was torn, the door jamb paint was scratched, and the wrap on the door was damaged. Currently working with insurance, a body shop, and WrapWorkz to get the car all fxed up (Pun intended). Unbelievably upsetting experience for me, as there is a lot of people's effort and time in this vehicle as well as my own money, and I hate to see that wrecked by some inconsiderate low life asshole.

In the mean time the modding doesn't stop:
-Paddle Shifters were installed, unfortunately ran into some problems with that, but Andy is walking me through sorting it all out. These will be finished after the car gets fixed.
-I also installed a couple of my ancillaries, one being a USB port by my VDC switch, and the other being my JL BassControl knob in the same area. I'll grab a picture of these when I can.

I have also purchased a bunch of parts:
-TBW Belly Pan in Raw Aluminum
-NRG polished Hood Struts
-Custom Made Baid Polish CoilPack Covers
-Custom Made (and Chromed) Baid Polish Coolant lines (These follow the principles of the DM2 coolant bypass mod, it will delete Oil warmer line circuit, Throttle body warmer line circuit, Radiator bypass line, and thermostat bypass)

Still in my plans:
-NWP 75mm TB
-Furookie 3.5" Intake
-KoyoRad or Mishimoto Radiator
-Mishimoto Fan Shroud
-Shave & Paint my Engine Cowls
-Paint my Core support
-Sean Chase PS tank and overflow tank
-Westcoast fasteners full ti Engine hardware kit
 
Brakes are on!

Rear to Rear comparison:

IMAG0325_zpswobspfb4.jpg

IMAG0324_zpscy07iqjs.jpg

End result Rear:

IMAG0335_zpspijgcx9y.jpg

End result front:

IMAG0336_zpsdhnvi8tn.jpg

I bedded them last night, they still feel a little spongy even after bleeding them three times, probably just need to settle a bit over the next few days. They feel incredible already though, so much more power than the factory setup.


I also received my parts from TBW, and Baid Polish. Mounted my underpan already, damn Shadow wasn't fucking around, when this thing hits the ground it makes a way louder noise than the stock pan. It sits much higher than my sagging plastic pan though, so it scrapes much less, I'll readjust my ride height a little higher in the front so that it never scrapes.
 

Attachments

  • IMAG0325_zpswobspfb4.jpg
    IMAG0325_zpswobspfb4.jpg
    140.8 KB · Views: 92
  • IMAG0324_zpscy07iqjs.jpg
    IMAG0324_zpscy07iqjs.jpg
    120 KB · Views: 63
  • IMAG0335_zpspijgcx9y.jpg
    IMAG0335_zpspijgcx9y.jpg
    109.3 KB · Views: 78
  • IMAG0336_zpsdhnvi8tn.jpg
    IMAG0336_zpsdhnvi8tn.jpg
    107 KB · Views: 51
Those are huge.
May want to check for bubbles & bleed again to get rid of spongee
 
Thanks Everyone, I am super pleased with them thusfar, they look miles better than my clapped out stock setup. As you can see in the picture of the old rotors, mine we're just toast. I had plenty of life on the pads, but I don't care, couldn't live with them any longer.

Those are huge.
May want to check for bubbles & bleed again to get rid of spongee

Yeah gonna drive a little bit like this for it to isolate the air, then bleed one more time.

I actually couldn't get the flare nut off the front, needed a torch and I didn't have one, so I'm going to do that next weekend and re-bleed everything one more time.

I used ATE SuperBlue fluid, the blue was awesome, we knew exactly when my old fluid was out, and then just kept bleeding each corner until no more air bubbles.
 
Last edited:
& they dont make it anymore. type 200 gold only, but your next change is a ways out. It will be easy to see the color change then too
 
& they dont make it anymore. type 200 gold only, but your next change is a ways out. It will be easy to see the color change then too

The guy told me that ever since the "new" formula type 200 fluid came out the formula has been the exact same as the superblue, just the colour has been different.

He also said that the Superblue was already out of production, and he said that the type 200 may follow it out the door as well. Sounds like the german company that makes the stuff doesn't care to stay in the brake game. Kinda makes sense the only product they currently sell related to braking is that fluid. They don't make rotors, pads, lines, brake kits, just fluid. :bulgy-eyes:

Looks great Meme!

Love it .

^thanks Guys.
 
Ur ride is totally sick, meme!!!

Thanks!

Somebody just recently posted this picture on a car page on FB, I had never seen the picture before...

10467007_708697135852042_5467631823488458099_o_zpscelyyroy.jpg

It was taken at a car show in Vancouver last summer. The car is a pretty different animal now. Haha.
 

Attachments

  • 10467007_708697135852042_5467631823488458099_o_zpscelyyroy.jpg
    10467007_708697135852042_5467631823488458099_o_zpscelyyroy.jpg
    78 KB · Views: 57
Okay. I thought I had updated this, but apparently not.

Gonna copy a bit of this from sporadic updates I had made on a local forum.

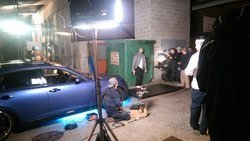
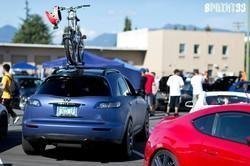
My car was involved in the filming of a TV show about a few weeks back. The car was on set for a total of 3 days, my car was one of three being utilized by the "baddies" in that episode; some sort of Latin street gang. I'll save you guys all the agony of details and stuff, but it was pretty cool I guess.

Quick shot they probably wouldn't want me posting from set (meh fuck it):


IMAG0434_zpsbg1mst4k.jpg


If anyone is interested you can check out Season 1 Episode 4 of Lucifer as that is the one my car is involved in. I just watched the pilot episode myself, and the show actually looks pretty cool. It is on Fox though, so it will probably get cancelled... lol

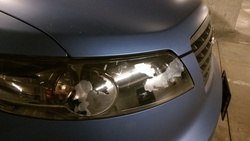
With that said while on set there was a bit of an incident with some tinting film on my headlights:


IMAG0439_zpsbssk71lv.jpg


IMAG0438_zpsxawokby6.jpg


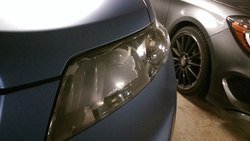
With that said the production company sorted me out quickly, and thanks to Jeff I already have a set of new headlights on hand to install. (Thanks Jeff, seriously).

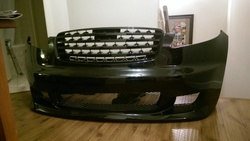
The headlights have to wait until next week because I also managed to snag another piece:

IMAG0452_zpsaflxzjpn.jpg

I previously bought the black badgeless grill, and I finally managed to get a Rookie front bumper. Just need to get it wrapped so I can install both the headlights and the bumper.

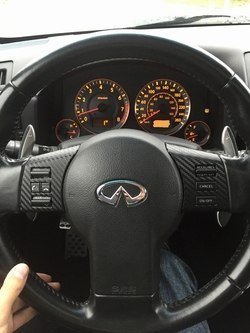
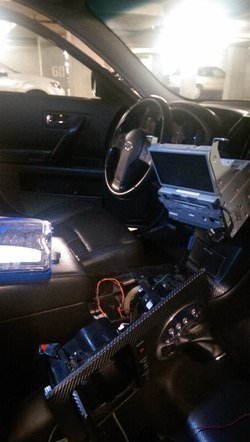
Now for something which I did finally manage to complete:

IMAG0454_zpsywirnh0p.jpg

This was while wiring up the paddle shifters. Fuck it was a pain working in behind the head unit soldering up wires. But I managed to get it done, and all with soldered joints, heat shrink tubing, and electrical tape. Looks totally factory.

Final Product:

6a7a6522-b734-4cc8-9d94-0178a16df66f_zps2vhciu13.jpg

Big thanks to Andy again, there was some initial problems, but he got everything sorted and walked me through install every step of the way. This is something that can be done by anyone as long as you are willing to get in there.

Bonus shot:

IMG_8210_zpsom6n0ewt.jpg
 

Attachments

  • IMAG0434_zpsbg1mst4k.jpg
    IMAG0434_zpsbg1mst4k.jpg
    126.8 KB · Views: 55
  • IMAG0438_zpsxawokby6.jpg
    IMAG0438_zpsxawokby6.jpg
    100.2 KB · Views: 49
  • IMAG0439_zpsbssk71lv.jpg
    IMAG0439_zpsbssk71lv.jpg
    101.5 KB · Views: 49
  • 6a7a6522-b734-4cc8-9d94-0178a16df66f_zps2vhciu13.jpg
    6a7a6522-b734-4cc8-9d94-0178a16df66f_zps2vhciu13.jpg
    136.3 KB · Views: 63
  • IMAG0454_zpsywirnh0p.jpg
    IMAG0454_zpsywirnh0p.jpg
    109.3 KB · Views: 52
  • IMAG0452_zpsaflxzjpn.jpg
    IMAG0452_zpsaflxzjpn.jpg
    107.8 KB · Views: 47
  • IMG_8210_zpsom6n0ewt.jpg
    IMG_8210_zpsom6n0ewt.jpg
    216 KB · Views: 59
Back
Top