Bracing advice please!

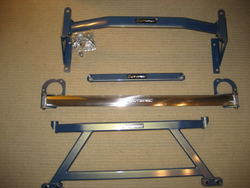
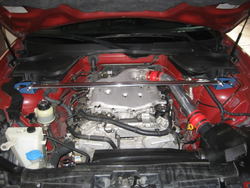
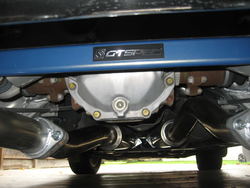
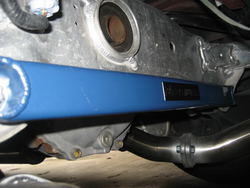
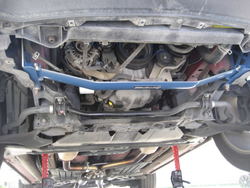
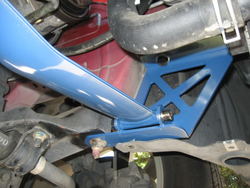
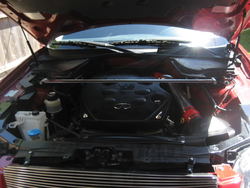
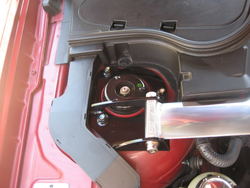
well blast it, I didn't get an e-mail today! I am waiting for all the braces underneath the FX, already had a strut tower.

oh well I've waited this long I guess what's another week
 
So am I one of a few or one of many who don't have any braces.
I need to save up for braces now amongst many other things.
What are the odds of having another group buy in a couple months or so?
 
Hey Jumbosrule,
I read your post, and I hope you do know that I had to have the passenger side exhaust pipe heated and pinched to fit the GTSpec bracing. If I had to do it over again, I would first try to force the bracing in there without heating the exhaust pipe. I had a feeling that might have worked with a little bit of muscle. If not, then perhaps you can try the heating route. Keep in mind, by forcing it in there you might have unwanted rattles....not sure though.

FYI, last month I ended up paying an exhaust shop to redo the piping. I just couldn't stand the pinched piping any more. It's a mental thing, I guess :err:
 
Yep - I read about your issues and I even saw pictures - so I just didn't order that particular brace. In addition to the exhaust clearance, this brace seems to be the lowest (least ground clearance) of all the braces, and since I'm planning on lowering, I just didn't want to worry about it.

Are you lowered? I'd like to see shots of your brace with redone exhaust...

So am I one of a few or one of many who don't have any braces.
I need to save up for braces now amongst many other things.
What are the odds of having another group buy in a couple months or so?

I actually talked to Upscale auto about a group buy and they said it would be ideal if it was in two to three months - after all the current backorders are filled. Upscale Auto gave me the best prices anywhere online - the only discount off MSRP I could ever find. I emailed them for status three separate times and they responded the next day each time. Once I placed an order, they only changed the delivery date on me once, and it was delayed about two weeks. Besides that - good service.

Pix of the braces and the first two installs. Would prefer a lift for the second two installs. Will DEFINITELY paint the STB plates black, as well as the hardware.
pix001.jpg
pix002.jpg
pix007.jpg
pix005.jpg
 

Attachments

  • pix001.jpg
    pix001.jpg
    72.4 KB · Views: 48
  • pix002.jpg
    pix002.jpg
    89.8 KB · Views: 32
  • pix005.jpg
    pix005.jpg
    66.7 KB · Views: 31
  • pix007.jpg
    pix007.jpg
    62.9 KB · Views: 40
Last edited:
Installing the front braces is a bitch. I tried it with only jack stands and simple tools, and could not even get one bolt loosened. I had a damn breaker bar but it was 1/2" drive, and I have 3/8" and 1/4" drive sockets so I couldn't get it loose. I also tried manually creating that rivet thing, and I got no where. Finally got pissed and just gave up until I can get a lift and an impact gun.
 
And that explains your signature... how long have you been waiting?

I also only have a half inch drive breaker bar, but with a 1/2 to 3/8 adapter. Think I'll probably take your advice and wait for a lift.
 
I got the FX pretty high up on jack stands to where I could comfortably move around underneath. It's just that when I had my socket wrench hanging on a bolt and I started kicking it to try and loosen the bolt that I worried about it coming off the stands and falling on me. One of these weekends I'm going to my neighbors shop where they have alot more tools, and I hope to knock it out with less effort.
 
I got the front lower engine tie done this morning. Not too difficult if you have a wobble/universal and an extension... but the jack stands are a must. I had my front up 20 inches. Removed the front skid and installed the shoulder washers in holes already present in the frame. Using supplied tools, you have to "swage" the shoulder washers into the existing frame holes so the shoulder washer sleeve doesn't spin. Then just put on the brace brackets and hand tighten the bolts. Attached the cross bar between the mounted brackets and torqued all the bolts.
pix004-1.jpg
pix002-1.jpg

Skid goes back on without any problem, but you can not attach two of the 10mm bolts due to the holes being blocked by the new brackets.

When I went to install the ladder brace, I didn't have a short 19mm socket - only a long one, which has an interference and won't fit. So I replaced the four rear shoulder bolts with those supplied in the kit and will have to try to buy the right size socket to break & remove the last two front nuts. Bolting up the 4PL should be easy with the right socket. I like the blue on the under-body braces - it changes colors from blue to yellow from different viewing angles. Photos always come out blue, but trust me - they look sparkly yellow at an angle. Too bad they are under the car!

While I was doing all this, the brackets on the STB were drying up after a glossy black rattle can treatment. Painted the nuts also. Looks so much better in the engine bay now.
pix005-1.jpg
pix006.jpg
 

Attachments

  • pix002-1.jpg
    pix002-1.jpg
    87 KB · Views: 20
  • pix004-1.jpg
    pix004-1.jpg
    74.1 KB · Views: 19
  • pix005-1.jpg
    pix005-1.jpg
    73.2 KB · Views: 32
  • pix006.jpg
    pix006.jpg
    64 KB · Views: 18
Last edited:
The ladder brace defeated me. I tried for three hours to break the nuts on the front end and the access is just perfectly impossible. I tried a bunch of different adapters, wobbles, universal joints, extensions - I even drilled out a socket to give me some extra bolt clearance. Used a brand new 3/8 drive torque wrench to try to break the bolt because it has the longest handle and I literally snapped the end of the drive off the wrench. :sad:

I took it to a local shop, put it on a lift and the guy used a wobble with an impact gun - and STILL COULDN'T BREAK THE NUTS. I left the shop with my tail between my legs. :embarrassed: Stupid nuts. :mad:

Since I plan on lowering , getting new tires and new brakes, I'll take the opportunity to try again when the wheel is off. It might just take a three foot breaker bar like I read in another thread. But then the question is - what torque value do I need to hit when I put them back on?!?!? Anybody that has done this - please speak up with your methods and tools.
 
I have not done this yet but you might want to try to soak it with WD-40 & if it still won't come off put some heat to it using something like a map tank.
btw, I like the gloss black paint job!
 
Last edited:
i was finally able to break it free with a 5 foot pipe slide over the handle of a 2 foot breaker bar. the bar itself wouldn't do it. when i put everything back together, i tightened as best i could with the ratchet, and then went at the nut on the other side with an impact gun. no problems so far and its been almost 6 months i would guess.
 
i was finally able to break it free with a 5 foot pipe slide over the handle of a 2 foot breaker bar. the bar itself wouldn't do it. when i put everything back together, i tightened as best i could with the ratchet, and then went at the nut on the other side with an impact gun. no problems so far and its been almost 6 months i would guess.


Geez. Did you use any lube on the threads ahead of time? Gonna have to look this one up in the book. Wonder what the factory torque is?

I was thinking maybe I'd wait until after my transmission has been worked on. Then I don't have to do this twice. Or I just have the transmission place put it on when they are finished... yeah - that could work...
 
Whenever I get around to doing this with the big tools I will let you know how it went. All I know is, the force I create by kicking it with the bottom of my foot wasn't enough. That's how I broke the rear bolts. T=r x cos(angle), so basically the torque you put on is directionally proportional to the length of the bar, since the cosine of 90 is 1, it's Torque=radius.
 
Geez. Did you use any lube on the threads ahead of time? Gonna have to look this one up in the book. Wonder what the factory torque is?

I was thinking maybe I'd wait until after my transmission has been worked on. Then I don't have to do this twice. Or I just have the transmission place put it on when they are finished... yeah - that could work...

yes we did spray it with PB blaster
 
Whenever I get around to doing this with the big tools I will let you know how it went. All I know is, the force I create by kicking it with the bottom of my foot wasn't enough. That's how I broke the rear bolts. T=r x cos(angle), so basically the torque you put on is directionally proportional to the length of the bar, since the cosine of 90 is 1, it's Torque=radius.

Ahhhh - high school trig. I don't use that stuff too often as a mechanical engineer! :wink:

Yeah, so if your breaker bar is five feet long and you put 50 lbs of force on it - that's 250 lbs at the nut. (assuming a 90 degree angle of access to the nut). I'm guessing it takes more than 50 lbs of force at five feet, but again, the question becomes what the installation torque should be. Generally the breaking torque is greater than the set torque (because of friction).

I gotta wonder why this bolt is so hard to break. Obviously important that it stays on...
 
Last edited:
Back
Top