AndrewBigA
Member
04 E46 M3 paint restoration project!
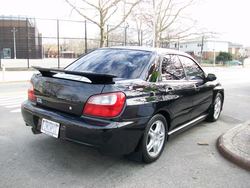
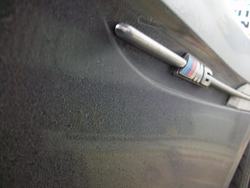
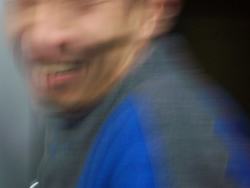
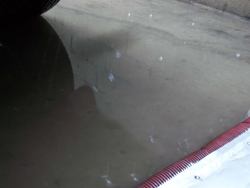
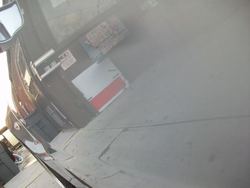
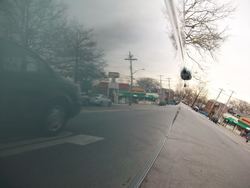
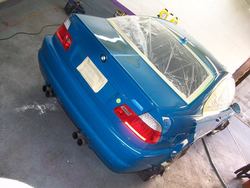
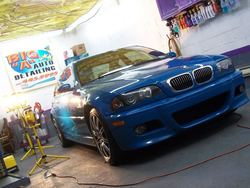
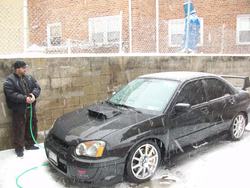
shots are taken from the passenger door. the entire car, every single panel has really bad paint damage from automatic car wash abuse & the previous owner mustve hired a butcher to buff the car out. i saw the car under the lights a few months ago @ the GPNY meet. I know the car was bad but big jobs never intimidate me, i was up for the challenge as always.
list of paint problems:
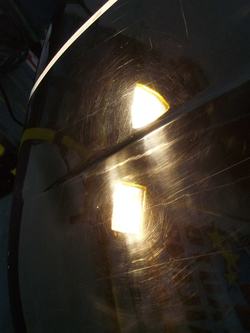
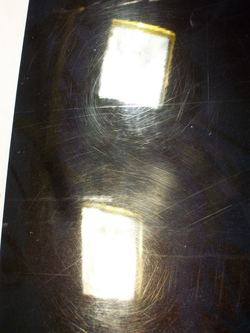
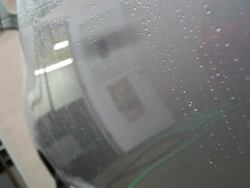
hollograms/extremely deep "buffer trails"
the cause: inexperienced butcher detailer with improper use of a rotary machine. wheel speed was probably around 1700-2000 rpms, may be even 2200. the pad obviously was not kept moist. this is what happens when you run the machine on too high of a speed with a dry pad. im surprised there were not any burn marks in the paint.
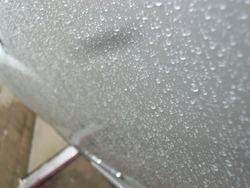
heavy & deep swirl marks
the cause: previous butcher detailer
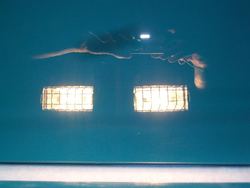
dull/flat reflection
the cause: all these dam paint defects & buffer trails giving off a horrible reflection, making the car not shine to its maximum potential
i am really excited about working on this car. i know the customer will be more than happy. everyone at the local meets has been on his case & telling him to go to me. this car will deffinitly turn heads the next time you see it!
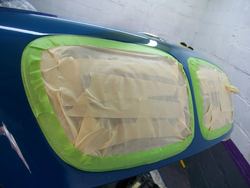
all prepped up & ready to get started on:


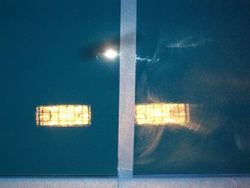
50/50
right side after wash & clay
left side after compound, polish, wax

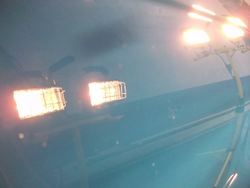
i wanted to cry after inspecting the paint under the halogen lights

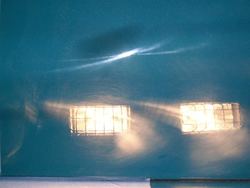
i can not wait to finish this car & see every panel looking like this!

---------- Post added at 10:49 AM ---------- Previous post was at 10:49 AM ----------
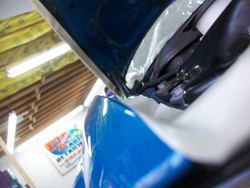
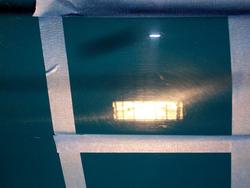
teaser shots of the dr side qp
after wash & clay

every single panel of the car looked like this after wash & clay!
after compound then polish

i apologize to everyone, i had some sick progress pics & before shots of every panel but i deleted them by mistake. i think that happened while i was taking pics of the car before it left the shop that night. im pissed i lost those pics! =/
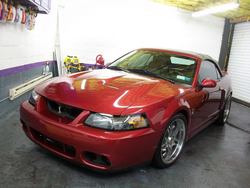
i hope everyone can get an idea how bad the paint was from the few before pictures i posted.every panel was glassed out to perfection. this was one of the biggest full car paint restoration jobs ive done in a long time.
enjoy these after shots, taken last night just before anthony left the shop finally after 14 total days here.!
I used my Dewalt DW849 rotary machine for this one & heres how it went:
3M Perfect-It Extra Cut Rubbing Compound with an orange 6.5" DD pad
3M Perfecft-It Ultrafine Machine Polish with a green 6.5" DD pad
i rinsed the car off after compounding & polishing to remove the light dusting that was on the paint.
just water, no car soap.
blown dry with the leaf blower & a few absorbers then tapped up again
3M Perfect-It Ultrafine Machine Polish with a blue 6.5" DD pad
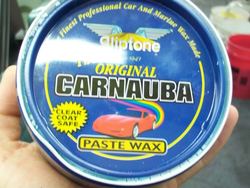
1Z Einszett Glanz Wax as a bottom coat to seal the clear
Adams Americana Paste Wax as the top coat for an extra wet & clear reflection
all glass was polished with #000 steel wool to remove some over spray & other grond in dirt on the glass
the glass was sealed with rejex
the head & tail lights were also compounded & polished then sealed with rejex
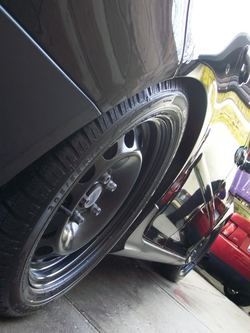
all wheels were also given a coat of rejex
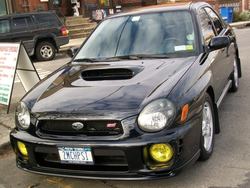
enjoy the final shots!
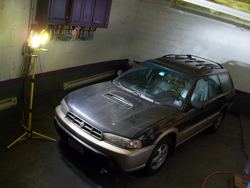
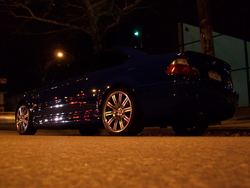
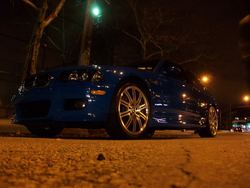
outside under the street lights


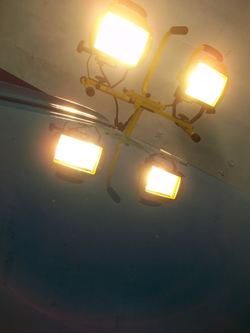
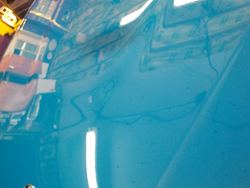
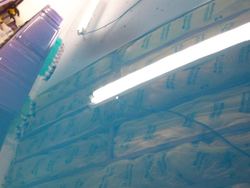
pics taken under different 1000 watt & 500 watt halogen light & 75 watt flourescent light
---------- Post added at 10:50 AM ---------- Previous post was at 10:49 AM ----------
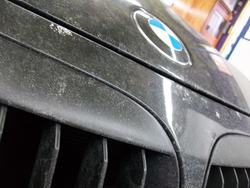
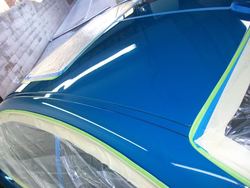
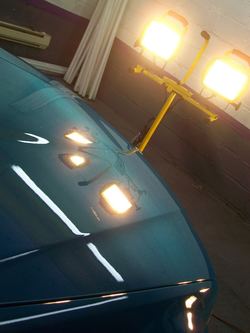
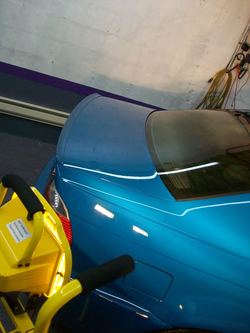
hood


one of the doors

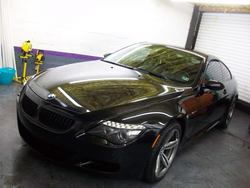
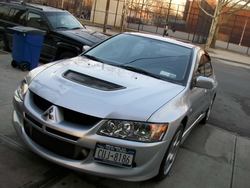
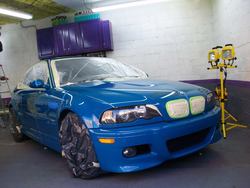
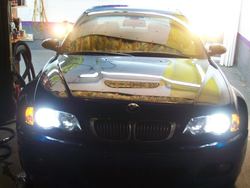
drivers side

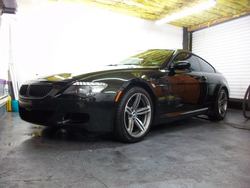
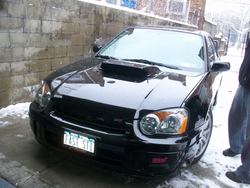
about to leave the shop & be taken for a drive by its owner

hood

from the drivers side

from the passenger side


trunk


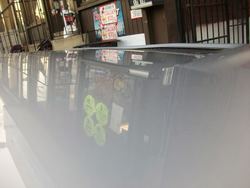
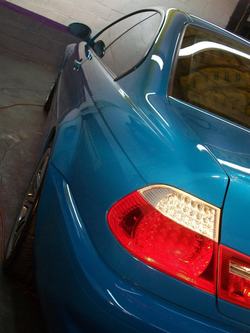
right quarter panel

roof

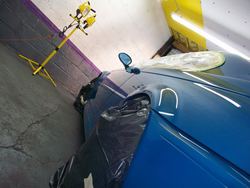
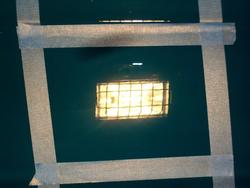
passenger door up close


I wish i didnt erase those 15 before & after pics of each panel. i had much better, closer shots but what can i do? up to this week for the last 2 months ive been working till 8,9,10pm & leaving the shop around midnight so i can keep up with all of the forums that i sponsor & search for new ones to sponsor as well. we have been extremly lucky to stay this busy up until now. usually the shop starts to die down once november comes but that didn't happen this year. i type my writeups when im half asleep with my eyes half closed. i think when i was uploading the 20 pics onto my laptop that i took of the car before it left the shop that night that i hit a wrong tab on the monitor to "delete old pics" or something like that =/
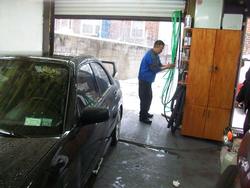
this was a fun car to work on. many late nights were spent alone while listening to a few country music cds.without the shop phone ringing every 5 minutes & me not wasting time running my mouth all day long talking to the customers & joking around with juan & johnny =).
---------- Post added at 01:22 PM ---------- Previous post was at 10:50 AM ----------
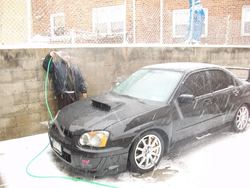
what were you guys doing on thu 12-31-09 around 9am?
this is what me & johnny were up to...
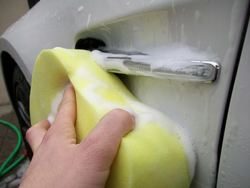
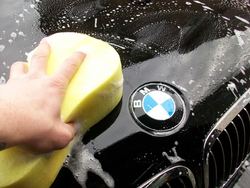
hand wash, paint dried with a leaf blower & absorber
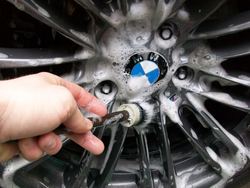
clay bar, wheels glass head & tail lights poilshed & REJEX applied
exterior:
1Z EINSZETT GLANZ WAX on the bottom to seal the clear coat
LUSSO ORO WAX on the top for extra protection & shine
REJEX on all glass,head & tail lights & wheels
interior:
vac, wipe & blow out dust on dash & vents
shampoo all floor mats
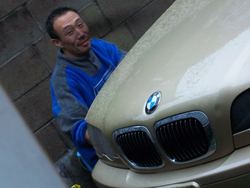
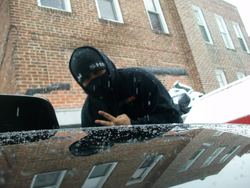
Kelvin & "Becky" are shop regulars
they like long drives on the LIE & drifting on snow covered slippery streets


finished

lol @ kelvin

shots are taken from the passenger door. the entire car, every single panel has really bad paint damage from automatic car wash abuse & the previous owner mustve hired a butcher to buff the car out. i saw the car under the lights a few months ago @ the GPNY meet. I know the car was bad but big jobs never intimidate me, i was up for the challenge as always.
list of paint problems:
hollograms/extremely deep "buffer trails"
the cause: inexperienced butcher detailer with improper use of a rotary machine. wheel speed was probably around 1700-2000 rpms, may be even 2200. the pad obviously was not kept moist. this is what happens when you run the machine on too high of a speed with a dry pad. im surprised there were not any burn marks in the paint.
heavy & deep swirl marks
the cause: previous butcher detailer
dull/flat reflection
the cause: all these dam paint defects & buffer trails giving off a horrible reflection, making the car not shine to its maximum potential
i am really excited about working on this car. i know the customer will be more than happy. everyone at the local meets has been on his case & telling him to go to me. this car will deffinitly turn heads the next time you see it!
all prepped up & ready to get started on:
50/50
right side after wash & clay
left side after compound, polish, wax
i wanted to cry after inspecting the paint under the halogen lights
i can not wait to finish this car & see every panel looking like this!
---------- Post added at 10:49 AM ---------- Previous post was at 10:49 AM ----------
teaser shots of the dr side qp
after wash & clay
every single panel of the car looked like this after wash & clay!
after compound then polish
i apologize to everyone, i had some sick progress pics & before shots of every panel but i deleted them by mistake. i think that happened while i was taking pics of the car before it left the shop that night. im pissed i lost those pics! =/
i hope everyone can get an idea how bad the paint was from the few before pictures i posted.every panel was glassed out to perfection. this was one of the biggest full car paint restoration jobs ive done in a long time.
enjoy these after shots, taken last night just before anthony left the shop finally after 14 total days here.!
I used my Dewalt DW849 rotary machine for this one & heres how it went:
3M Perfect-It Extra Cut Rubbing Compound with an orange 6.5" DD pad
3M Perfecft-It Ultrafine Machine Polish with a green 6.5" DD pad
i rinsed the car off after compounding & polishing to remove the light dusting that was on the paint.
just water, no car soap.
blown dry with the leaf blower & a few absorbers then tapped up again
3M Perfect-It Ultrafine Machine Polish with a blue 6.5" DD pad
1Z Einszett Glanz Wax as a bottom coat to seal the clear
Adams Americana Paste Wax as the top coat for an extra wet & clear reflection
all glass was polished with #000 steel wool to remove some over spray & other grond in dirt on the glass
the glass was sealed with rejex
the head & tail lights were also compounded & polished then sealed with rejex
all wheels were also given a coat of rejex
enjoy the final shots!
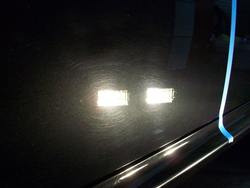
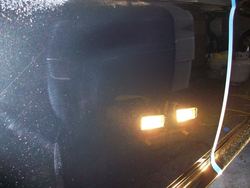
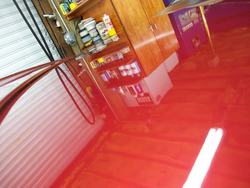
outside under the street lights
pics taken under different 1000 watt & 500 watt halogen light & 75 watt flourescent light
---------- Post added at 10:50 AM ---------- Previous post was at 10:49 AM ----------
hood
one of the doors
drivers side
about to leave the shop & be taken for a drive by its owner
hood
from the drivers side
from the passenger side
trunk
right quarter panel
roof
passenger door up close
I wish i didnt erase those 15 before & after pics of each panel. i had much better, closer shots but what can i do? up to this week for the last 2 months ive been working till 8,9,10pm & leaving the shop around midnight so i can keep up with all of the forums that i sponsor & search for new ones to sponsor as well. we have been extremly lucky to stay this busy up until now. usually the shop starts to die down once november comes but that didn't happen this year. i type my writeups when im half asleep with my eyes half closed. i think when i was uploading the 20 pics onto my laptop that i took of the car before it left the shop that night that i hit a wrong tab on the monitor to "delete old pics" or something like that =/
this was a fun car to work on. many late nights were spent alone while listening to a few country music cds.without the shop phone ringing every 5 minutes & me not wasting time running my mouth all day long talking to the customers & joking around with juan & johnny =).
---------- Post added at 01:22 PM ---------- Previous post was at 10:50 AM ----------
what were you guys doing on thu 12-31-09 around 9am?
this is what me & johnny were up to...
hand wash, paint dried with a leaf blower & absorber
clay bar, wheels glass head & tail lights poilshed & REJEX applied
exterior:
1Z EINSZETT GLANZ WAX on the bottom to seal the clear coat
LUSSO ORO WAX on the top for extra protection & shine
REJEX on all glass,head & tail lights & wheels
interior:
vac, wipe & blow out dust on dash & vents
shampoo all floor mats
Kelvin & "Becky" are shop regulars
they like long drives on the LIE & drifting on snow covered slippery streets
finished
lol @ kelvin
Attachments
-
 lsb2.jpg111.6 KB · Views: 7
 -
 lsb2.jpg111.6 KB · Views: 7
 -
 lsb3.jpg110.5 KB · Views: 6
 -
 lsb3.jpg110.5 KB · Views: 7
 -
 lsb1.jpg142.1 KB · Views: 7
 -
 lsb1.jpg142.1 KB · Views: 8
 -
 lsb4.jpg154.2 KB · Views: 6
 -
 lsb4.jpg154.2 KB · Views: 7
 -
 lsb7.jpg150 KB · Views: 8
 -
 lsb6.jpg151.3 KB · Views: 9
 -
 lsb6.jpg151.3 KB · Views: 4
 -
 lsb5.jpg179.5 KB · Views: 6
 -
 lsb5.jpg179.5 KB · Views: 8
 -
 lsbpaintrestorationteasershots001.jpg90.5 KB · Views: 7
 -
 lsbpaintrestorationteasershots001.jpg90.5 KB · Views: 8
 -
 lsb8.jpg182.3 KB · Views: 6
 -
 lsb8.jpg182.3 KB · Views: 6
 -
 lsb7.jpg150 KB · Views: 6
 -
 teasser2.jpg86.5 KB · Views: 7
 -
 teasser2.jpg86.5 KB · Views: 4
 -
 lsbpaintrestorationteasershots002.jpg77.1 KB · Views: 7
 -
 lsbpaintrestorationteasershots002.jpg77.1 KB · Views: 6
 -
 lsbpaintrestorationteasershots003.jpg79.6 KB · Views: 6
 -
 lsbpaintrestorationteasershots003.jpg79.6 KB · Views: 8
 -
 outside2.jpg102.8 KB · Views: 8
 -
 teaser1.jpg91.6 KB · Views: 8
 -
 teaser1.jpg91.6 KB · Views: 7
 -
 hoodwlight3.jpg115.3 KB · Views: 6
 -
 hoodwlight3.jpg115.3 KB · Views: 8
 -
 outside1.jpg120 KB · Views: 6
 -
 outside1.jpg120 KB · Views: 9
 -
 outside2.jpg102.8 KB · Views: 9
 -
 drsideqpwlight.jpg89.9 KB · Views: 8
 -
 drsideqpwlight.jpg89.9 KB · Views: 6
 -
 hoodwlight1.jpg80.3 KB · Views: 8
 -
 hoodwlight1.jpg80.3 KB · Views: 6
 -
 hoodwlight2.jpg79.3 KB · Views: 7
 -
 hoodwlight2.jpg79.3 KB · Views: 7
 -
 anotherhoodshot.jpg123.4 KB · Views: 7
 -
 bouttoleavethegarage.jpg120.2 KB · Views: 7
 -
 bouttoleavethegarage.jpg120.2 KB · Views: 10
 -
 drsideofcaringaragebeforeitleft.jpg133.6 KB · Views: 6
 -
 drsideofcaringaragebeforeitleft.jpg133.6 KB · Views: 7
 -
 2.jpg166 KB · Views: 8
 -
 3.jpg183.9 KB · Views: 9
 -
 3.jpg183.9 KB · Views: 7
 -
 anotherhoodshot.jpg123.4 KB · Views: 10
 -
 trunkwlights.jpg86.2 KB · Views: 7
 -
 trunkwlights.jpg86.2 KB · Views: 6
 -
 1.jpg180.9 KB · Views: 9
 -
 1.jpg180.9 KB · Views: 6
 -
 2.jpg166 KB · Views: 10
 -
 topoftrunknolight.jpg127.8 KB · Views: 6
 -
 topoftrunknolight.jpg127.8 KB · Views: 7
 -
 roof.jpg109.2 KB · Views: 7
 -
 roof.jpg109.2 KB · Views: 7
 -
 rtqpwlight.jpg124.5 KB · Views: 6
 -
 rtqpwlight.jpg124.5 KB · Views: 4
 -
 1-9.jpg211.6 KB · Views: 8
 -
 1-9.jpg211.6 KB · Views: 6
 -
 pasdoorwlightleavingthegarage.jpg88.3 KB · Views: 7
 -
 pasdoorwlightleavingthegarage.jpg88.3 KB · Views: 6
 -
 pasdoorwlight.jpg138.4 KB · Views: 8
 -
 pasdoorwlight.jpg138.4 KB · Views: 9
 -
 3-5.jpg124.5 KB · Views: 8
 -
 3-5.jpg124.5 KB · Views: 5
 -
 2-9.jpg201.9 KB · Views: 7
 -
 2-9.jpg201.9 KB · Views: 8
 -
 6-3.jpg160.3 KB · Views: 6
 -
 6-3.jpg160.3 KB · Views: 6
 -
 5-3.jpg190.8 KB · Views: 8
 -
 5-3.jpg190.8 KB · Views: 5
 -
 4-5.jpg162.8 KB · Views: 8
 -
 4-5.jpg162.8 KB · Views: 4