kingrick05
Member
- Car
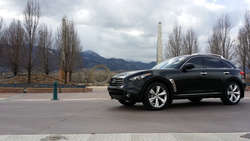
- 2009 FX50s
Hi,
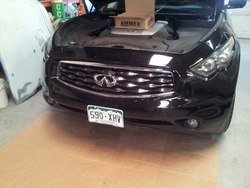
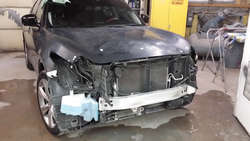
I am currently in the process of retrofitting my 2009 FX50s, with a 2013 bumper/grill.
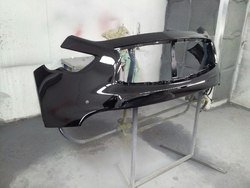
•Ordered all parts (bumper, grill, and fog light finishers) cost $1,000. W/tax ordered from Red Nolan Infiniti of Colorado Springs.
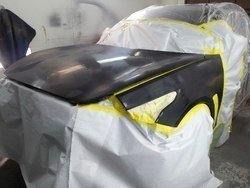
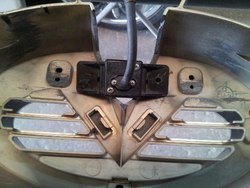
•Custom Auto Body Shop- removed and pre-fitted 2013 bumper and balancing (balancing is the black plastic underneath the bumper that also houses the fog lights) pre-fit completed.
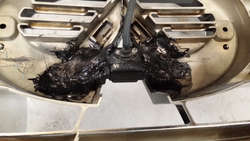
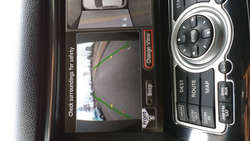
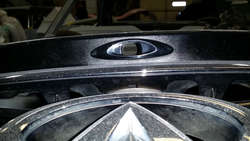
•2009 front camera is being used to save money and because @BeeLove an IS supporter, mentioned on another retrofit thread that he was unable to get the 2012+ camera to be recognized by the older computer.
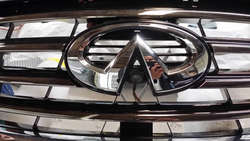
Front camera was "modified" to fit: 2013 grill completed.
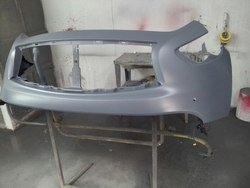
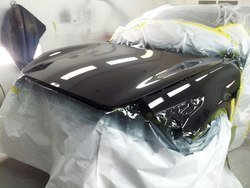
•Sanding/painting of bumper completed.
•Pending wash/wax/buff.
Once all the work is completed I will post pictures and total cost of retrofit.
Very Respectfully
Rick.

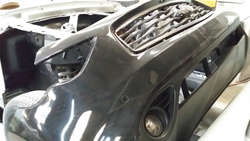
•Removing Bumper/Grill.

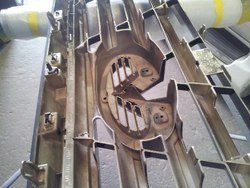
•Removed: Same balancing will be used to save money.

•Removed: Same camera will be used to save money.

•Next remove headlights. (Headlights will get a touch up)

•Removed: Next Fix rock chips/ sand. Prep for painting. I decided to give the entire front end a touch up, I didn't want to have a new shiny bumper/grill and rock chips to take away from the upgraded look.
•"Modify" old camera for 2012+ Grill.


I am currently in the process of retrofitting my 2009 FX50s, with a 2013 bumper/grill.
•Ordered all parts (bumper, grill, and fog light finishers) cost $1,000. W/tax ordered from Red Nolan Infiniti of Colorado Springs.
•Custom Auto Body Shop- removed and pre-fitted 2013 bumper and balancing (balancing is the black plastic underneath the bumper that also houses the fog lights) pre-fit completed.
•2009 front camera is being used to save money and because @BeeLove an IS supporter, mentioned on another retrofit thread that he was unable to get the 2012+ camera to be recognized by the older computer.
Front camera was "modified" to fit: 2013 grill completed.
•Sanding/painting of bumper completed.
•Pending wash/wax/buff.
Once all the work is completed I will post pictures and total cost of retrofit.
Very Respectfully
Rick.
•Removing Bumper/Grill.
•Removed: Same balancing will be used to save money.
•Removed: Same camera will be used to save money.
•Next remove headlights. (Headlights will get a touch up)
•Removed: Next Fix rock chips/ sand. Prep for painting. I decided to give the entire front end a touch up, I didn't want to have a new shiny bumper/grill and rock chips to take away from the upgraded look.
•"Modify" old camera for 2012+ Grill.
Attachments
-
 c7d944ff1204607dbdec84515f0d24aa_zpse3ff3897.jpg124.7 KB · Views: 177
 -
 606b8f076c3591eda19018c7f88e6cda_zps6bb3c870.jpg85 KB · Views: 165
 -
 67f9e8d0786ce97a4142d1c45878ce2e_zps08a5a759.jpg111.5 KB · Views: 163
 -
 73ccf6a65d171e3d1c1cb731f5e9120c_zpsba0de7f9.jpg145.2 KB · Views: 181
 -
 3cb15a811fc6e2b6c8873db02935374a_zps2378b521.jpg100.8 KB · Views: 291
 -
 1930a2581de082f0fdf9edc129d11c75_zps34b83fca.jpg122.4 KB · Views: 197
 -
 1a32bf49e5bd8a52eb01021d053975d0_zps1af8d3c7.jpg134.8 KB · Views: 177
Last edited: