
- Location
- Portland, OR
I had a couple free hours today so I did some laundry and cleaned my house....bwaaahahahahha! Just kidding, I installed some sound insulation on my hood under the hoodliner that's been kicking around my tool shed for a few months. Its a pretty straight forward install but I snapped some awful cell phone pics so I figured I would post them.
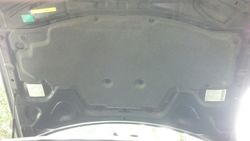
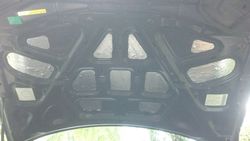
Here's a shot of the existing conditions.
.

.
I elected to remove the factory insulation for two reasons: Primarily, I didn't want any sticky residue on the oem piece if for any reason the hoodliner has to come off in the future. Second, the installation instructions recommend installing the hoodliner over Dynamat Extreme, and I happen to have a bunch of extra Brown Bread Ultimate (pretty much the same thing).
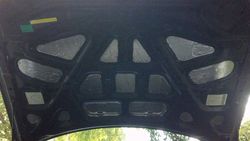
To remove the factory insulation piece, You simply need to pop off the little plastic retainers. Trim removal tools work great...
.

.
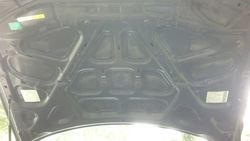
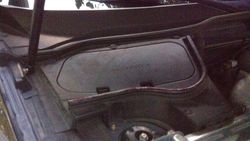
It was filthy under the insulation...
.

.
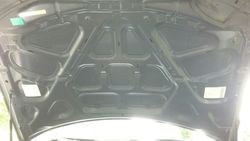
About 50 Clorox wipes and a half roll of mineral spirit-laden paper towels later, the surfaces are clean-clean.
.

.
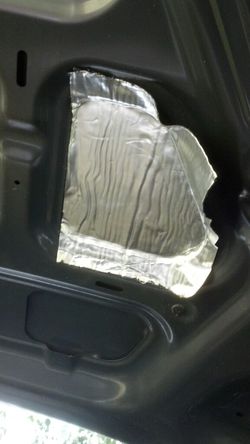
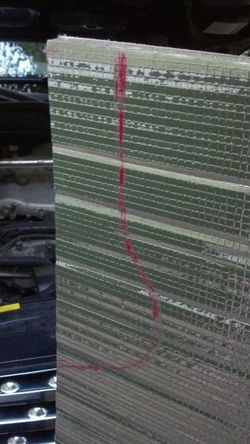
During the course of installing this brown bread stuff on a couple different cars I've found that the easiest way to roll in tight or extremely contoured spaces is to cut oversized pieces, press them firmly in place on the desired surface, then trim away the excess and peel it back off. Like this:
.

.
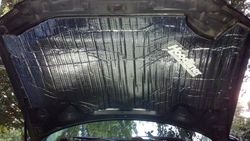
I installed the brown bread ultimate in layers organized by depth. Layer one is the under side of the exterior hood skin. Layer two is the inside layer of the reinforcing skin closest to the outer layer.
Layer 1
.

.
Layer 2
.

.
To cut the hoodliner to fit around the seals, I ran a very small bead of red grease on the rubber hood seals...
.

.
...then laid the liner over the engine compartment. After closing the hood, I had easy lines to follow with scissors.
.

.
Four cuts later, I stuck it on like a big ass ninja turtle sticker on a lumpy trapper keeper.
.

.
Fin.
Here's a shot of the existing conditions.
.
.
I elected to remove the factory insulation for two reasons: Primarily, I didn't want any sticky residue on the oem piece if for any reason the hoodliner has to come off in the future. Second, the installation instructions recommend installing the hoodliner over Dynamat Extreme, and I happen to have a bunch of extra Brown Bread Ultimate (pretty much the same thing).
To remove the factory insulation piece, You simply need to pop off the little plastic retainers. Trim removal tools work great...
.
.
It was filthy under the insulation...
.
.
About 50 Clorox wipes and a half roll of mineral spirit-laden paper towels later, the surfaces are clean-clean.
.
.
During the course of installing this brown bread stuff on a couple different cars I've found that the easiest way to roll in tight or extremely contoured spaces is to cut oversized pieces, press them firmly in place on the desired surface, then trim away the excess and peel it back off. Like this:
.
.
I installed the brown bread ultimate in layers organized by depth. Layer one is the under side of the exterior hood skin. Layer two is the inside layer of the reinforcing skin closest to the outer layer.
Layer 1
.
.
Layer 2
.
.
To cut the hoodliner to fit around the seals, I ran a very small bead of red grease on the rubber hood seals...
.
.
...then laid the liner over the engine compartment. After closing the hood, I had easy lines to follow with scissors.
.
.
Four cuts later, I stuck it on like a big ass ninja turtle sticker on a lumpy trapper keeper.
.
.
Fin.
Attachments
-
 473bfc29-e70b-a0ca.jpg45.2 KB · Views: 48
 -
 473bfc29-e7b7-46fc.jpg84.7 KB · Views: 50
 -
 473bfc29-e7d7-da60.jpg49.8 KB · Views: 52
 -
 473bfc29-e86c-714d.jpg55.6 KB · Views: 79
 -
 473bfc29-e978-05f3.jpg61.4 KB · Views: 40
 -
 473bfc29-e9c5-c105.jpg63.7 KB · Views: 60
 -
 473bfc29-e9d7-f709.jpg82.6 KB · Views: 49
 -
 473bfc29-ea7c-8af7.jpg77.3 KB · Views: 74
 -
 473bfc29-ea98-5bd0.jpg91.5 KB · Views: 61
 -
 473bfc29-ead7-6a00.jpg84.4 KB · Views: 52
Last edited by a moderator:
")