Install paddle shifters on 2010 FX35
Heres a quick write up on how to do it. Its not too detailed....Sorry guys. Don't have too much time on my hands.
1. Purchase Paddle shifters and Steering column cover from any Infiniti Dealer. (Riverside infiniti was cheapest for me and they included the hardware). Referance to the FX50 Sport when they ask for what car its from. Choose your color and Choose manual or mechanical Steering column.
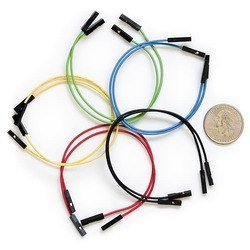
2. Purchase some Jumper wires at your Electronics store. I bought mine at Frys. They come crimped and with shrink wrap on it.

(this is not the exact picture. This is just to give you an example) The ones at Frys come with shrink wrap, not the hard plastic.
3. Purchase extra wire to run from your steering column to the back of your AV unit.
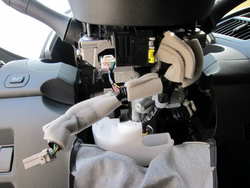
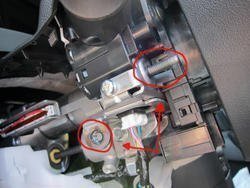
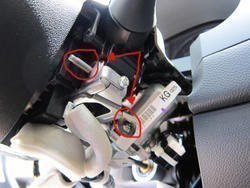
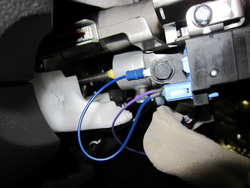
4. Take apart your steering column covers and you will find the shifter mounts on each side.
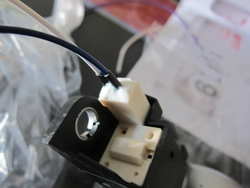
5. Cut two of your jumper wires and insert one into each prong on your shifters. Then fill it with silicon to secure them. Let it dry and then mount onto your steering column.


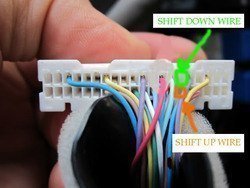
6. Wiring is pretty easy. On each of the shifters, ground one wire. Doesn't matter which one. The last wire on each shifter will be ran to the back of the AV unit so go ahead and extend that wire making sure it will reach the back of the AV unit.


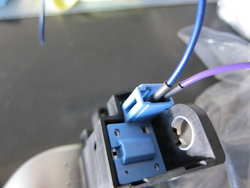
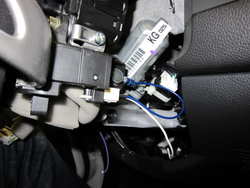
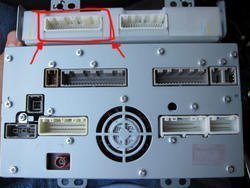
7. Take apart your Center Council and pull out the AV unit. At this time you can run the extended wires from the back of the dash to the AV unit itself. Make sure that the wires do not interfere with the steering column moving mechanism. You are gonna work with this harness behind the AV unit:

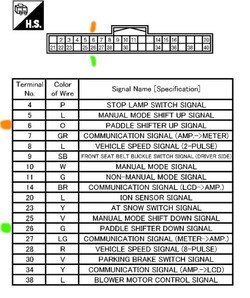
8. Cut one more of your Jumper wires and attach one to each end of the wires you extended. On each of the jumper wires removed the shrink wrap to reveal the metal crimp. This crimp will be inserted to the harness so it can make contact with the prong when plugged back into the unit.
By opening the harness the way i showed in the "Around View Camera Mod," i was able to insert the exposed jumper wire into the harness, close up the security tabs and plug it back into the AV unit and it worked just fine.


Once everything is done you can take a spin around and test it before putting everything back together.
Sorry for the lack of detail and or pictures. But this should give you a good idea on how to do it.

 . We do, however, have the mounts for them though. Here are some pics that i took.