eJay's FX

eJay

Member
Location
Fairfax, VA
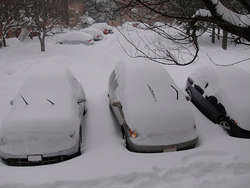
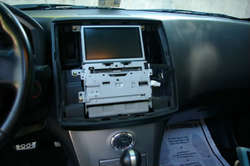
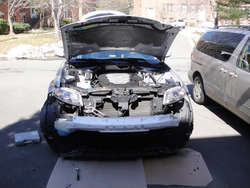
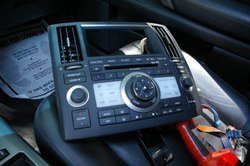
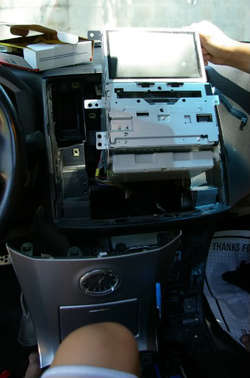
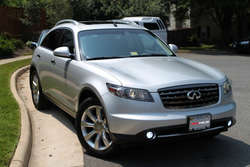
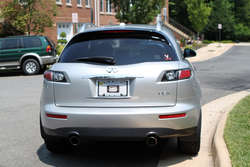
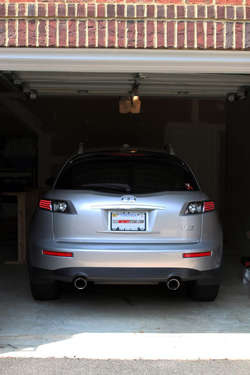
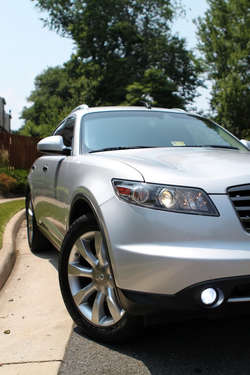
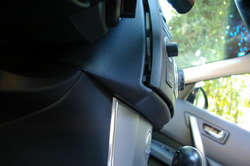
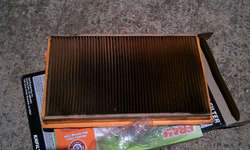
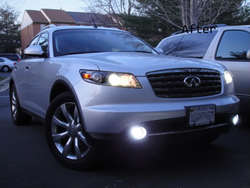
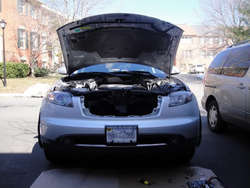
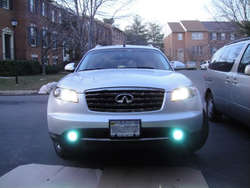
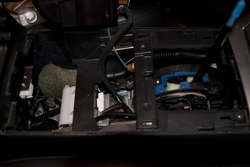
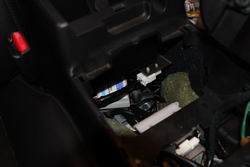
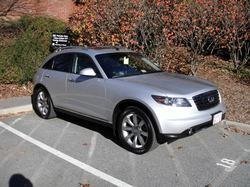
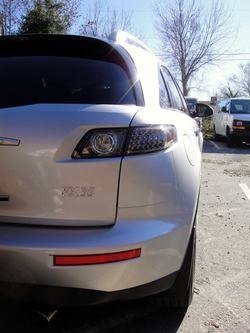
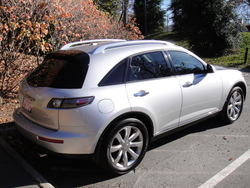
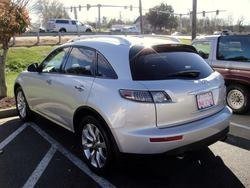
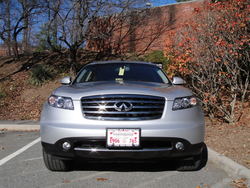
I've uploaded some pics under the Newbie section but I thought I should re-post it under the proper topic. I got her about a month ago and I must say, this is one AWESOME ride!

DSC03969.jpg

DSC03968.jpg

DSC03973.jpg

DSC03974.jpg

DSC03970.jpg
 

Attachments

  • DSC03969.jpg
    DSC03969.jpg
    259.7 KB · Views: 65
  • DSC03969.jpg
    DSC03969.jpg
    259.7 KB · Views: 48
  • DSC03969.jpg
    DSC03969.jpg
    259.7 KB · Views: 37
  • DSC03974.jpg
    DSC03974.jpg
    242.7 KB · Views: 47
  • DSC03973.jpg
    DSC03973.jpg
    139.6 KB · Views: 55
  • DSC03973.jpg
    DSC03973.jpg
    139.6 KB · Views: 43
  • DSC03973.jpg
    DSC03973.jpg
    139.6 KB · Views: 47
  • DSC03968.jpg
    DSC03968.jpg
    149.7 KB · Views: 61
  • DSC03968.jpg
    DSC03968.jpg
    149.7 KB · Views: 34
  • DSC03968.jpg
    DSC03968.jpg
    149.7 KB · Views: 37
  • DSC03970.jpg
    DSC03970.jpg
    287 KB · Views: 48
  • DSC03974.jpg
    DSC03974.jpg
    242.7 KB · Views: 46
  • DSC03974.jpg
    DSC03974.jpg
    242.7 KB · Views: 36
  • DSC03970.jpg
    DSC03970.jpg
    287 KB · Views: 48
  • DSC03970.jpg
    DSC03970.jpg
    287 KB · Views: 51
  • DSC03969.jpg
    DSC03969.jpg
    259.7 KB · Views: 36
  • DSC03968.jpg
    DSC03968.jpg
    149.7 KB · Views: 66
  • DSC03973.jpg
    DSC03973.jpg
    139.6 KB · Views: 38
  • DSC03974.jpg
    DSC03974.jpg
    242.7 KB · Views: 40
  • DSC03970.jpg
    DSC03970.jpg
    287 KB · Views: 47
  • DSC03968.jpg
    DSC03968.jpg
    149.7 KB · Views: 35
  • DSC03969.jpg
    DSC03969.jpg
    259.7 KB · Views: 35
  • DSC03970.jpg
    DSC03970.jpg
    287 KB · Views: 40
  • DSC03974.jpg
    DSC03974.jpg
    242.7 KB · Views: 29
  • DSC03973.jpg
    DSC03973.jpg
    139.6 KB · Views: 70
Here they are :D

DSC04048_R-1.jpg

DSC04054-1.jpg

DSC04055-1.jpg
 

Attachments

  • DSC04048_R-1.jpg
    DSC04048_R-1.jpg
    35 KB · Views: 28
  • DSC04048_R-1.jpg
    DSC04048_R-1.jpg
    35 KB · Views: 65
  • DSC04048_R-1.jpg
    DSC04048_R-1.jpg
    35 KB · Views: 51
  • DSC04054-1.jpg
    DSC04054-1.jpg
    53.3 KB · Views: 30
  • DSC04055-1.jpg
    DSC04055-1.jpg
    35.9 KB · Views: 31
  • DSC04054-1.jpg
    DSC04054-1.jpg
    53.3 KB · Views: 36
  • DSC04054-1.jpg
    DSC04054-1.jpg
    53.3 KB · Views: 35
  • DSC04055-1.jpg
    DSC04055-1.jpg
    35.9 KB · Views: 29
  • DSC04055-1.jpg
    DSC04055-1.jpg
    35.9 KB · Views: 46
  • DSC04054-1.jpg
    DSC04054-1.jpg
    53.3 KB · Views: 31
  • DSC04048_R-1.jpg
    DSC04048_R-1.jpg
    35 KB · Views: 32
  • DSC04055-1.jpg
    DSC04055-1.jpg
    35.9 KB · Views: 30
  • DSC04048_R-1.jpg
    DSC04048_R-1.jpg
    35 KB · Views: 65
  • DSC04054-1.jpg
    DSC04054-1.jpg
    53.3 KB · Views: 35
  • DSC04055-1.jpg
    DSC04055-1.jpg
    35.9 KB · Views: 35
Replaced the intake filter and the cabin filter. The engine filter was disgustingly dirty. Now I have K&N high-performance filter.
IMAG0245-1.jpg

AND installed USA Spec PA15-NIS iPod adapter! Overall I am very satisfied with it.

SG1S5888-1.jpg
I used an old gift card to pry it open.

SG1S5889-1.jpg
SG1S5902_Resized-1.jpg
I put the box underneath the center console and drilled a little hole to feed in the iPod cable. I have both the iPod cable and aux input cable in the console.
SG1S5890_Resized-1.jpg
If you're planning on removing the gearshifter panel, it is the easiest to pull up from the cup holders (the panel will pop right out) instead of trying to pry it up from the sides. I found this out after having to take it off several times :rofl:

I also had 6K HID Fogs installed but took it off for now. I'm going to put it back in when my factory warranty ends (this august).
DSC03901-1.jpg
DSC03904-1.jpg
DSC03905-1.jpg
DSC03909-1.jpg
 

Attachments

  • IMAG0245-1.jpg
    IMAG0245-1.jpg
    55.9 KB · Views: 31
  • SG1S5888-1.jpg
    SG1S5888-1.jpg
    26.3 KB · Views: 28
  • IMAG0245-1.jpg
    IMAG0245-1.jpg
    55.9 KB · Views: 28
  • IMAG0245-1.jpg
    IMAG0245-1.jpg
    55.9 KB · Views: 54
  • SG1S5888-1.jpg
    SG1S5888-1.jpg
    26.3 KB · Views: 28
  • SG1S5888-1.jpg
    SG1S5888-1.jpg
    26.3 KB · Views: 34
  • SG1S5889-1.jpg
    SG1S5889-1.jpg
    40.1 KB · Views: 32
  • SG1S5902_Resized-1.jpg
    SG1S5902_Resized-1.jpg
    33.7 KB · Views: 44
  • SG1S5902_Resized-1.jpg
    SG1S5902_Resized-1.jpg
    33.7 KB · Views: 30
  • SG1S5902_Resized-1.jpg
    SG1S5902_Resized-1.jpg
    33.7 KB · Views: 34
  • SG1S5889-1.jpg
    SG1S5889-1.jpg
    40.1 KB · Views: 34
  • SG1S5889-1.jpg
    SG1S5889-1.jpg
    40.1 KB · Views: 37
  • DSC03901-1.jpg
    DSC03901-1.jpg
    49.2 KB · Views: 36
  • SG1S5890_Resized-1.jpg
    SG1S5890_Resized-1.jpg
    29.4 KB · Views: 43
  • SG1S5890_Resized-1.jpg
    SG1S5890_Resized-1.jpg
    29.4 KB · Views: 42
  • SG1S5890_Resized-1.jpg
    SG1S5890_Resized-1.jpg
    29.4 KB · Views: 46
  • DSC03901-1.jpg
    DSC03901-1.jpg
    49.2 KB · Views: 27
  • DSC03901-1.jpg
    DSC03901-1.jpg
    49.2 KB · Views: 33
  • DSC03904-1.jpg
    DSC03904-1.jpg
    53.2 KB · Views: 37
  • DSC03909-1.jpg
    DSC03909-1.jpg
    39.8 KB · Views: 39
  • DSC03905-1.jpg
    DSC03905-1.jpg
    43.9 KB · Views: 28
  • DSC03905-1.jpg
    DSC03905-1.jpg
    43.9 KB · Views: 29
  • DSC03905-1.jpg
    DSC03905-1.jpg
    43.9 KB · Views: 33
  • DSC03904-1.jpg
    DSC03904-1.jpg
    53.2 KB · Views: 67
  • DSC03904-1.jpg
    DSC03904-1.jpg
    53.2 KB · Views: 34
  • DSC03909-1.jpg
    DSC03909-1.jpg
    39.8 KB · Views: 44
  • DSC03909-1.jpg
    DSC03909-1.jpg
    39.8 KB · Views: 45
  • IMAG0245-1.jpg
    IMAG0245-1.jpg
    55.9 KB · Views: 34
  • SG1S5888-1.jpg
    SG1S5888-1.jpg
    26.3 KB · Views: 27
  • DSC03909-1.jpg
    DSC03909-1.jpg
    39.8 KB · Views: 46
  • DSC03905-1.jpg
    DSC03905-1.jpg
    43.9 KB · Views: 43
  • DSC03904-1.jpg
    DSC03904-1.jpg
    53.2 KB · Views: 49
  • DSC03901-1.jpg
    DSC03901-1.jpg
    49.2 KB · Views: 58
  • SG1S5902_Resized-1.jpg
    SG1S5902_Resized-1.jpg
    33.7 KB · Views: 56
  • SG1S5889-1.jpg
    SG1S5889-1.jpg
    40.1 KB · Views: 65
  • SG1S5890_Resized-1.jpg
    SG1S5890_Resized-1.jpg
    29.4 KB · Views: 30
  • IMAG0245-1.jpg
    IMAG0245-1.jpg
    55.9 KB · Views: 36
  • DSC03901-1.jpg
    DSC03901-1.jpg
    49.2 KB · Views: 33
  • SG1S5890_Resized-1.jpg
    SG1S5890_Resized-1.jpg
    29.4 KB · Views: 46
  • SG1S5888-1.jpg
    SG1S5888-1.jpg
    26.3 KB · Views: 26
  • SG1S5889-1.jpg
    SG1S5889-1.jpg
    40.1 KB · Views: 63
  • SG1S5902_Resized-1.jpg
    SG1S5902_Resized-1.jpg
    33.7 KB · Views: 37
  • DSC03904-1.jpg
    DSC03904-1.jpg
    53.2 KB · Views: 38
  • DSC03909-1.jpg
    DSC03909-1.jpg
    39.8 KB · Views: 32
  • DSC03905-1.jpg
    DSC03905-1.jpg
    43.9 KB · Views: 30
Last edited:
Wow it's almost been a year since I updated this thread! I washed my car recently and wanted to test my new lens for the DSRL so took some pictures! Didn't really do much appearance mod since last year partially because I like the clean look and partially because I don't have much $$ to spend on mods right now :tonguey:

IMG_4669.jpg
IMG_4692.jpg
IMG_4673.jpg
IMG_4705.jpg
 

Attachments

  • IMG_4669.jpg
    IMG_4669.jpg
    78.2 KB · Views: 39
  • IMG_4669.jpg
    IMG_4669.jpg
    78.2 KB · Views: 40
  • IMG_4692.jpg
    IMG_4692.jpg
    76.4 KB · Views: 35
  • IMG_4692.jpg
    IMG_4692.jpg
    76.4 KB · Views: 38
  • IMG_4692.jpg
    IMG_4692.jpg
    76.4 KB · Views: 36
  • IMG_4669.jpg
    IMG_4669.jpg
    78.2 KB · Views: 45
  • IMG_4673.jpg
    IMG_4673.jpg
    78.8 KB · Views: 36
  • IMG_4705.jpg
    IMG_4705.jpg
    66.9 KB · Views: 39
  • IMG_4705.jpg
    IMG_4705.jpg
    66.9 KB · Views: 49
  • IMG_4673.jpg
    IMG_4673.jpg
    78.8 KB · Views: 43
  • IMG_4673.jpg
    IMG_4673.jpg
    78.8 KB · Views: 79
  • IMG_4705.jpg
    IMG_4705.jpg
    66.9 KB · Views: 44
  • IMG_4669.jpg
    IMG_4669.jpg
    78.2 KB · Views: 52
  • IMG_4692.jpg
    IMG_4692.jpg
    76.4 KB · Views: 46
  • IMG_4673.jpg
    IMG_4673.jpg
    78.8 KB · Views: 33
  • IMG_4705.jpg
    IMG_4705.jpg
    66.9 KB · Views: 34
  • IMG_4692.jpg
    IMG_4692.jpg
    76.4 KB · Views: 36
  • IMG_4669.jpg
    IMG_4669.jpg
    78.2 KB · Views: 31
  • IMG_4673.jpg
    IMG_4673.jpg
    78.8 KB · Views: 46
  • IMG_4705.jpg
    IMG_4705.jpg
    66.9 KB · Views: 43
Eric the ride looks great and the pictures are nice and sharp.

Love the UVA sticker man. Good times we had a few years back as hallmates :wink:. Can't believe we are on the last stretch already of our college careers...
 
Nice! So you were the one I watched on YouTube taking the bumper apart:tup:

Haha yes, that was my first time taking it apart and I accidently broke off the nut that secures the bumper to the fender so it ended up taking me well over 4 hours to get the bumper back together. Since then I removed/ put back the fog HID numerous times mainly because I was scared of the stealership voiding my warranty but now that my bumper-to-bumper warranty is over, I think I will leave it on for a long timee

---------- Post added at 10:47 PM ---------- Previous post was at 10:44 PM ----------

Eric the ride looks great and the pictures are nice and sharp.

Love the UVA sticker man. Good times we had a few years back as hallmates :wink:. Can't believe we are on the last stretch already of our college careers...

I know pat! Those were probably the most memorable days of my life (all the stupid things we did lol). AND MOST IMPORTANTLY(?) if I didn't meet you, I probably wouldn't be driving the FX right now!
 
Nice ride bro, I'm also going to install the pa15-nis was wondering where u mounted the ground cable? I couldnt find a solid metal piece behind the factory radio. Is it ok to just mount the ground cable to one of the 6 screws that hold the radio in place? Thanks for your help.


Replaced the intake filter and the cabin filter. The engine filter was disgustingly dirty. Now I have K&N high-performance filter.
IMAG0245-1.jpg

AND installed USA Spec PA15-NIS iPod adapter! Overall I am very satisfied with it.

SG1S5888-1.jpg
I used an old gift card to pry it open.

SG1S5889-1.jpg
SG1S5902_Resized-1.jpg
I put the box underneath the center console and drilled a little hole to feed in the iPod cable. I have both the iPod cable and aux input cable in the console.
SG1S5890_Resized-1.jpg
If you're planning on removing the gearshifter panel, it is the easiest to pull up from the cup holders (the panel will pop right out) instead of trying to pry it up from the sides. I found this out after having to take it off several times :rofl:

I also had 6K HID Fogs installed but took it off for now. I'm going to put it back in when my factory warranty ends (this august).
DSC03901-1.jpg
DSC03904-1.jpg
DSC03905-1.jpg
DSC03909-1.jpg
 

Attachments

  • SG1S5902_Resized-1.jpg
    SG1S5902_Resized-1.jpg
    33.7 KB · Views: 28
  • SG1S5890_Resized-1.jpg
    SG1S5890_Resized-1.jpg
    29.4 KB · Views: 32
  • SG1S5902_Resized-1.jpg
    SG1S5902_Resized-1.jpg
    33.7 KB · Views: 41
  • IMAG0245-1.jpg
    IMAG0245-1.jpg
    55.9 KB · Views: 30
  • IMAG0245-1.jpg
    IMAG0245-1.jpg
    55.9 KB · Views: 35
  • IMAG0245-1.jpg
    IMAG0245-1.jpg
    55.9 KB · Views: 41
  • SG1S5888-1.jpg
    SG1S5888-1.jpg
    26.3 KB · Views: 21
  • SG1S5888-1.jpg
    SG1S5888-1.jpg
    26.3 KB · Views: 45
  • SG1S5888-1.jpg
    SG1S5888-1.jpg
    26.3 KB · Views: 34
  • SG1S5889-1.jpg
    SG1S5889-1.jpg
    40.1 KB · Views: 31
  • SG1S5889-1.jpg
    SG1S5889-1.jpg
    40.1 KB · Views: 28
  • SG1S5889-1.jpg
    SG1S5889-1.jpg
    40.1 KB · Views: 32
  • SG1S5902_Resized-1.jpg
    SG1S5902_Resized-1.jpg
    33.7 KB · Views: 30
  • DSC03905-1.jpg
    DSC03905-1.jpg
    43.9 KB · Views: 30
  • DSC03905-1.jpg
    DSC03905-1.jpg
    43.9 KB · Views: 40
  • DSC03904-1.jpg
    DSC03904-1.jpg
    53.2 KB · Views: 55
  • DSC03904-1.jpg
    DSC03904-1.jpg
    53.2 KB · Views: 27
  • DSC03901-1.jpg
    DSC03901-1.jpg
    49.2 KB · Views: 27
  • DSC03904-1.jpg
    DSC03904-1.jpg
    53.2 KB · Views: 30
  • DSC03901-1.jpg
    DSC03901-1.jpg
    49.2 KB · Views: 37
  • SG1S5890_Resized-1.jpg
    SG1S5890_Resized-1.jpg
    29.4 KB · Views: 34
  • DSC03901-1.jpg
    DSC03901-1.jpg
    49.2 KB · Views: 29
  • SG1S5890_Resized-1.jpg
    SG1S5890_Resized-1.jpg
    29.4 KB · Views: 36
  • DSC03909-1.jpg
    DSC03909-1.jpg
    39.8 KB · Views: 32
  • DSC03905-1.jpg
    DSC03905-1.jpg
    43.9 KB · Views: 58
  • DSC03909-1.jpg
    DSC03909-1.jpg
    39.8 KB · Views: 27
  • DSC03909-1.jpg
    DSC03909-1.jpg
    39.8 KB · Views: 32
  • SG1S5902_Resized-1.jpg
    SG1S5902_Resized-1.jpg
    33.7 KB · Views: 23
  • SG1S5889-1.jpg
    SG1S5889-1.jpg
    40.1 KB · Views: 45
  • SG1S5888-1.jpg
    SG1S5888-1.jpg
    26.3 KB · Views: 52
  • IMAG0245-1.jpg
    IMAG0245-1.jpg
    55.9 KB · Views: 68
  • DSC03904-1.jpg
    DSC03904-1.jpg
    53.2 KB · Views: 37
  • DSC03905-1.jpg
    DSC03905-1.jpg
    43.9 KB · Views: 26
  • DSC03901-1.jpg
    DSC03901-1.jpg
    49.2 KB · Views: 48
  • SG1S5890_Resized-1.jpg
    SG1S5890_Resized-1.jpg
    29.4 KB · Views: 25
  • DSC03909-1.jpg
    DSC03909-1.jpg
    39.8 KB · Views: 30
  • DSC03901-1.jpg
    DSC03901-1.jpg
    49.2 KB · Views: 49
  • SG1S5890_Resized-1.jpg
    SG1S5890_Resized-1.jpg
    29.4 KB · Views: 46
  • SG1S5888-1.jpg
    SG1S5888-1.jpg
    26.3 KB · Views: 39
  • SG1S5889-1.jpg
    SG1S5889-1.jpg
    40.1 KB · Views: 25
  • SG1S5902_Resized-1.jpg
    SG1S5902_Resized-1.jpg
    33.7 KB · Views: 63
  • IMAG0245-1.jpg
    IMAG0245-1.jpg
    55.9 KB · Views: 37
  • DSC03905-1.jpg
    DSC03905-1.jpg
    43.9 KB · Views: 35
  • DSC03909-1.jpg
    DSC03909-1.jpg
    39.8 KB · Views: 27
  • DSC03904-1.jpg
    DSC03904-1.jpg
    53.2 KB · Views: 42
Nice ride bro, I'm also going to install the pa15-nis was wondering where u mounted the ground cable? I couldnt find a solid metal piece behind the factory radio. Is it ok to just mount the ground cable to one of the 6 screws that hold the radio in place? Thanks for your help.

Thanks! I am not sure about putting it in one of the 6 screws cuz I don't know if they're even grounded (I think they're just metal clips placed in plastic just to hold the unit in place). Since the screen & the head unit are grounded by wires connecting to the back, I mounted my grounding wire to the back of the screen. I am pretty sure there was one screw that I took out from the back of the screen (or the radio) and added the grounding wire to. Any metal contacting screws in the back would do in my opinion. If you can't figure it out, let me know and I'll open it up and see where I attached it to.

Also if you're trying to get the ipod installed, I found this set up very helpful as I can hide the wires under the center console and access it anytime. It's only an option and you can choose to do whatever you find most comfortable!

I took out the center panel and fed the iPod cable that connects the adapter and the radio through this.
IMG_5100a.jpg

I placed the adapter right underneath the center console. I didn't secure it to anything but I don't hear any vibrations or noise while driving.
IMG_5097.jpg

So I drilled a small hole in the front/right side of the console and fed the wires through. As you can see from the picture, there's a little groove for you to feed the wires through and still be able to close the console.
IMG_5096.jpg

I hope it helped! Let me know if you have any other questions.
 

Attachments

  • IMG_5100a.jpg
    IMG_5100a.jpg
    64.7 KB · Views: 31
  • IMG_5100a.jpg
    IMG_5100a.jpg
    64.7 KB · Views: 45
  • IMG_5100a.jpg
    IMG_5100a.jpg
    64.7 KB · Views: 50
  • IMG_5097.jpg
    IMG_5097.jpg
    41.9 KB · Views: 35
  • IMG_5097.jpg
    IMG_5097.jpg
    41.9 KB · Views: 35
  • IMG_5097.jpg
    IMG_5097.jpg
    41.9 KB · Views: 28
  • IMG_5096.jpg
    IMG_5096.jpg
    66.1 KB · Views: 31
  • IMG_5096.jpg
    IMG_5096.jpg
    66.1 KB · Views: 52
  • IMG_5096.jpg
    IMG_5096.jpg
    66.1 KB · Views: 34
  • IMG_5100a.jpg
    IMG_5100a.jpg
    64.7 KB · Views: 54
  • IMG_5097.jpg
    IMG_5097.jpg
    41.9 KB · Views: 33
  • IMG_5096.jpg
    IMG_5096.jpg
    66.1 KB · Views: 35
  • IMG_5096.jpg
    IMG_5096.jpg
    66.1 KB · Views: 37
  • IMG_5100a.jpg
    IMG_5100a.jpg
    64.7 KB · Views: 33
  • IMG_5097.jpg
    IMG_5097.jpg
    41.9 KB · Views: 30
Last edited:
Thanks a lot bro, the pictures u provided were excellent. I like your setup since u didnt have to mount the adapter to anything. I think I understand what your saying with the screws behind the radio/monitor. I will look for a screw to install the ground wire there as well. You should put your install in the DIY section since it was so helpful. What dip settings are you using on the adapter? I would prefer to control the tracks and volume on the steering wheel if possible, is yours setup like that also? Thanks a lot for your help again! :tup:


Thanks! I am not sure about putting it in one of the 6 screws cuz I don't know if they're even grounded (I think they're just metal clips placed in plastic just to hold the unit in place). Since the screen & the head unit are grounded by wires connecting to the back, I mounted my grounding wire to the back of the screen. I am pretty sure there was one screw that I took out from the back of the screen (or the radio) and added the grounding wire to. Any metal contacting screws in the back would do in my opinion. If you can't figure it out, let me know and I'll open it up and see where I attached it to.

Also if you're trying to get the ipod installed, I found this set up very helpful as I can hide the wires under the center console and access it anytime. It's only an option and you can choose to do whatever you find most comfortable!

I took out the center panel and fed the iPod cable that connects the adapter and the radio through this.
IMG_5100a.jpg

I placed the adapter right underneath the center console. I didn't secure it to anything but I don't hear any vibrations or noise while driving.
IMG_5097.jpg

So I drilled a small hole in the front/right side of the console and fed the wires through. As you can see from the picture, there's a little groove for you to feed the wires through and still be able to close the console.
IMG_5096.jpg

I hope it helped! Let me know if you have any other questions.
 

Attachments

  • IMG_5097.jpg
    IMG_5097.jpg
    41.9 KB · Views: 29
  • IMG_5097.jpg
    IMG_5097.jpg
    41.9 KB · Views: 32
  • IMG_5100a.jpg
    IMG_5100a.jpg
    64.7 KB · Views: 65
  • IMG_5100a.jpg
    IMG_5100a.jpg
    64.7 KB · Views: 66
  • IMG_5100a.jpg
    IMG_5100a.jpg
    64.7 KB · Views: 57
  • IMG_5096.jpg
    IMG_5096.jpg
    66.1 KB · Views: 39
  • IMG_5096.jpg
    IMG_5096.jpg
    66.1 KB · Views: 46
  • IMG_5096.jpg
    IMG_5096.jpg
    66.1 KB · Views: 61
  • IMG_5097.jpg
    IMG_5097.jpg
    41.9 KB · Views: 41
  • IMG_5097.jpg
    IMG_5097.jpg
    41.9 KB · Views: 44
  • IMG_5100a.jpg
    IMG_5100a.jpg
    64.7 KB · Views: 32
  • IMG_5096.jpg
    IMG_5096.jpg
    66.1 KB · Views: 48
  • IMG_5100a.jpg
    IMG_5100a.jpg
    64.7 KB · Views: 46
  • IMG_5096.jpg
    IMG_5096.jpg
    66.1 KB · Views: 41
  • IMG_5097.jpg
    IMG_5097.jpg
    41.9 KB · Views: 32
Last edited:
I tried installing the pa15-nis today and used the 10 pin harness that came with it but after I installed everything and tried testing it out the radio will only play my CDs or the radio. I followed the instructions and played a song on my my iPhone 3GS a few seconds then paused it and turned on my car. according to the instructions the radio should automatically play the iPhone but it did not. I have a 2006 fx35 with non-sat radio. I tried setting the dip switch to (1-4)(on-off-on-off) and also (on-on-on-on) and both did not work. Am I doing something wrong? when the iphone is connected it does charge and it displays "accessory connected" unfortunately USASPEC is closed today and I figured someone might be able to shed some light before I call them Monday. thank u all for all your help.
 
Last edited:
I never knew that some FXs are not equipped with SAT radios? Does the SAT radio only come with the Technology Package? Anyways I am using it as a folder mode with the SAT radio so I cannot provide you with a direct answer but I did take a look at the manual and it seems like you have to have the DIP switches #2 - #4 to be On, On, On (it says DIP #1 is independent). Also to switch from CD changer to iPod, it says to "change the radio to AM, FM, or SAT band first and iPod will be connected when CD button is pressed again."

It is listed on page 10. PDF version of the manual is posted below!
http://usaspec.com/userfiles/editor/file/pa15nis_manual_singlepg.pdf

If you can get access to the radio, try pressing "DISC 6" as this will put you on "Direct Mode" and allow you to control the iPod directly. If you connected the cables correctly, it might just be that your iPhone is "paused" and simply needs to be played.

Good luck and let me know how it goes!

---------- Post added at 12:14 AM ---------- Previous post was at 12:10 AM ----------

Would connecting your iPhone through an RCA cable play the song through the speakers? If you have an RCA cable laying around at home, it might be worth a shot!

RCA Cable:
CC399-12_LR.jpg
 
Last edited:
Back
Top