
KongzTT M45
Member
- Location
- United States, MD
Just copy and pasting my 'How to" I did over on Nicoforums from July 7 2013.. about fixing the broken seat bracket that some of us have..
Here are some pics..
Its pretty self explanatory once you get the seat removed. So I apologize this isn't a "step by step".. but i'm sure it'll help someone at least get started.
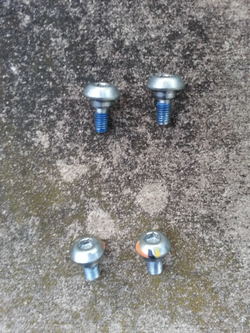
-Pop off 4 plastic bolt head covers from base of seat mounts. just use a screw driver and they will pop right off.
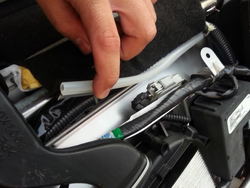
-Remove several of the electrical conduit zip ties that secure the wiring to under the seat.
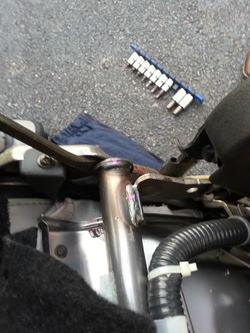
-Unplug the 3, electrical connectors..
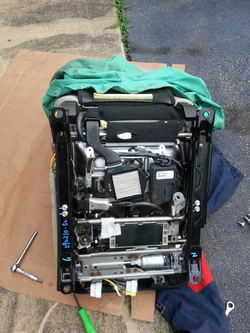
-Carefully lift the seat up and out.. turning/twisting it as needed to avoid hitting interior door panels or door sill etc. I lifted it by myself.. its about 70lbs (ish).
Here are some pics of me removing what I needed to remove (self explanatory parts).
I used a welding blanket to protect parts I did not want to get burned etc.. Just take your time.

bottom of seat..

Non broken side


Broken side

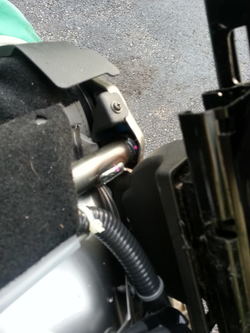
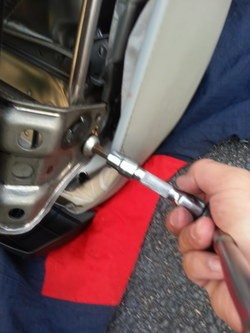
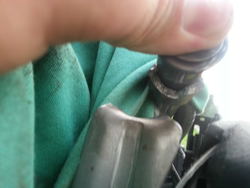
I removed the Shoulder button allen head cap screws using an M6 socket allen bit.


I removed both upper and lower ones from the whole seat... there are 4 of them total. Two up front of seat the smaller ones. You can probably get away with removing just the two rear bigger ones if that is all you are repairing. but I opted to do all of them and reinforce by using much heavier welds all the way around the pipe/bracket that breaks.
There are several small screws and clips that you need to remove. You will see which ones I am talking about.


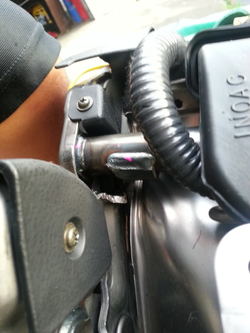
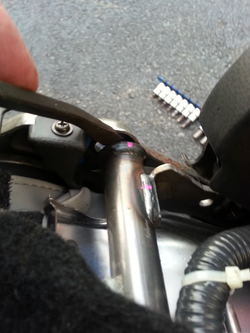
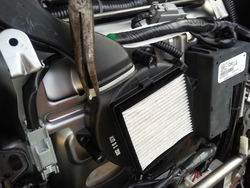
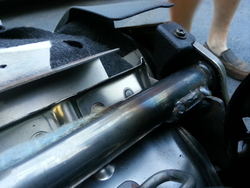
Use a pry bar or large screw driver to remove the pipe/bracket away/around the side plates so you can repair the broken weld. Make sure you keep water near by and use a welding blanket to protect the areas you dont want burned!

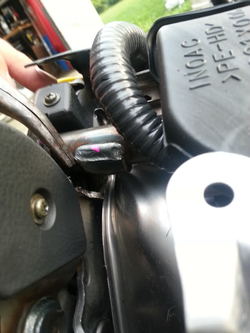
Zip tie for coolant fan inlet must be cut and duct removed .. just replace it with another regular zip tie when you are re-assembling everything.


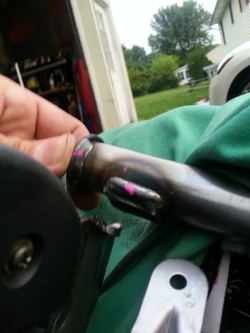
Broken factory weld. Clean surfaces off and re-weld the area heavily .. reinforcing with metal tabs or atleast weld all the way around the pipe/bracket so it is stronger than new.

I reinforced and re-welded all the sides to ensure it does not happen again in the future. Let it cool by using a damp/wet rag and let it sit on the pipe or just air dry if you have the time.
It took me about 1hr of my time. I used my Hobart 140 MIG welder. I saved ~$1200 instead of buying a new seat bracket. And at least now I know its stronger than how they are from the factory.
I usually enjoy making "how to" posts.. but this one was pretty simple once you got under the seat so there is no way to really do this one besides seeing in person. I am big on the 300zx forums (Twinturbo.net) and have several How to posts on there..
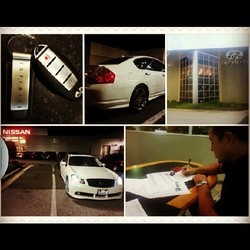
I'll surely be making more of these since I have recently purchased a 2007 M45 sport.
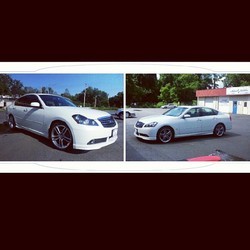
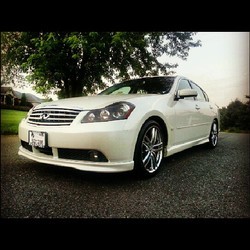
Here are some pics!


It has NAV and all the cool stuff.. Just got the windows tinted with 30% and windshield done in the clear UV protectant tint. I think my next mod will be Akebono brakes front and rear.
Here are some pics..
Its pretty self explanatory once you get the seat removed. So I apologize this isn't a "step by step".. but i'm sure it'll help someone at least get started.
-Pop off 4 plastic bolt head covers from base of seat mounts. just use a screw driver and they will pop right off.
-Remove several of the electrical conduit zip ties that secure the wiring to under the seat.
-Unplug the 3, electrical connectors..
-Carefully lift the seat up and out.. turning/twisting it as needed to avoid hitting interior door panels or door sill etc. I lifted it by myself.. its about 70lbs (ish).
Here are some pics of me removing what I needed to remove (self explanatory parts).
I used a welding blanket to protect parts I did not want to get burned etc.. Just take your time.
bottom of seat..
Non broken side
Broken side
I removed the Shoulder button allen head cap screws using an M6 socket allen bit.
I removed both upper and lower ones from the whole seat... there are 4 of them total. Two up front of seat the smaller ones. You can probably get away with removing just the two rear bigger ones if that is all you are repairing. but I opted to do all of them and reinforce by using much heavier welds all the way around the pipe/bracket that breaks.
There are several small screws and clips that you need to remove. You will see which ones I am talking about.
Use a pry bar or large screw driver to remove the pipe/bracket away/around the side plates so you can repair the broken weld. Make sure you keep water near by and use a welding blanket to protect the areas you dont want burned!
Zip tie for coolant fan inlet must be cut and duct removed .. just replace it with another regular zip tie when you are re-assembling everything.
Broken factory weld. Clean surfaces off and re-weld the area heavily .. reinforcing with metal tabs or atleast weld all the way around the pipe/bracket so it is stronger than new.
I reinforced and re-welded all the sides to ensure it does not happen again in the future. Let it cool by using a damp/wet rag and let it sit on the pipe or just air dry if you have the time.
It took me about 1hr of my time. I used my Hobart 140 MIG welder. I saved ~$1200 instead of buying a new seat bracket. And at least now I know its stronger than how they are from the factory.
I usually enjoy making "how to" posts.. but this one was pretty simple once you got under the seat so there is no way to really do this one besides seeing in person. I am big on the 300zx forums (Twinturbo.net) and have several How to posts on there..
I'll surely be making more of these since I have recently purchased a 2007 M45 sport.
Here are some pics!
It has NAV and all the cool stuff.. Just got the windows tinted with 30% and windshield done in the clear UV protectant tint. I think my next mod will be Akebono brakes front and rear.
Attachments
-
 20130630_194428_zps5d768619.jpg125.6 KB · Views: 454
 -
 20130630_194435_zps81e73da0.jpg71.1 KB · Views: 317
 -
 20130630_194451_zpsd47c57be.jpg54.8 KB · Views: 237
 -
 20130630_194443_zps17193b6a.jpg58.8 KB · Views: 237
 -
 20130630_194531_zps46305d5d.jpg57.3 KB · Views: 234
 -
 20130630_194539_zps089b8bb7.jpg36 KB · Views: 210
 -
 20130630_194628_zps9d53c22f.jpg141.5 KB · Views: 210
 -
 20130630_194740_zps07a81f58.jpg61.9 KB · Views: 213
 -
 20130630_194814_zps0b9de48f.jpg52.6 KB · Views: 254
 -
 20130630_194828_zps85600bd8.jpg74.2 KB · Views: 256
 -
 20130630_194909_zps09e190be.jpg80.8 KB · Views: 198
 -
 20130630_195347_zps190e693b.jpg47.2 KB · Views: 227
 -
 20130630_195351_zpsbbcfe809.jpg44.4 KB · Views: 249
 -
 20130630_202624_zps16e91a10.jpg69.6 KB · Views: 227
 -
 1011418_657934730887909_370013121_n_zpsedb3f77f.jpg86.1 KB · Views: 132
 -
 421875_659180647429984_477230501_n_zps626abe52.jpg56.8 KB · Views: 244
 -
 1003976_658054747542574_2025654094_n_zps506ae7a6.jpg119 KB · Views: 133